Setting up mail on an iPhone is a very simple process, as we’ve built an application that automatically configures the server settings for you and installs these settings via a profile. Follow along with the guide below that walks you through this process.
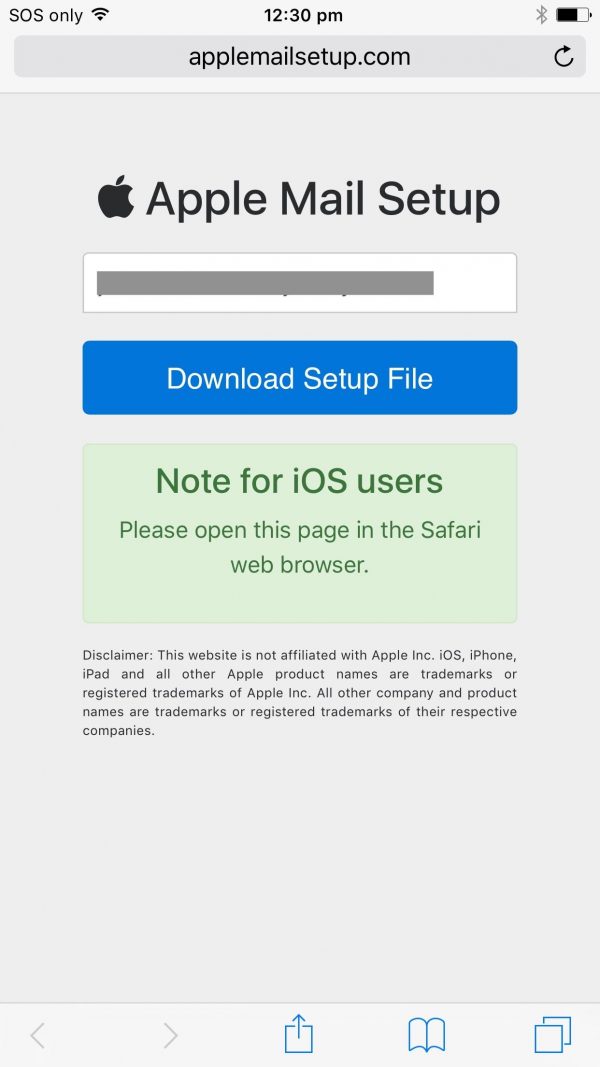
| Step 1
Browse to applemailsetup.com in Safari on your iPhone. Once the page has loaded type your email address into the address field then tap ‘Download Setup File’. |
 |
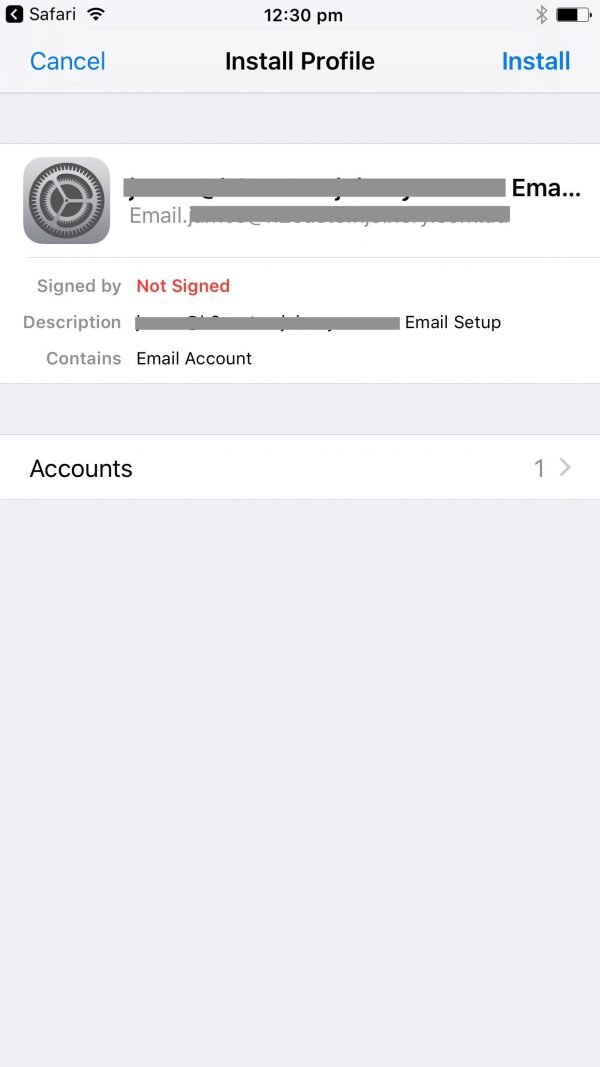
| Step 2
The application will generate an automatic install profile for you and prompt you to install as indicated in the screenshot. Tap ‘Install’ to continue. |
 |
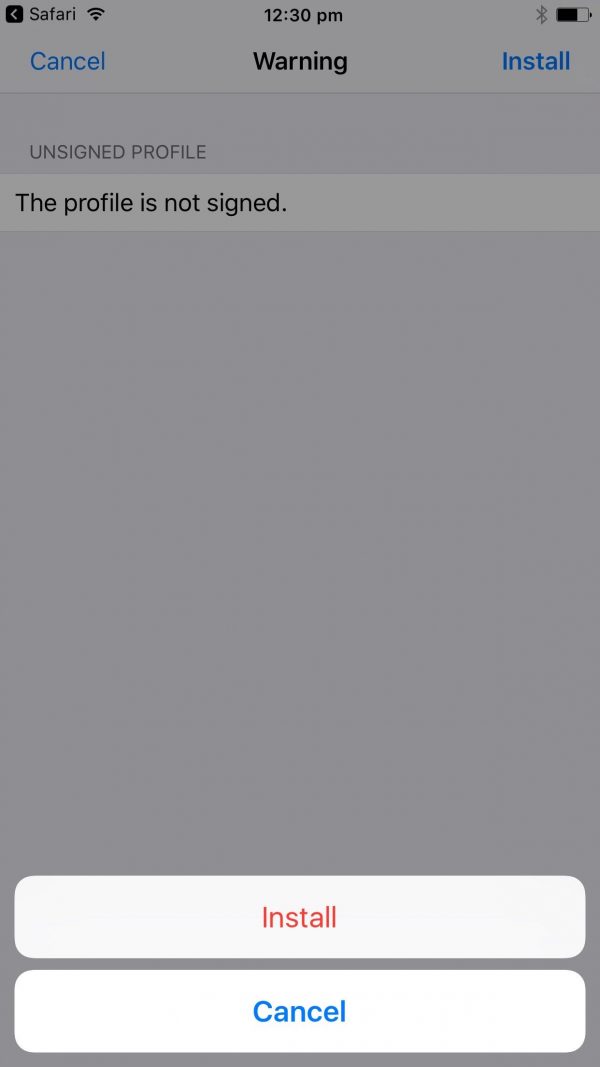
| Step 3
A warning will be displayed, indicating that the profile is not signed by Apple, simply hit ‘Install’ again. |
 |
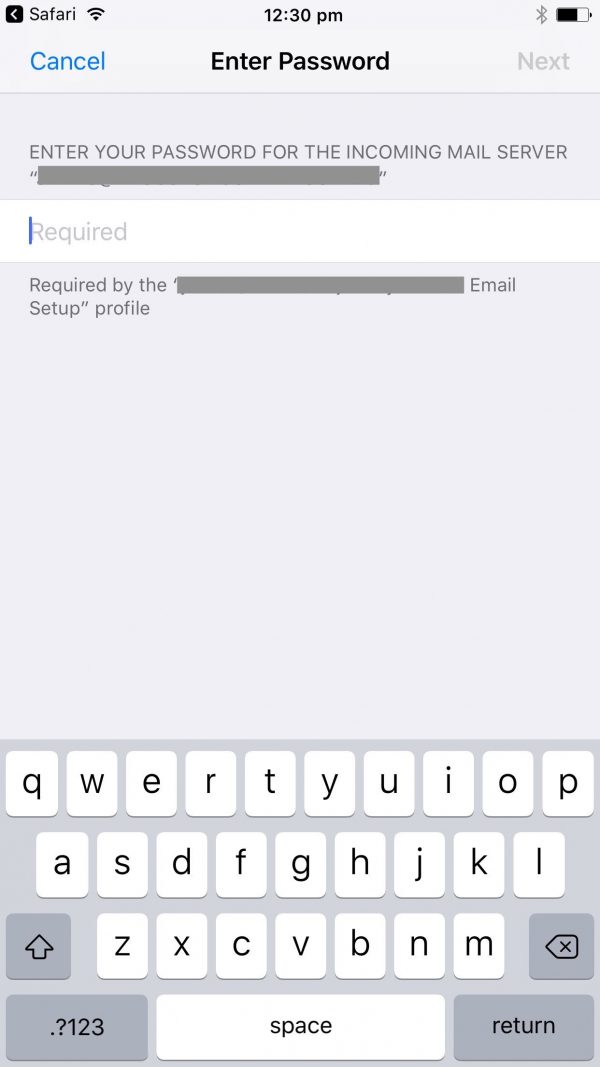
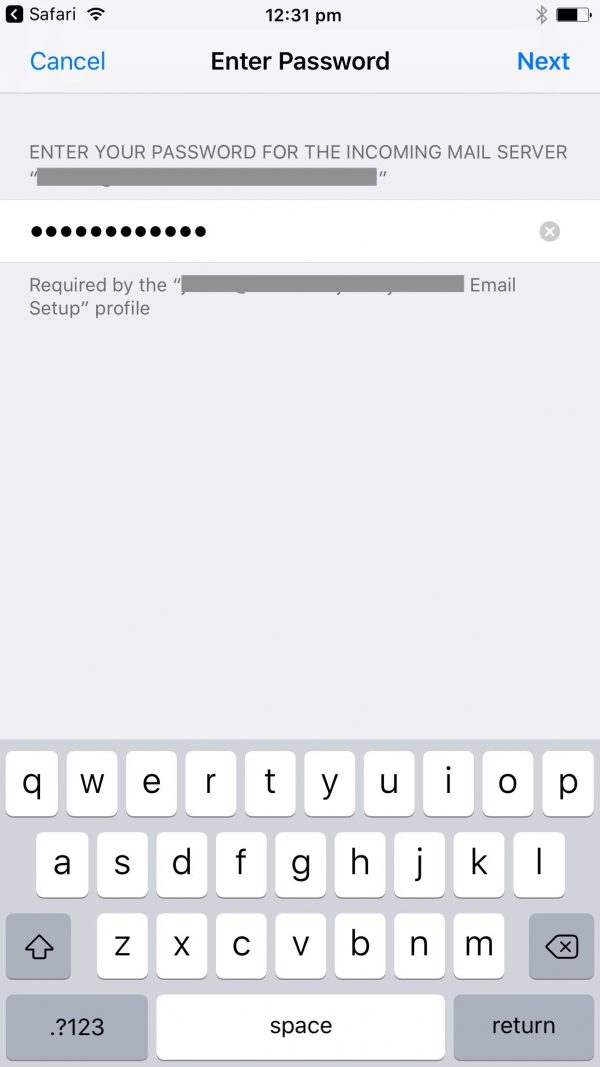
| Step 4
A password dialogue box will be shown next, and this is where your email password must be entered correctly. This box is case-sensitive so carefully type your password in – you only need to do this once if you’re careful, so taking your time is recommended or you may need to start over. |
 |
| Step 5
Once your password is carefully typed out, tap ‘Next’ to continue. |
 |
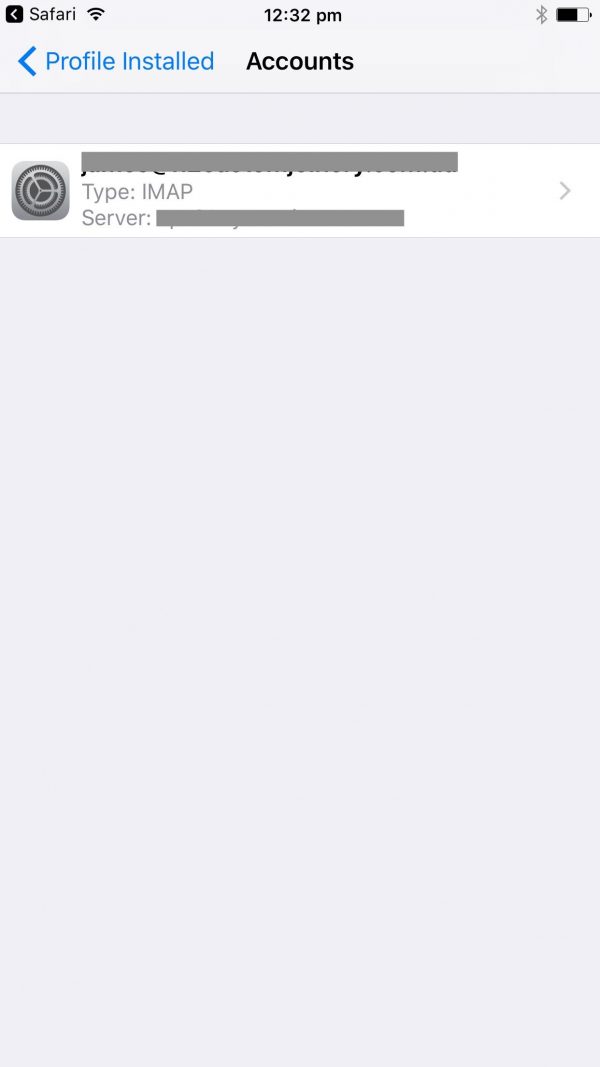
| Step 6
If successful your phone should now display ‘Profile Installed’ near the top left and list the profile details under the heading ‘Accounts’. Exit the setup by pressing the home button, and navigating to the ‘Mail’ app to begin using your newly configured mailbox. |
 |