This topic covers processes relating to the operation of a cPanel service, if you cannot access your service – first follow this guide before continuing.
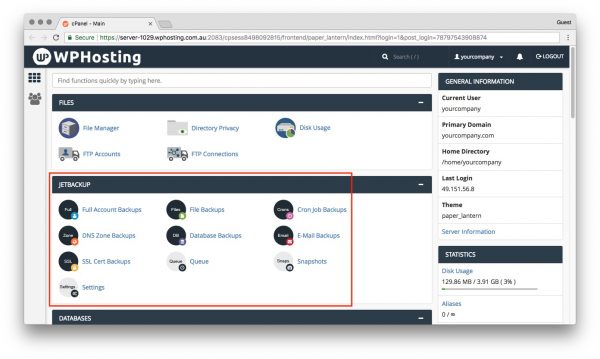
- Login to cPanel
- Find the “JetBackup” section
From here you have the option to restore the following items;- Full Account Backups
- File Backups
- Cron Job Backups
- DNS Zone Backups
- Database Backups
- E-Mail Backups
- SSL Cert Backups
- Snapshots
- Queue & Settings
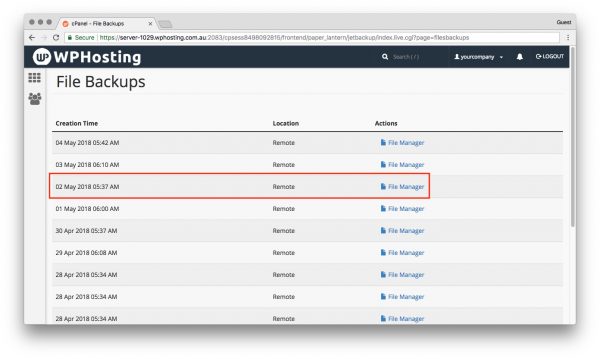
Example: Let’s restore our WordPress config file to yesterday’s version, which can be done using ‘File Backups’.
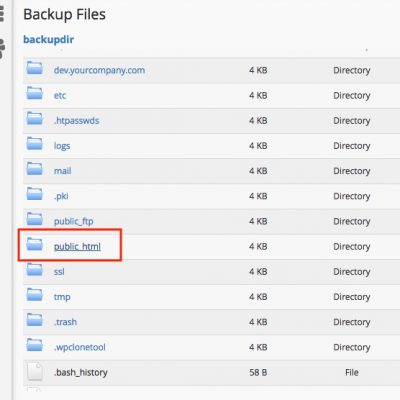
- Click ‘File Backups’, then find the date of your choosing. Once chosen click ‘File Manager’ in the ‘Actions’ column.
- After a few seconds cPanel will connect to the backup server and list the files available. Navigate through as normal by double-clicking a folder, and you can navigate back again using the breadcrumb menu.
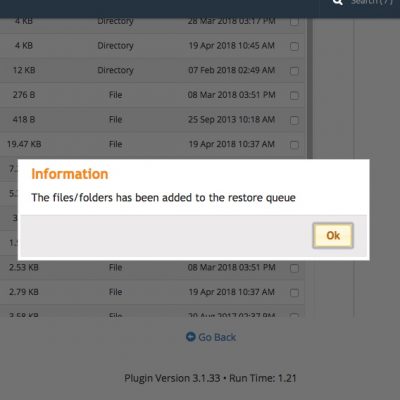
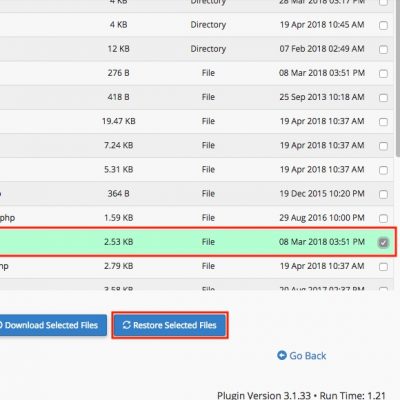
- After you’ve found your file(s) use the checkbox to select them, and finally click ‘Restore Selected Files’.
- Accept the warning statement indicating the files will be overwritten, and click ‘Restore’. Use the WPHosting logo in the header to navigate back to the cPanel homepage.
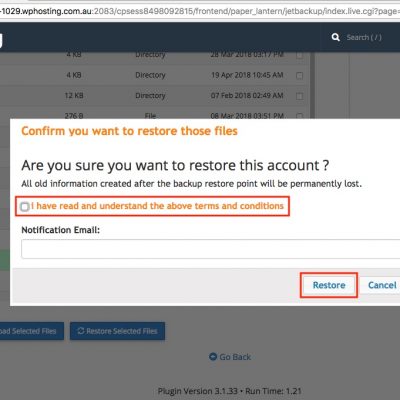
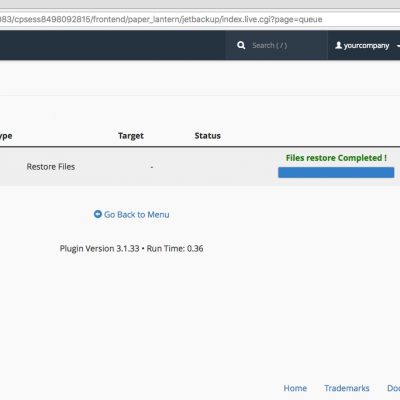
- You can also monitor the progress of the restoration using the ‘Queue’ option.