This topic covers processes relating to a cPanel service.
You will need to be logged into the cPanel account to follow the steps.
If you’re not sure how to access your cPanel service — please, follow this guide before continuing: How do I Login to cPanel?
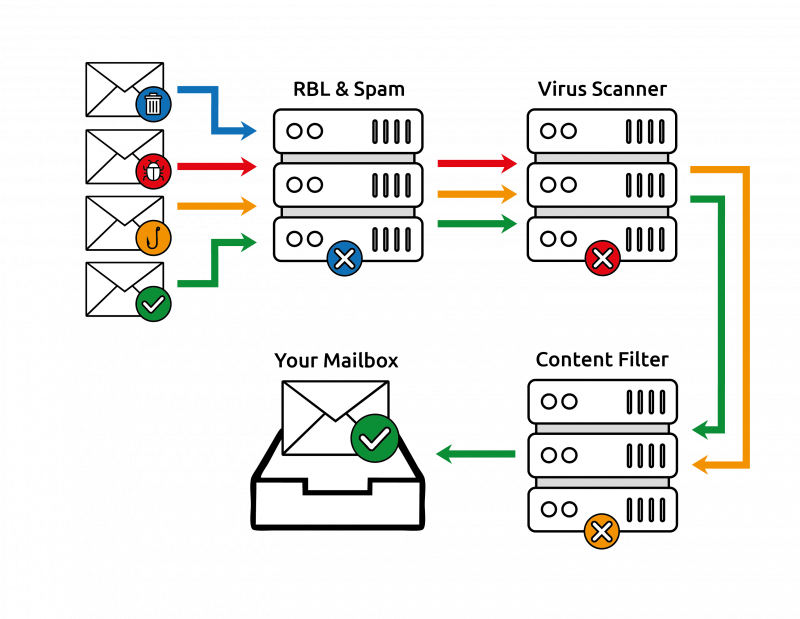
Spam filtering for cPanel is essential for maintaining a secure and efficient email system. By learning how to adjust spam filtering options for cPanel-hosted email, you can effectively block unwanted messages and protect your communications. In this guide, we explore best practices and step-by-step methods to optimize your email security while keeping your inbox clutter-free.
All of our WP Hosting web hosting packages include basic spam filtering features for cPanel-hosted email addresses.
The steps in this guide will show how to enable/disable the spam filter and adjust the sensitivity of the filter.
To enable spam filtering for cPanel
1. First and foremost, log in to cPanel using your credentials.
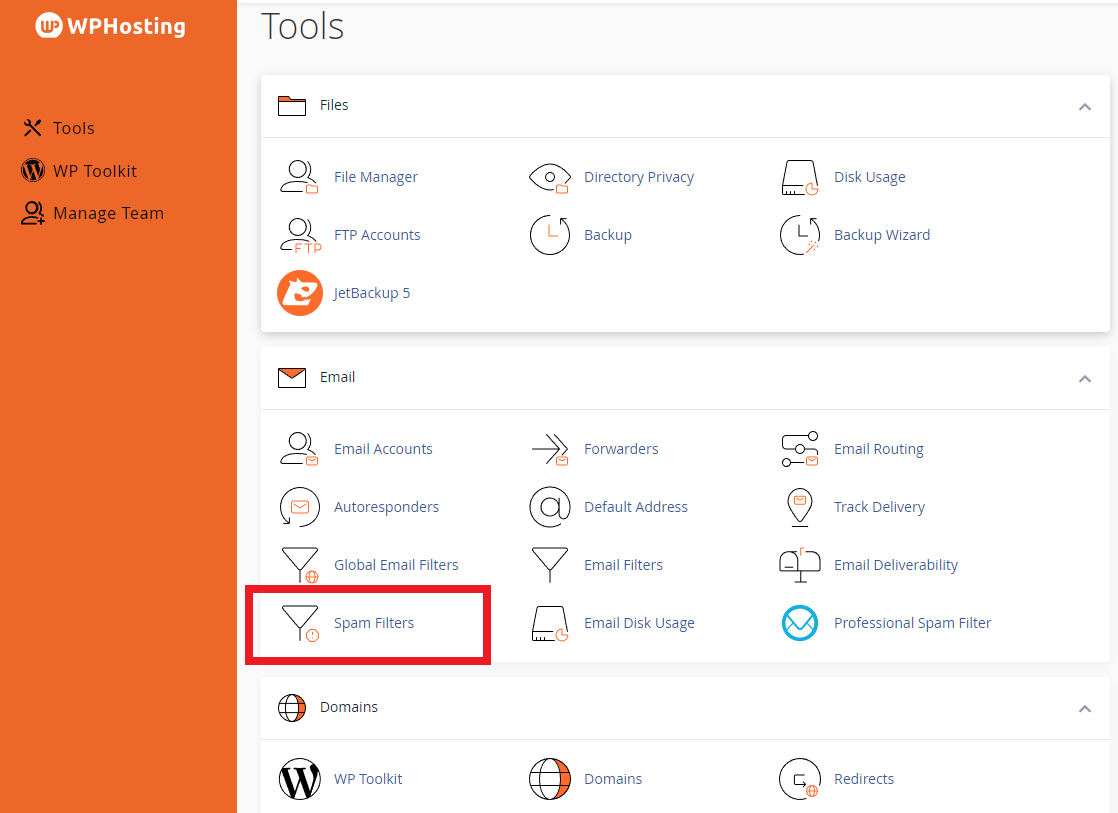
2. Then, immediately after, navigate to the ‘Spam Filters’ tool to adjust your settings.
3. Next to ‘Process New Emails and Mark them as Spam:‘ toggle the switch to the ON position (the toggle switch will appear blue if enabled and grey if disabled).

I want messages to go to a ‘spam’ folder
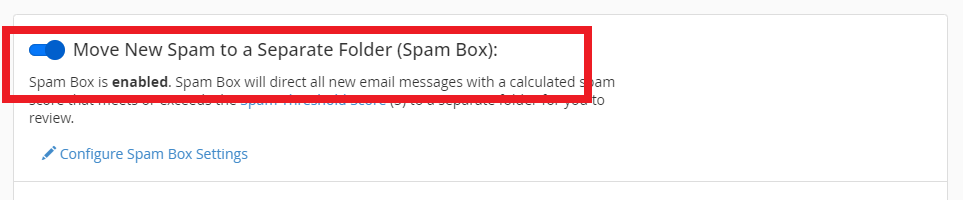
In most cases, you will also want anything flagged as spam to be automatically moved to a spam/junk folder.
To enable this behaviour:
1. Navigate to the ‘Spam Filters‘ tool
2. Next to ‘Move New Spam to a Separate Folder (Spam Box):‘ Toggle the switch to the ON position (the toggle switch will appear blue if enabled and grey if disabled).
To adjust the sensitivity of the spam filter
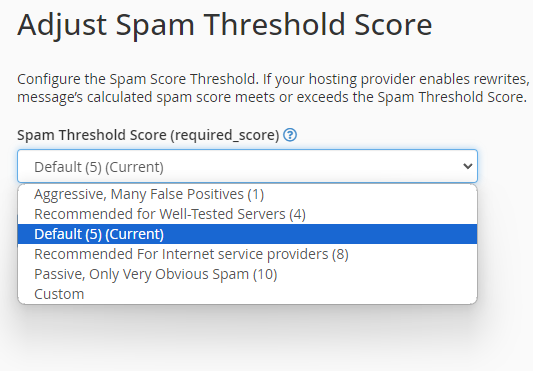
PLEASE NOTE: Changing the “Spam Threshold Score” will affect how aggressive or relaxed the spam filtering is. Setting a lower score will mean a more aggressive filter, likely resulting in many incorrectly flagged messages. A higher score will be more relaxed and only flag mail that is very obviously spam.
- e.g. A threshold score set to 10 will only mark messages that are very obviously spam.
- e.g. A threshold score of 2 will label many messages as spam, including messages that are likely not spam.
- We recommend that users start with the default setting of 5 and make small, incremental adjustments if needed.
Getting TOO MUCH SPAM in your inbox?
1. Firstly, from the ‘Spam Filters‘ page, click ‘Spam Threshold Score‘.

2. Then, immediately after, click the drop-down arrow to change the current threshold score to a lower number.
3. Then, click ‘Update Scoring Options‘ when you’re done
TOO MANY FALSE POSITIVES?
(legitimate messages going to spam)
1. From the ‘Spam Filters‘ page, click ‘Spam Threshold Score‘
2. Click the drop-down arrow to change the current score to a higher number.
3. Then, click ‘Update Scoring Options‘ when you’re done
Advanced Spam Filtering
For additional protection, you may wish to purchase ‘Advanced Spam Filtering’.
We also offer an Advanced Spam Filtering service with additional features and more robust filtering options to further help stop annoying spam, phishing and spoofing emails, viruses and malware.
See our “Advanced Spam Filtering” product page for more information – wphosting.com.au/advanced-spam-filtering