What is a DNS resolver?
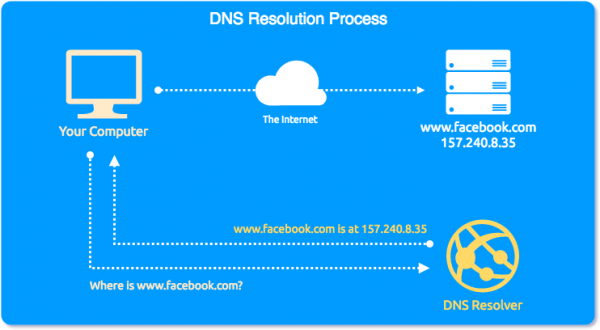
A DNS resolver provides a way that your computer (or device) can locate services on the internet, without requiring the user to remember lengthy strings of IP addresses. It is much easier to remember facebook.com than 157.240.8.35 right? DNS resolvers perform the translation between a domain name and an IP address. A typical ‘conversation’ called a resolution between your computer and a DNS server would look like this:
What is an IP address?
Every device that is connected to the internet is assigned an IP address, as without an IP address you would have no method to communicate with other machines on your network and external networks.
Why would you want to update your DNS resolver?
When you browse to a website (ie.wphosting.com.au) and the DNS server returns the result to you in IP address format, the result of this search is cached for a set amount of time. This means that the next time another search is performed for the same address, it can be instantly returned to the user without requiring a look up – this is called a time to live or TTL for short. The TTL designates how long the DNS record should be cached before being requested from the source again.
Sometimes your local network (wireless or ethernet) at your physical location might have pre-configured DNS records to send traffic to a particular location. This often happens in a corporate network. Other times this may be necessary if you’ve recently migrated your website and want to view the website before your DNS has finished updating.
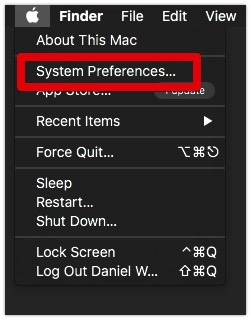
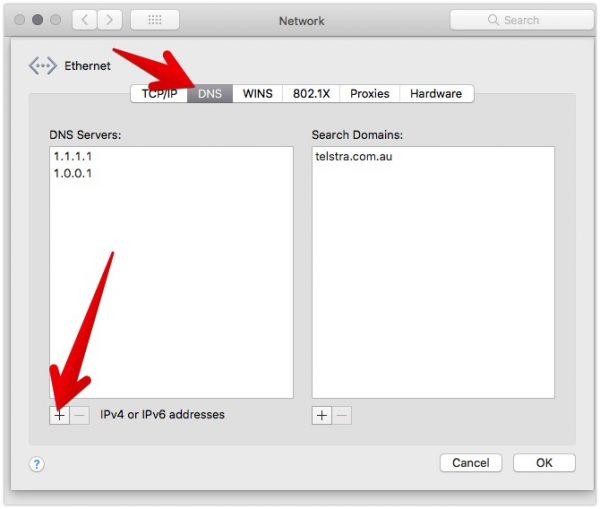
How to update your DNS Resolver on Mac OS
1. First, navigate to ‘System Preferences‘.
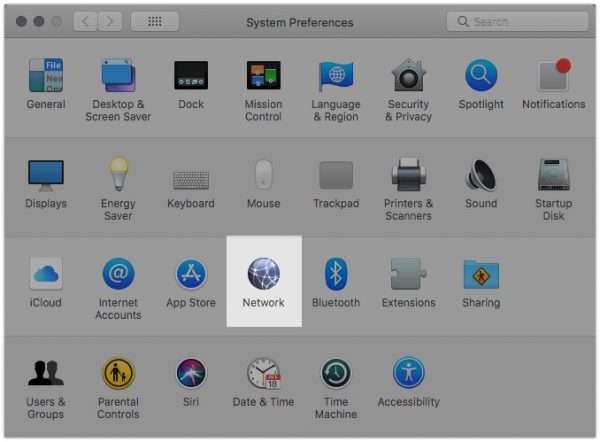
2. Click on Network
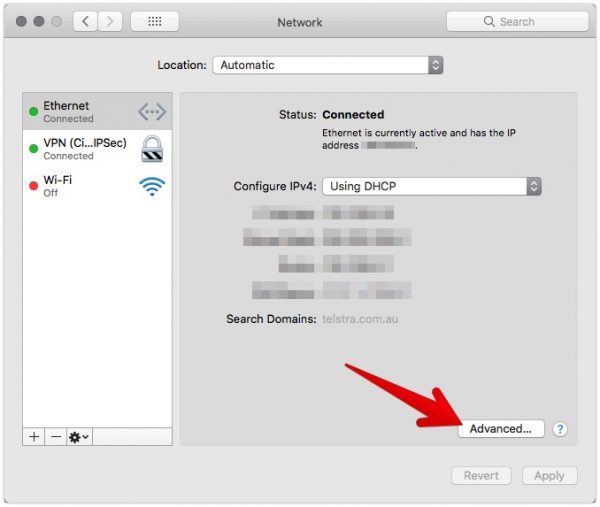
3. Next, locate and select your network adapter (if you only have one, it should appear automatically) and then click Advanced.
4. Click on the DNS tab, then use the + button to add your DNS resolver then click apply
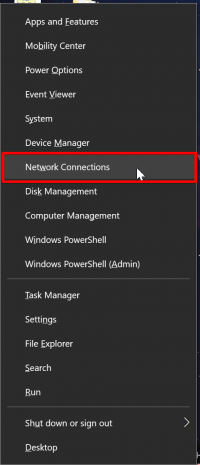
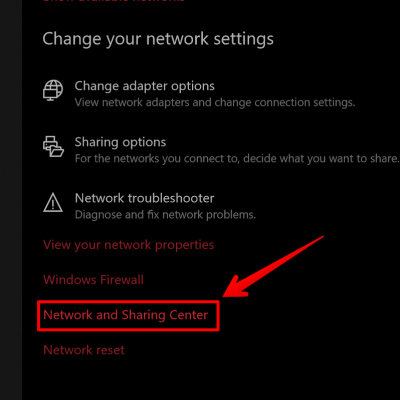
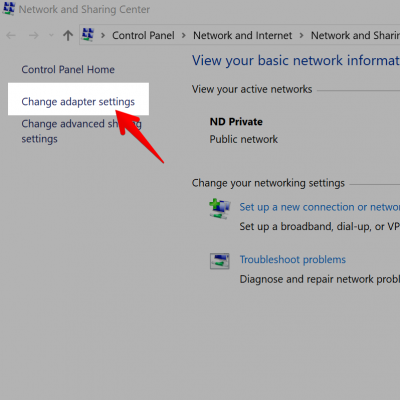
How to update your DNS Resolver on Windows
1. First, right-click in the bottom-left of your screen next to the Windows start menu. Then, select ‘Network Connections‘.
2. Next choose the option Network and Sharing Center near the bottom of this screen.
3. Next, choose “Change adapter settings” from the menu on the left-hand side as indicated.
4. Next, locate the active network adapter. Typically, this will be the Wi-Fi (wireless) adapter.
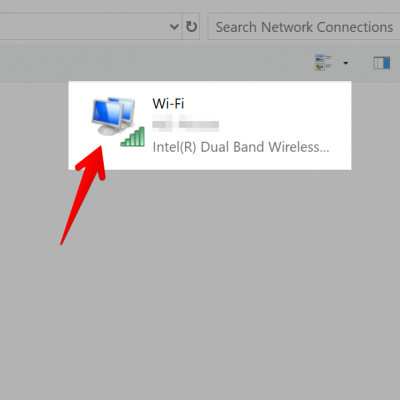
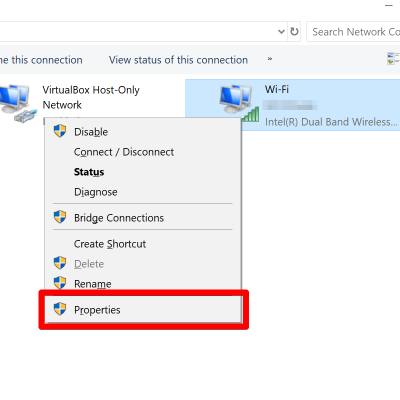
5. Next, right-click the adapter and choose Properties.
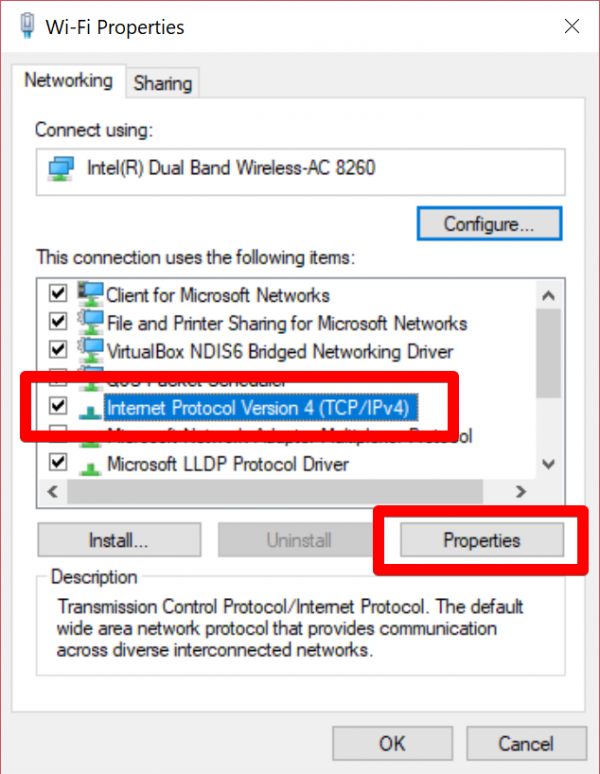
6. With the properties open, first locate Internet Protocol Version 4 (TCP/IPv4) in the list, and then select it with a single left click. Then, click ‘Properties‘.
7. With the properties open, select the radio button for “Use the following DNS server addresses.” Then, specify your DNS servers.
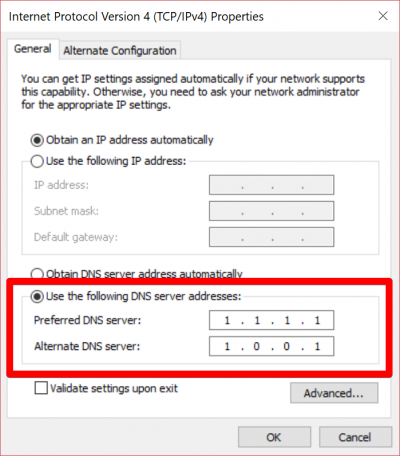
In this example we have used the free public CloudFlare resolvers 1.1.1.1 and 1.0.0.1. More information about these specific resolvers is available here.
Conclusion
In conclusion, updating your DNS resolver plays a vital role in optimising your network connectivity. Not only does this process boost your browsing speed and reliability, but it also ensures that you always access the most current DNS information. Furthermore, by following the recommended steps and regularly reviewing your settings, you can minimise network issues and maintain a stable online experience. Ultimately, taking proactive measures to update your DNS resolver significantly enhances your overall connectivity and performance.