This article describes the process by which you would configure email access using IMAP on an Android device. The will need to have an email address already ready for use, so if not then check out this article first to complete that step.
Configuring email on an Android device can sometimes be a tricky affair. This is due to the large number of devices and manufacturers on the market. Additionally the built in mail apps are usually confusing and difficult to set up. To remedy this we will be using the free Microsoft Outlook app which is comparatively easy to set up. Before you continue with this guide be sure that you have the app downloaded and updated – lets begin!
Setup
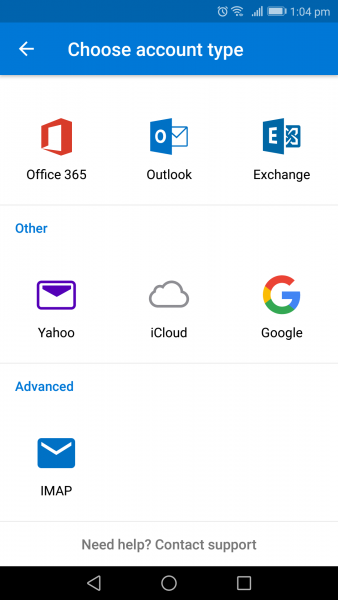
1. From the ‘Choose account type’ screen select IMAP
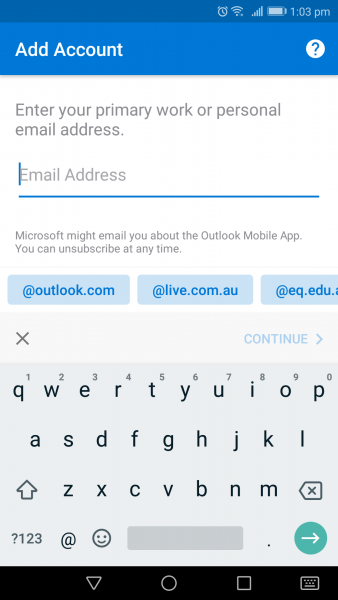
2. Enter your email address carefully, and click continue. The email address is not case-sensitive.
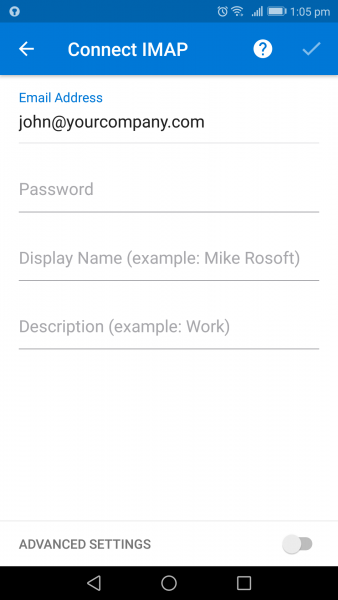
3. On the ‘Connect IMAP’ screen fill out the fields accordingly. The ‘Display Name’ dictates what your emails will be signed as. It defines how your emails appear when received by others. The description just assigns a name in the Outlook accounts list.
Before hitting the tick to accept check the ‘Advanced Settings’ toggle.
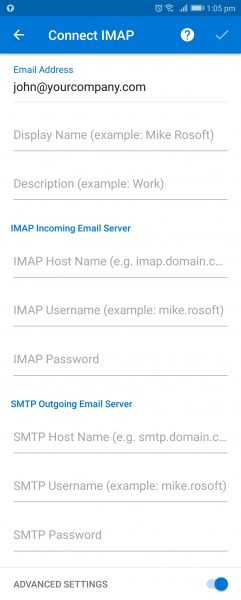
4. On this last step, ensure that you fill out all of the fields before continuing. They’re all necessary. However, some fields might already display default values. To find your email configuration settings, login to cPanel and navigate to Email Accounts > Connect Devices. For more information, please view this support article.
Testing
Once you have completed the process to configure email on Android, it’s worthwhile testing your newly set-up device. This ensures that you set up the account correctly. The most efficient way to do this is to send yourself an email from an external provider such as Hotmail or Gmail. Verify that you receive it on your device. Assuming you’ve been successful, reply back to the test email. See if it’s received on the other end.
If either test is unsuccessful, go back over the setup process and see if you missed any steps. However, if both tests are successful, you’re done!