This topic covers processes requiring access to your WP Hosting Client Area. If you’re not sure how to access the Client Area, please follow this guide before continuing – How do I login to my WP Hosting Client Area?
Changing your hosting plan
Upgrading your hosting service can significantly enhance your website’s performance, scalability, and overall user experience. With an upgraded hosting plan, you’ll benefit from increased resource allocations, faster load times, and improved security, ensuring your site is better equipped to handle traffic spikes.
Additionally, with certain plans, you gain access to enhanced tools in your hosting service/cPanel, making it easier to maintain and update your sites as your needs evolve.
Important note
PLEASE NOTE: Upgrade price is calculated from a credit of the unused portion of the current plan and billing of the new plan for the same period.
Begin your upgrade process
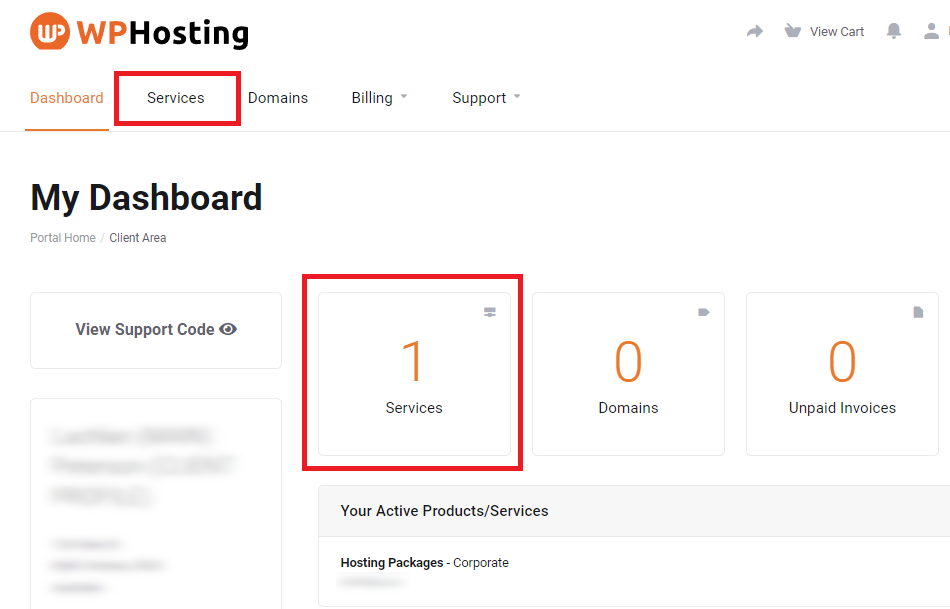
1. First, login to the WP Hosting Client Area via my.wphosting.com.au/login
2. Then, navigate to ‘Services‘
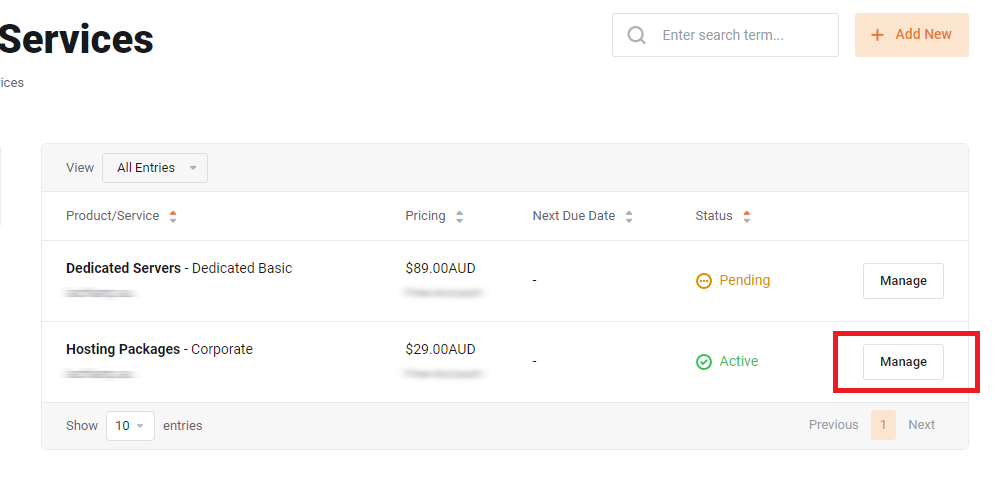
3. Find the service you want and then click the ‘Manage‘ button
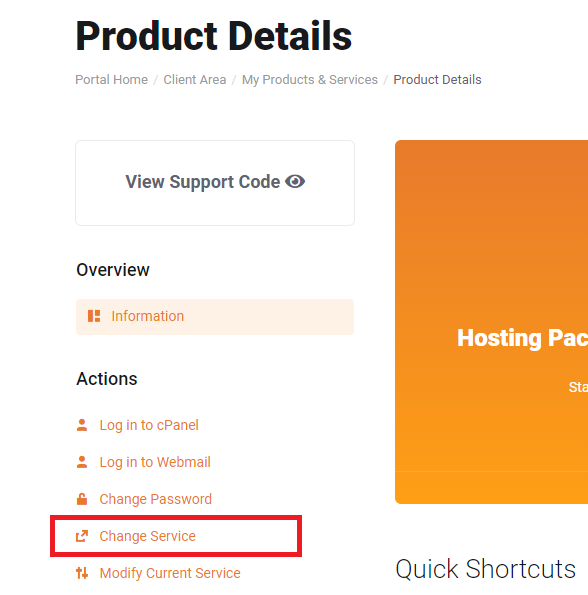
4. Then, from the ‘Product Details’ page, in the ‘Actions’ sub-heading on the left, choose ‘Change Service‘
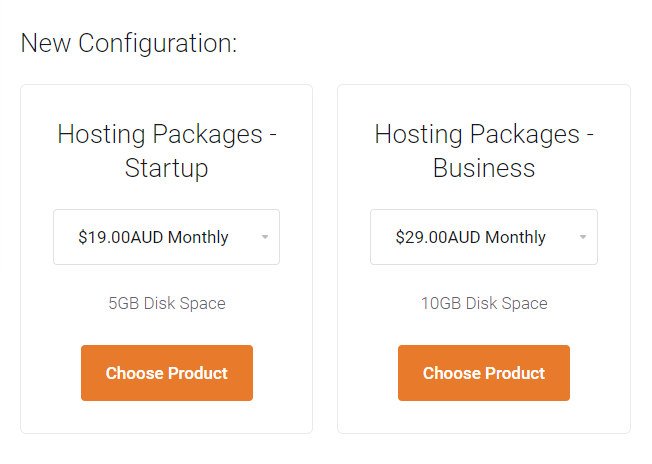
5. Under the ‘New Configuration’ section, select the new plan you want to upgrade/downgrade to, along with the preferred billing cycle
6. Click ‘Choose Product‘ to continue to the checkout
7. On the next page, select your preferred payment options, then click ‘Checkout‘
8. Once the upgrade invoice has been paid, the updated plan will be provisioned immediately
Conclusion
By following these steps, you’ll be able to confidently upgrade your hosting service. This will align your plan with your current needs and billing cycle. If you encounter any issues during the process, our support team is ready to help. They are committed to making your transition as seamless as possible.