Register a new domain name with WP Hosting
Managing your online presence starts with securing the right domain. With WP Hosting, you can easily register and manage domain names to establish your brand and maintain full control over your settings. This guide will walk you through how to register and manage domain names, update key configurations, and optimise your domain’s features for seamless operation.
To register a new domain
1. First, head to our website and click on ‘Domains‘ or go directly to our domains page at https://wphosting.com.au/domains/
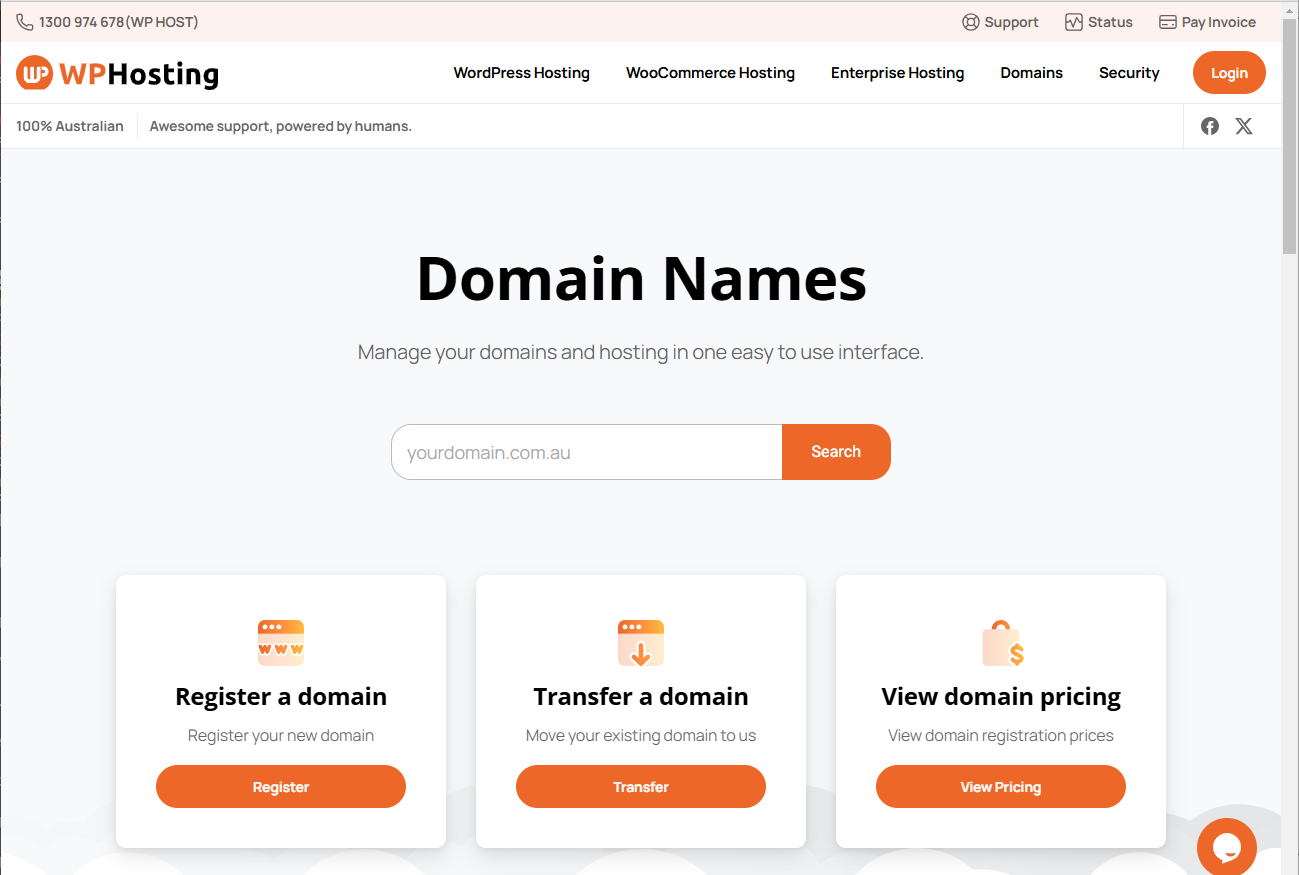
2. Search for the domain name you want to see if it’s available to register
- If the domain is available, you’ll see a green “tick” icon along with a message confirming availability and the registration price
- Then, unavailable domains will display a red “cross” (X) icon.
Domain unavailable? Get creative! Try alternate extensions (.au, .net, .com.au, .net.au), or include hyphens like “example-domain.com”
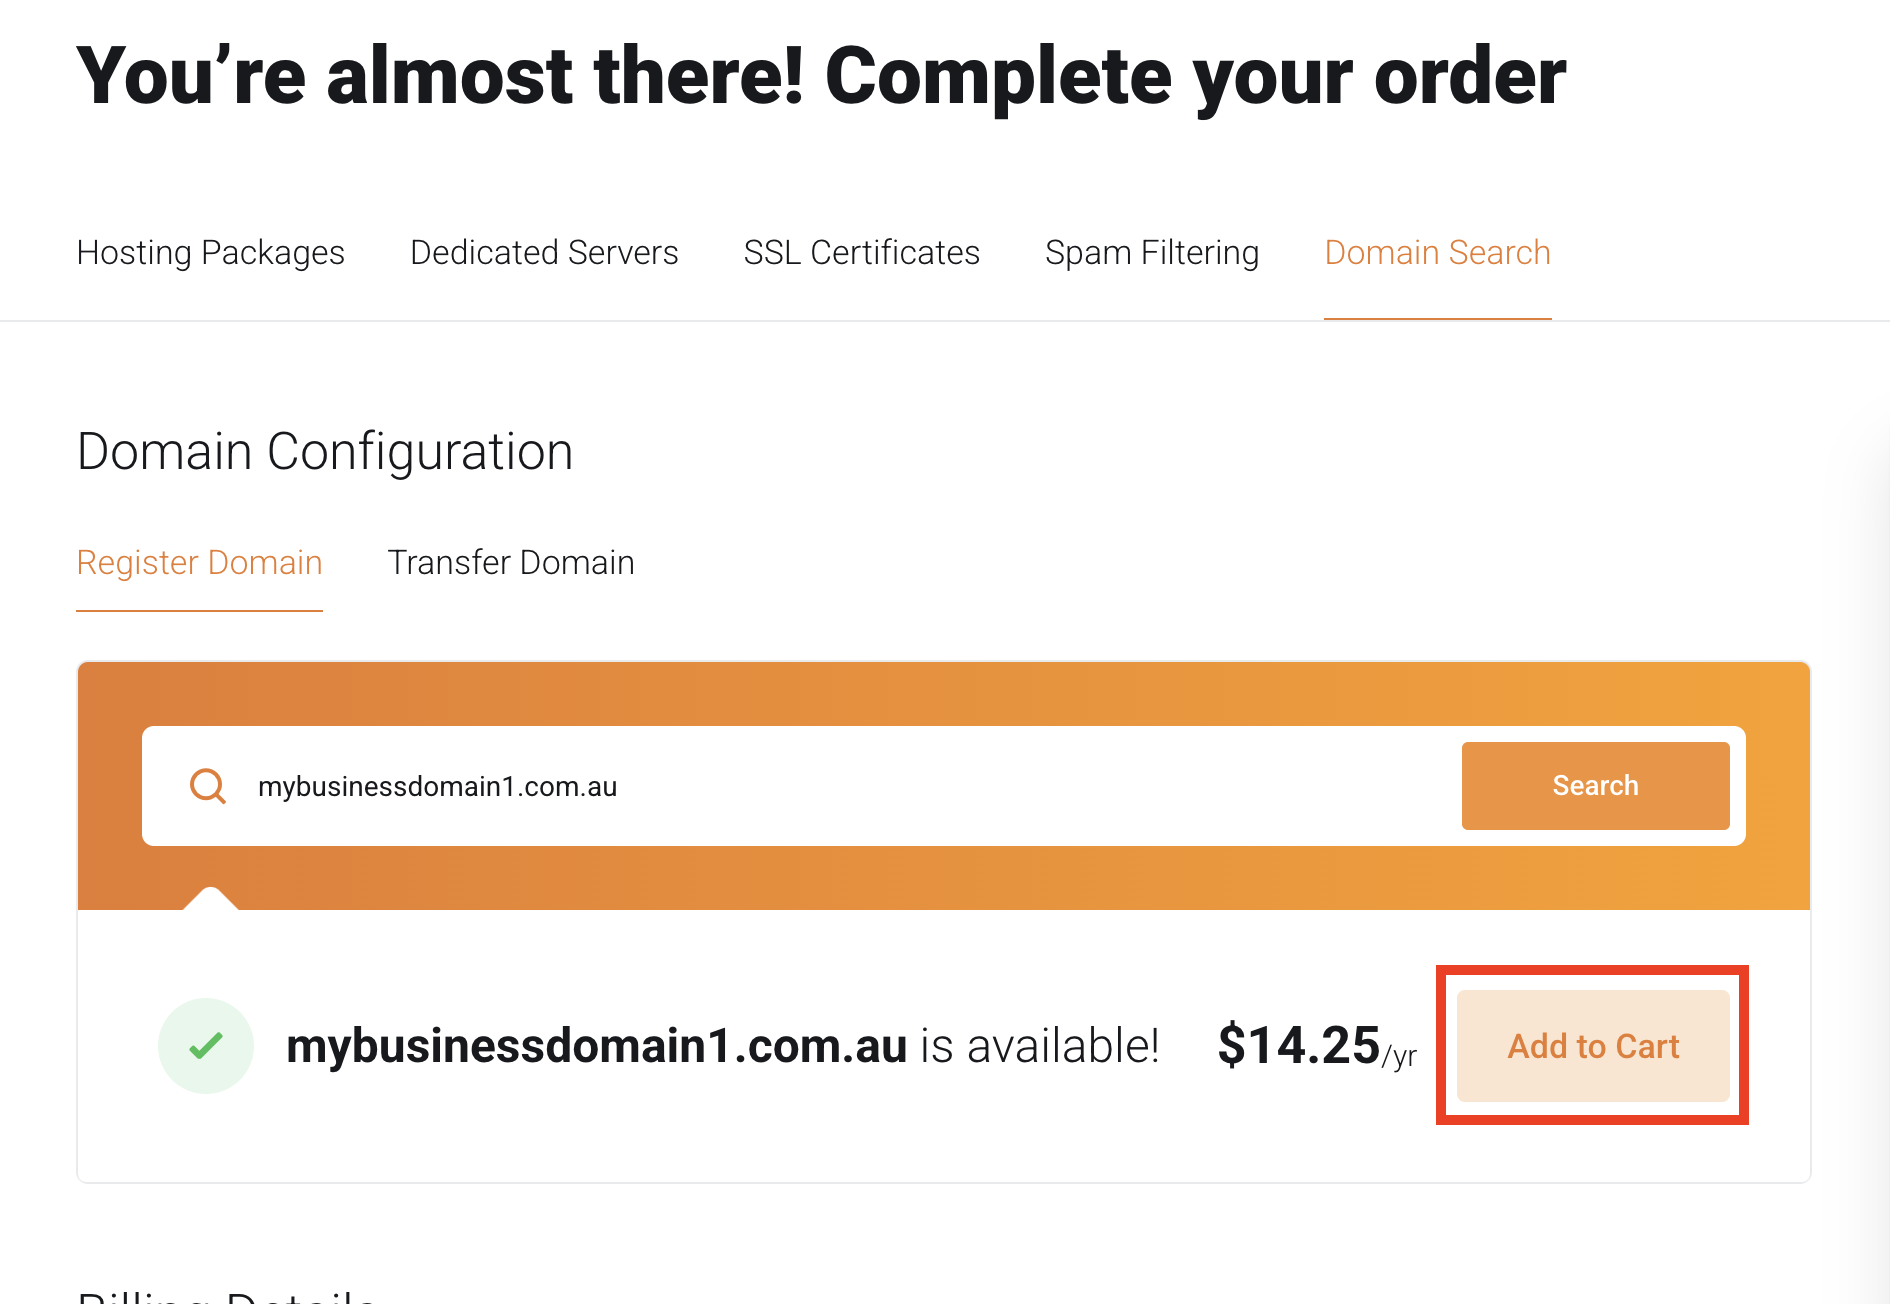
- When you’ve found a domain name you like, click ‘Add to Cart‘ to continue
Domain configuration
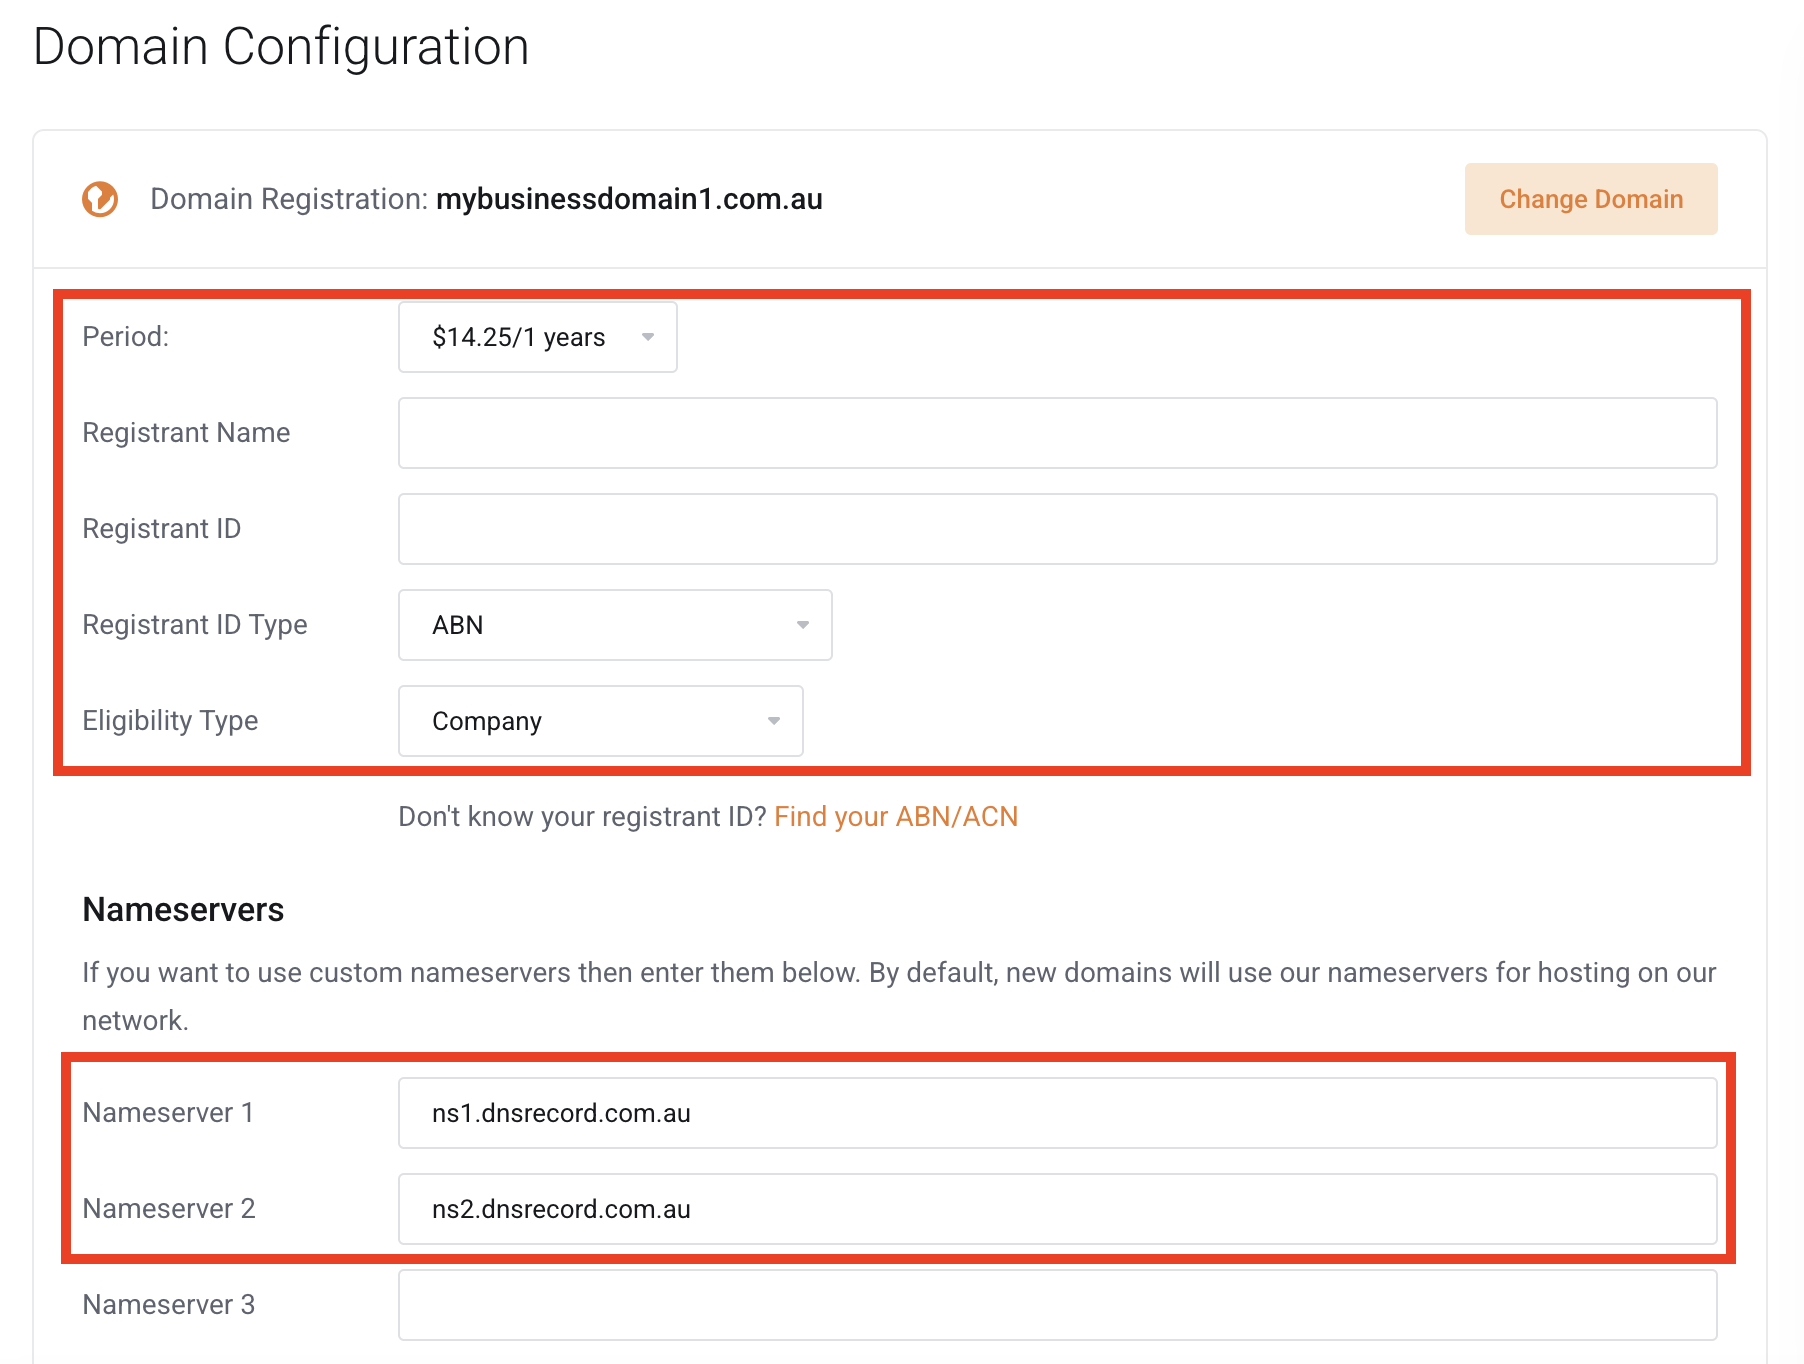
3. Next, you’ll be asked to enter Registrant Eligibility (ABN/ACN etc)and Nameserver details.
If you don’t know what Nameservers are or are unsure about which ones to use, you can leave the nameserver settings as default for now.
Please Note: For most .AU domains, you’ll need to meet the eligibility criteria (e.g. to hold a .com.au, the registrant must be a Commercial Entity. See the auDA website for more information – auDA Eligibility and Allocation Criteria)
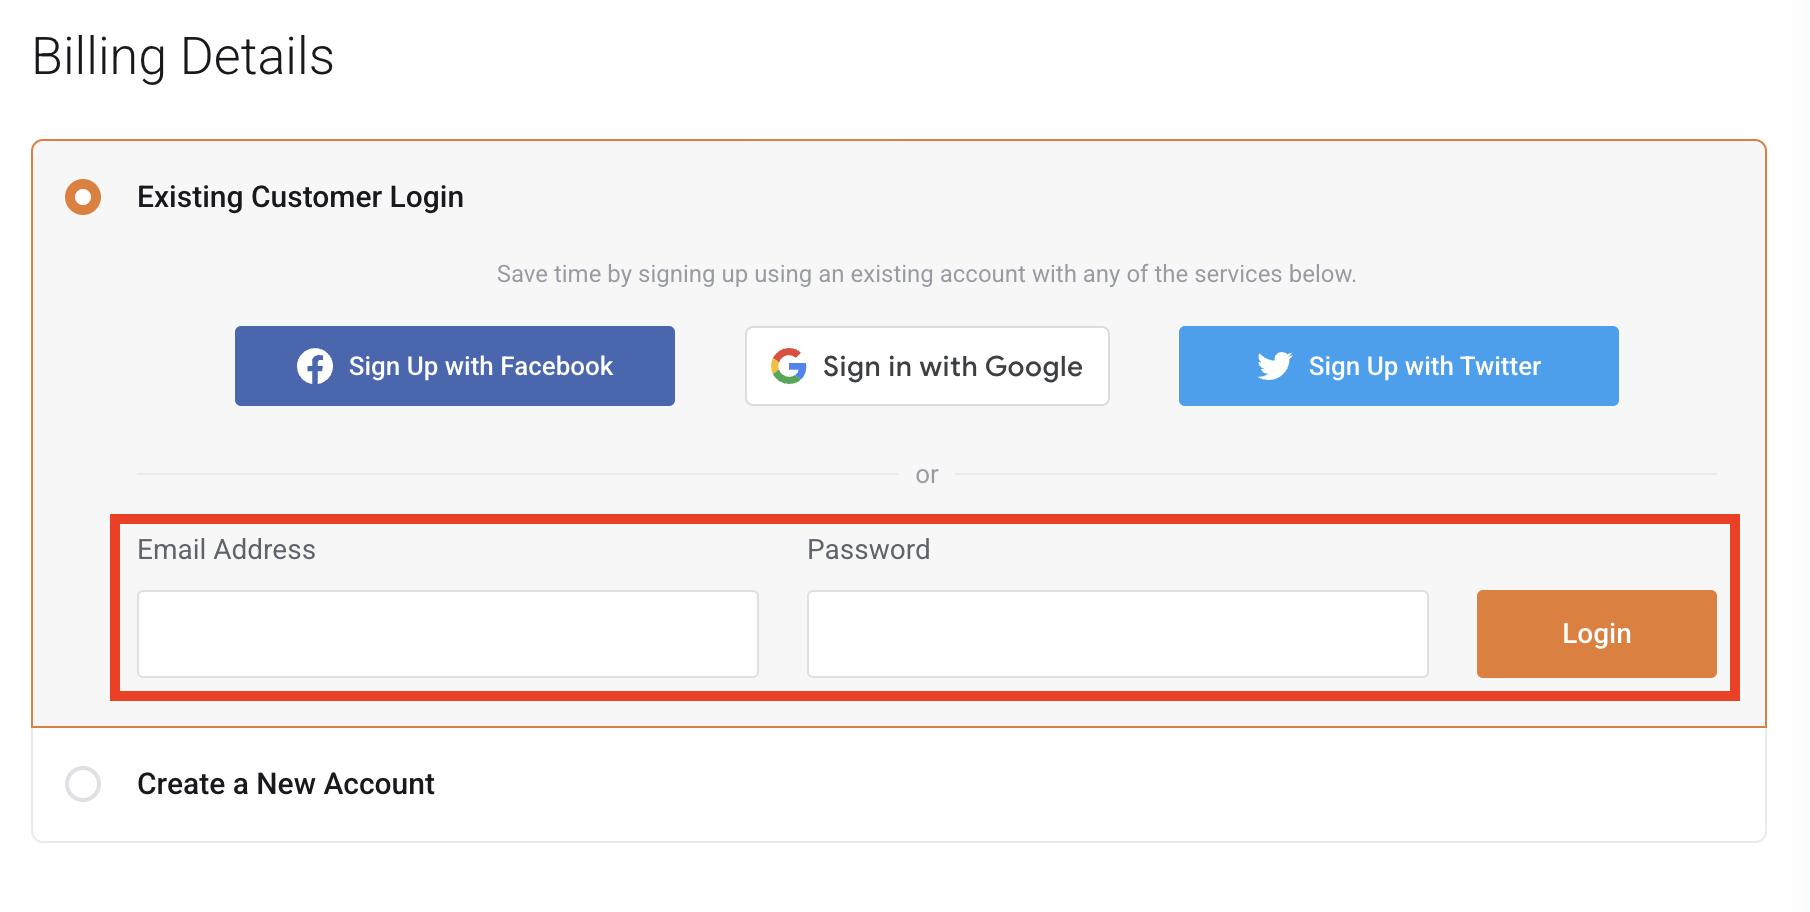
Billing details
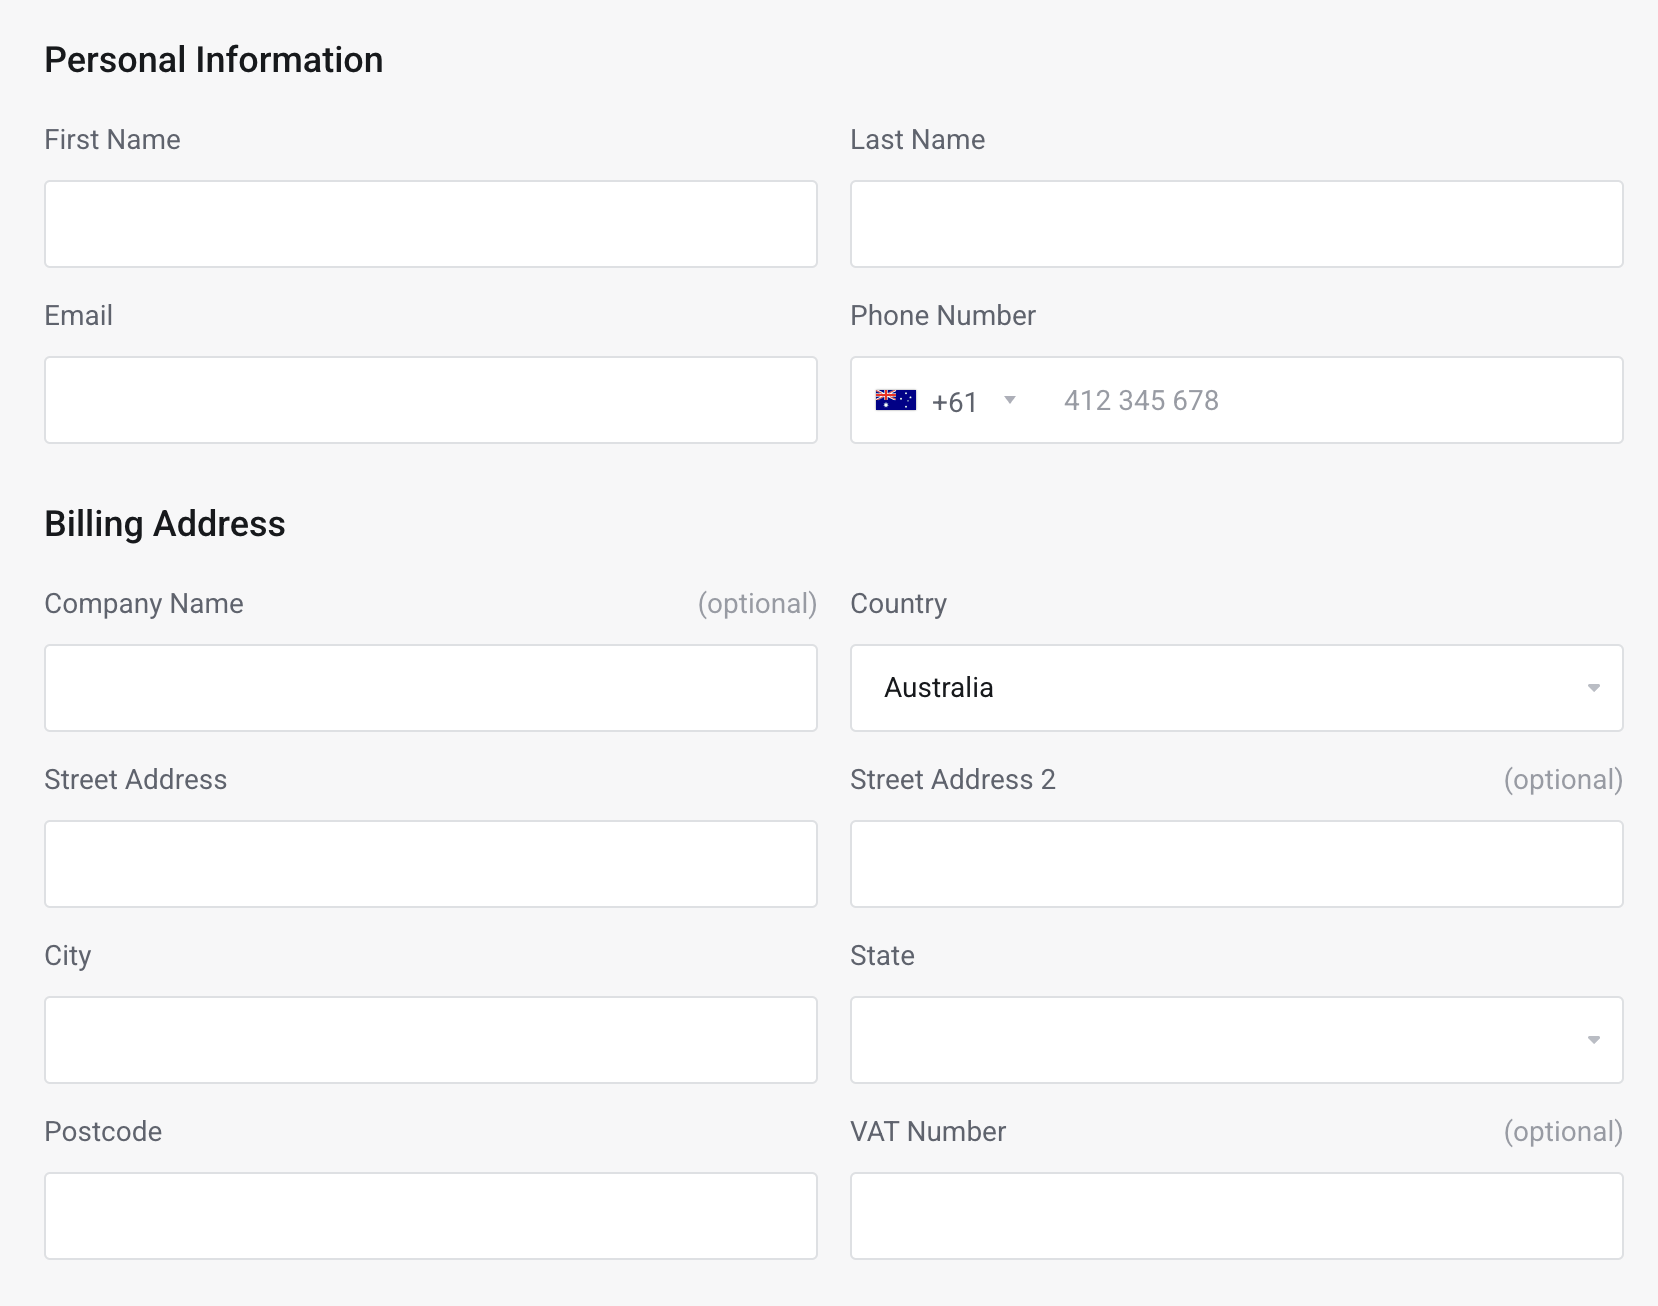
4. If you are a new customer, select ‘Create New Account‘. Fill in the required account information.
- Existing customers, please select ‘Existing Customer Login‘
- Login using your existing account credentials
FOR NEW CUSTOMERS
- Choose ‘Create New Account‘
- Please fill in the required details to create your WP Hosting account
FOR EXISTING CUSTOMERS
- Select ‘Existing Customer Login‘
- Please log in using your existing account credentials
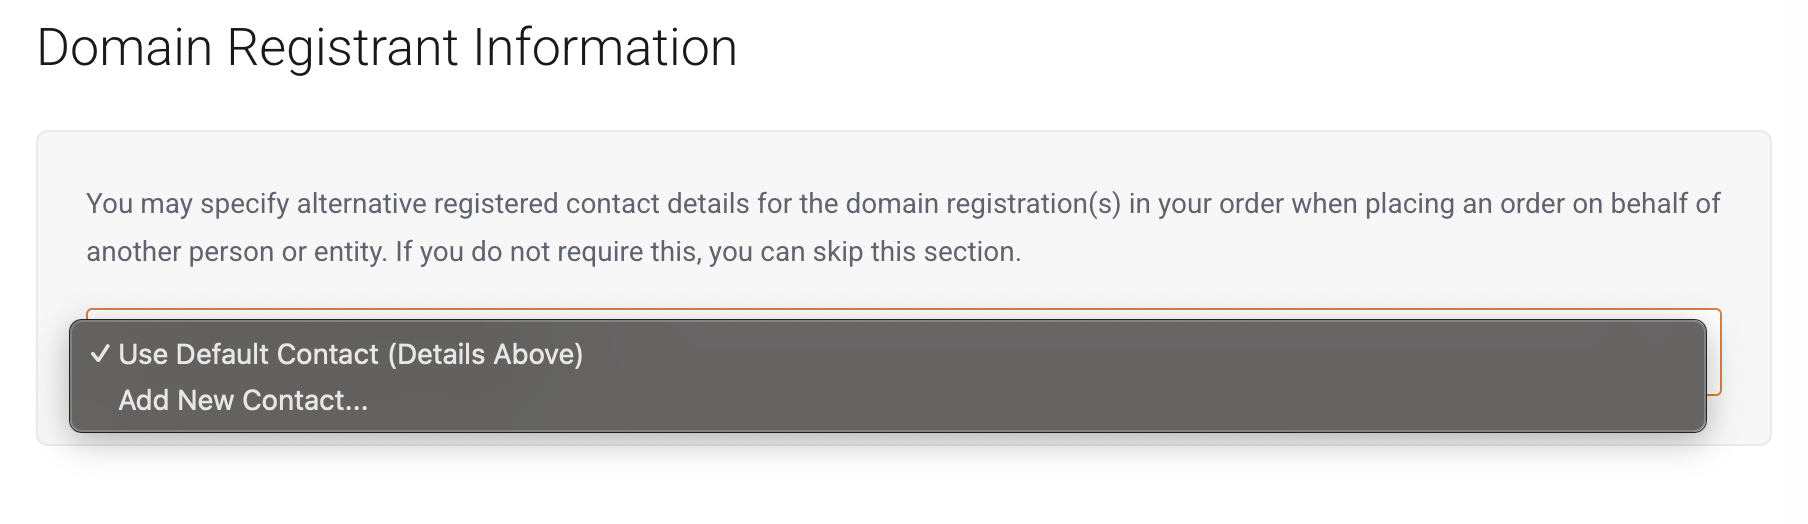
Domain registrant contact information
5. After that, in this section, you’ll be providing the domain’s registrant contact information
- If you’ll be registering the domain using your details, (provided in the previous step), choose ‘Use Default Contact‘
- Select ‘Add New Contact‘ to provide contact details that are different to your account contact details
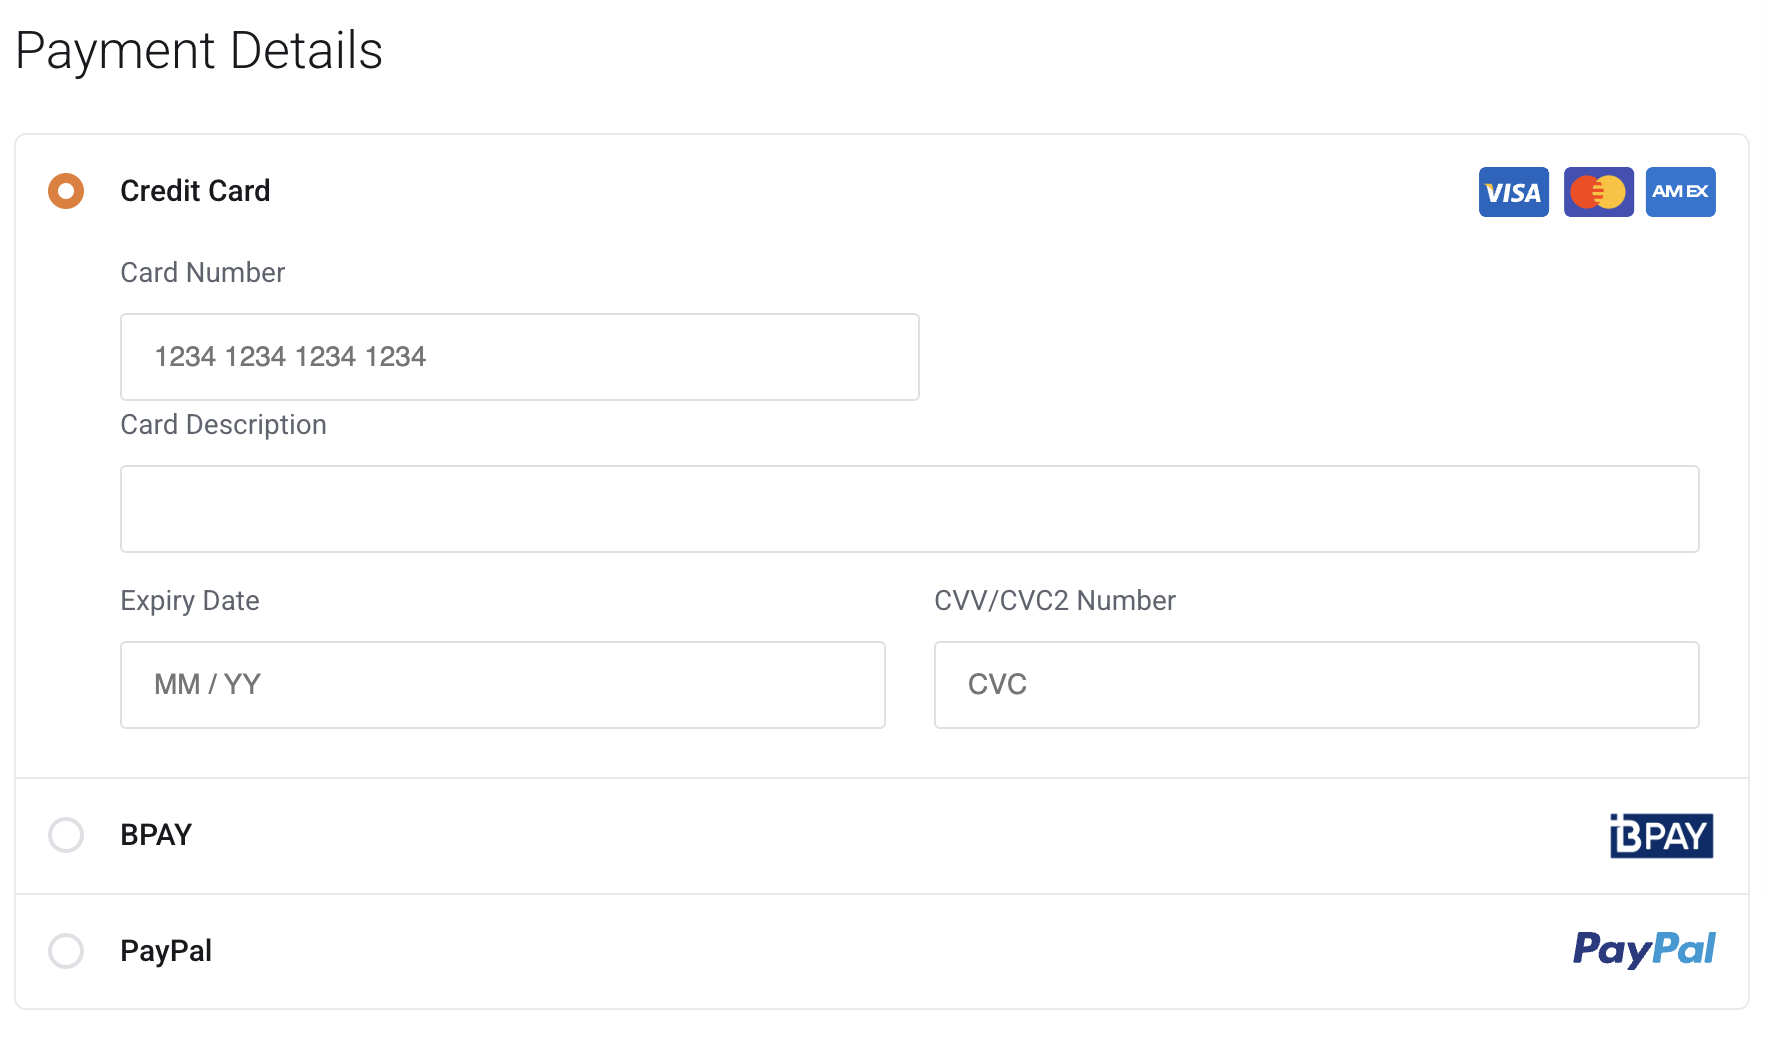
Payment details
6. Then, select your preferred payment method
- Credit Card (automatic billing)
- PayPal (automatic billing)
- BPAY (requires manual payment)
This will set the default payment method for recurring invoices (can be changed later via the Client Area – How to change your default billing method)
Please also note that BPAY payments can take 1-3 business days to process
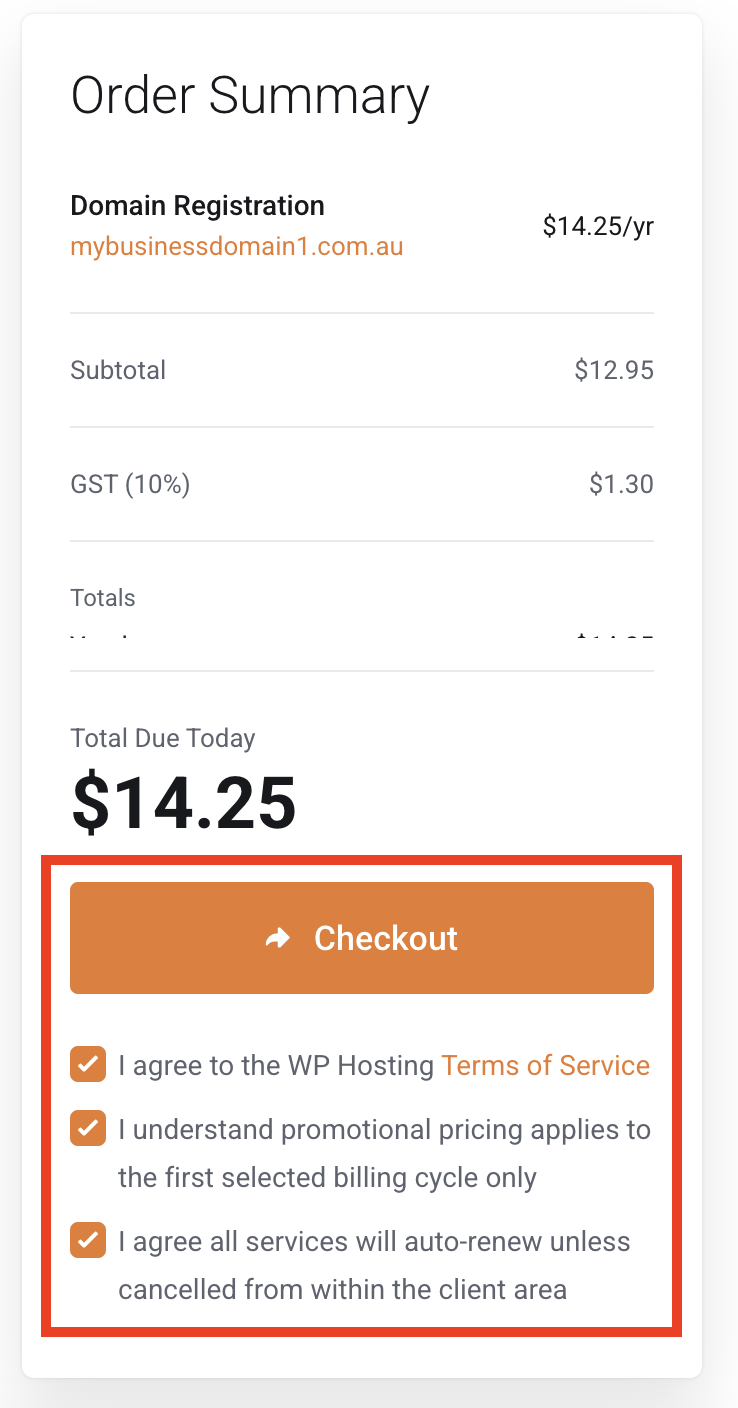
Checkout
7. When you’re ready, simply agree to the terms in the Order Summary by clicking the checkboxes then click the ‘Checkout‘ button to complete your order.
8. Finally, once your order has been processed you’ll receive an order confirmation to the email address you provided.
You’ll be able to view and manage your domain names from within the WP Hosting Client Area – use the email address and password you just created to login.
Manage your domain settings
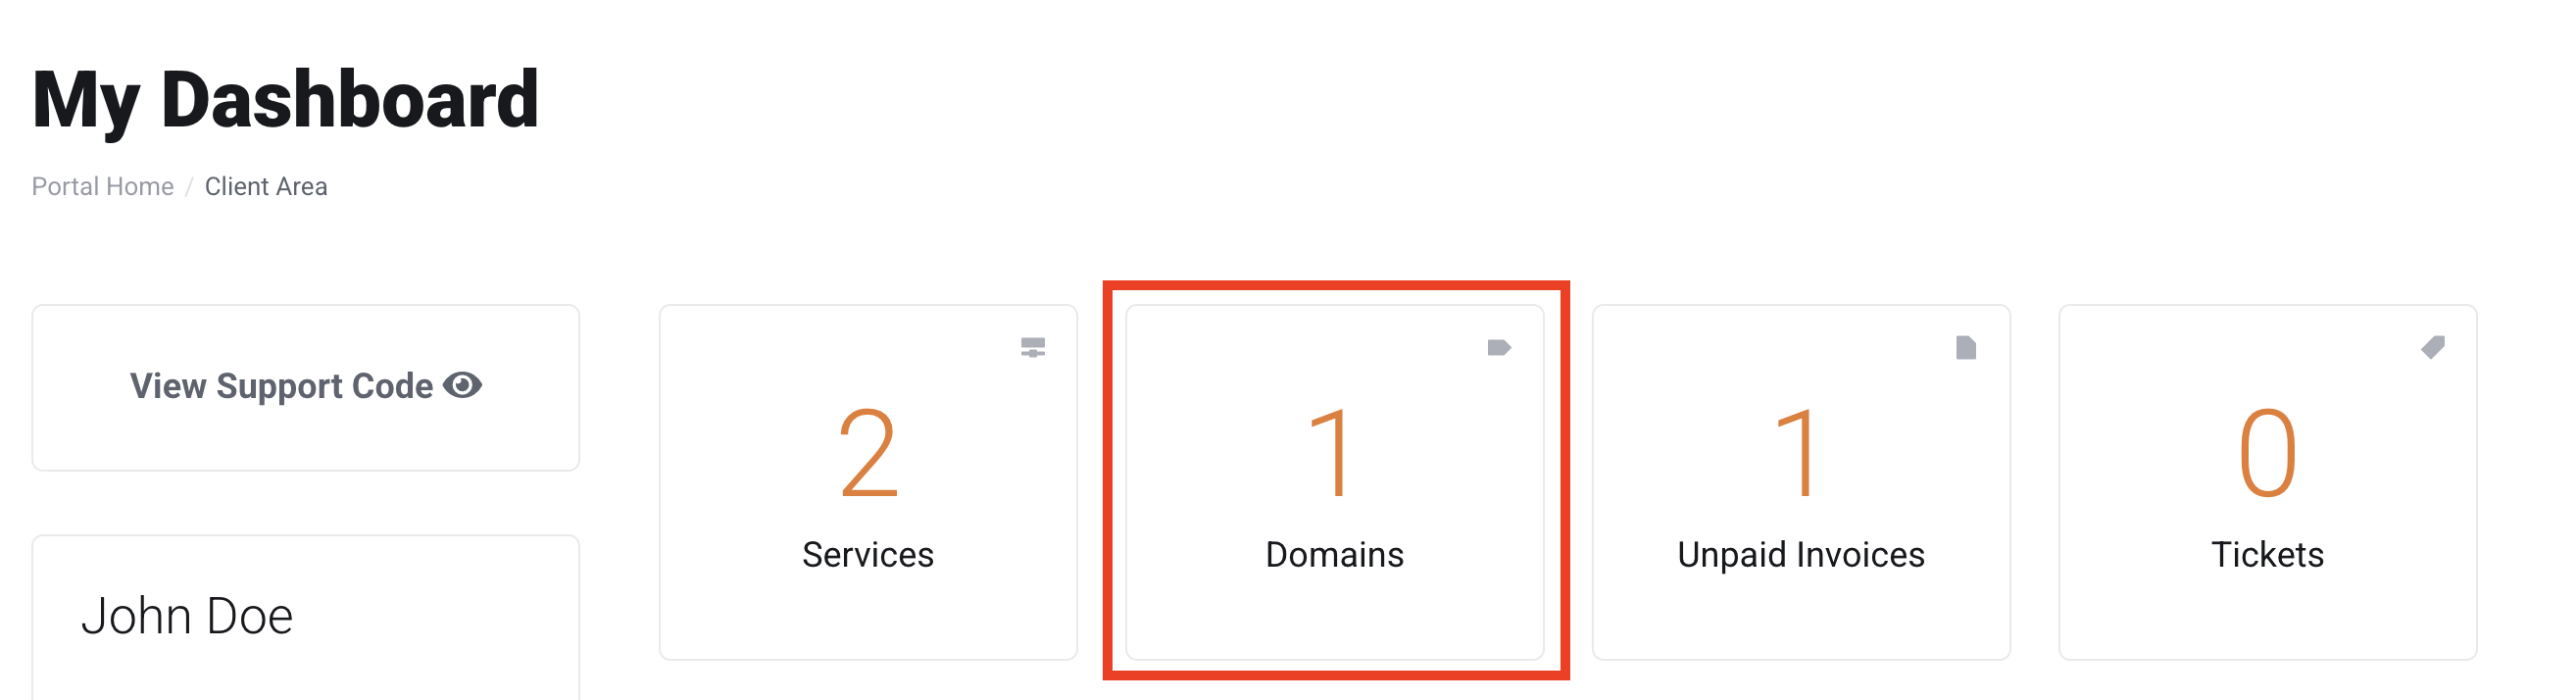
1. To manage your domain, log in to your client area and click the ‘Domains‘ button on your dashboard.
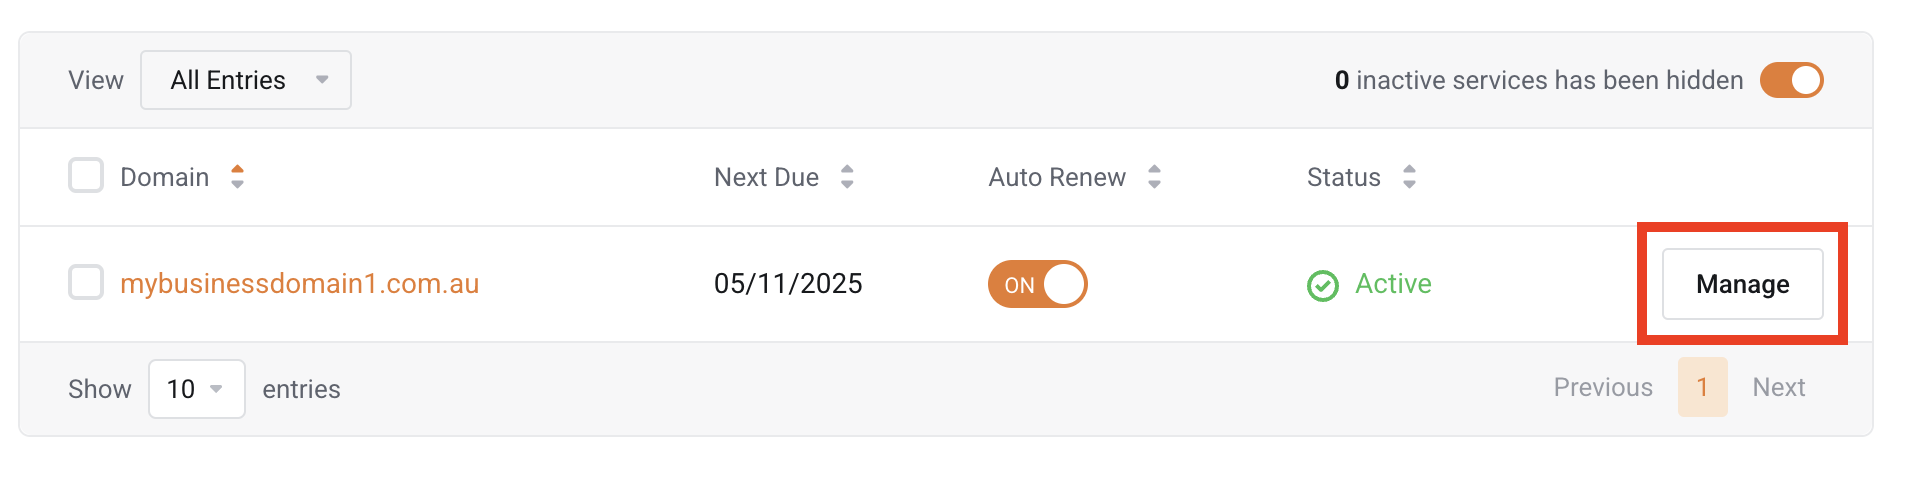
2. On your domain list page, simply locate the domain you want to manage, and then click the ‘Manage‘ button next to it.
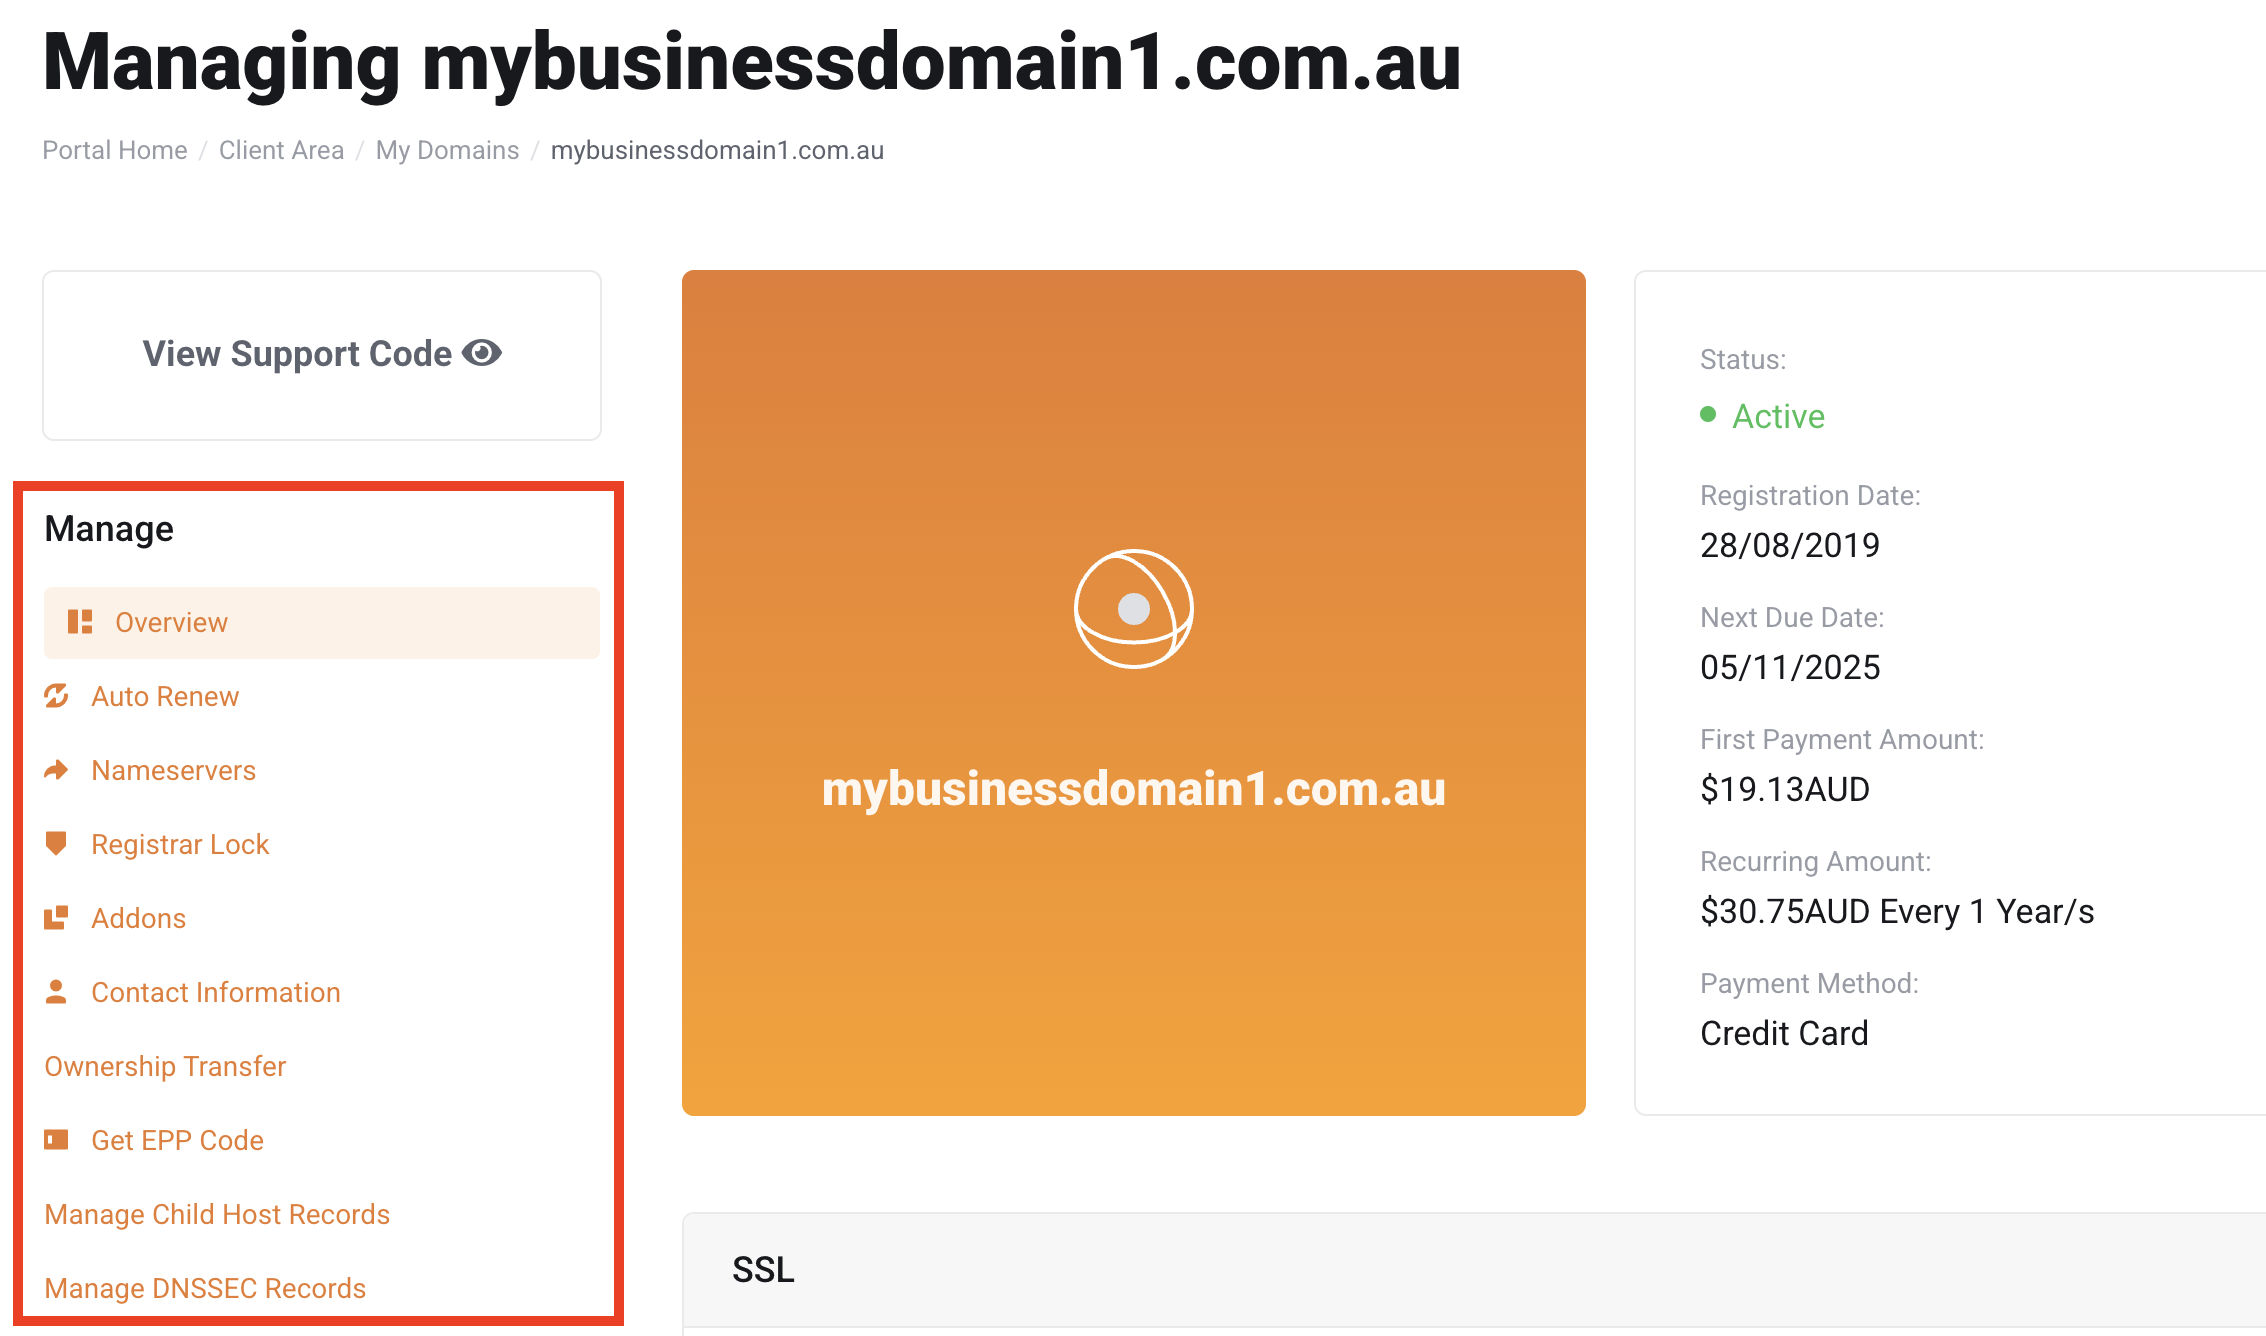
3. After completing this step, your ‘Domain‘ page will display a ‘Manage‘ section, which provides a set of tools for managing your domain.
4. To check your domain’s auto-renew status, follow our guide here: Check Your Domain’s Auto Renew Status.
5. To update your nameservers, refer to our guide here: Changing the Nameservers for Your Domain.
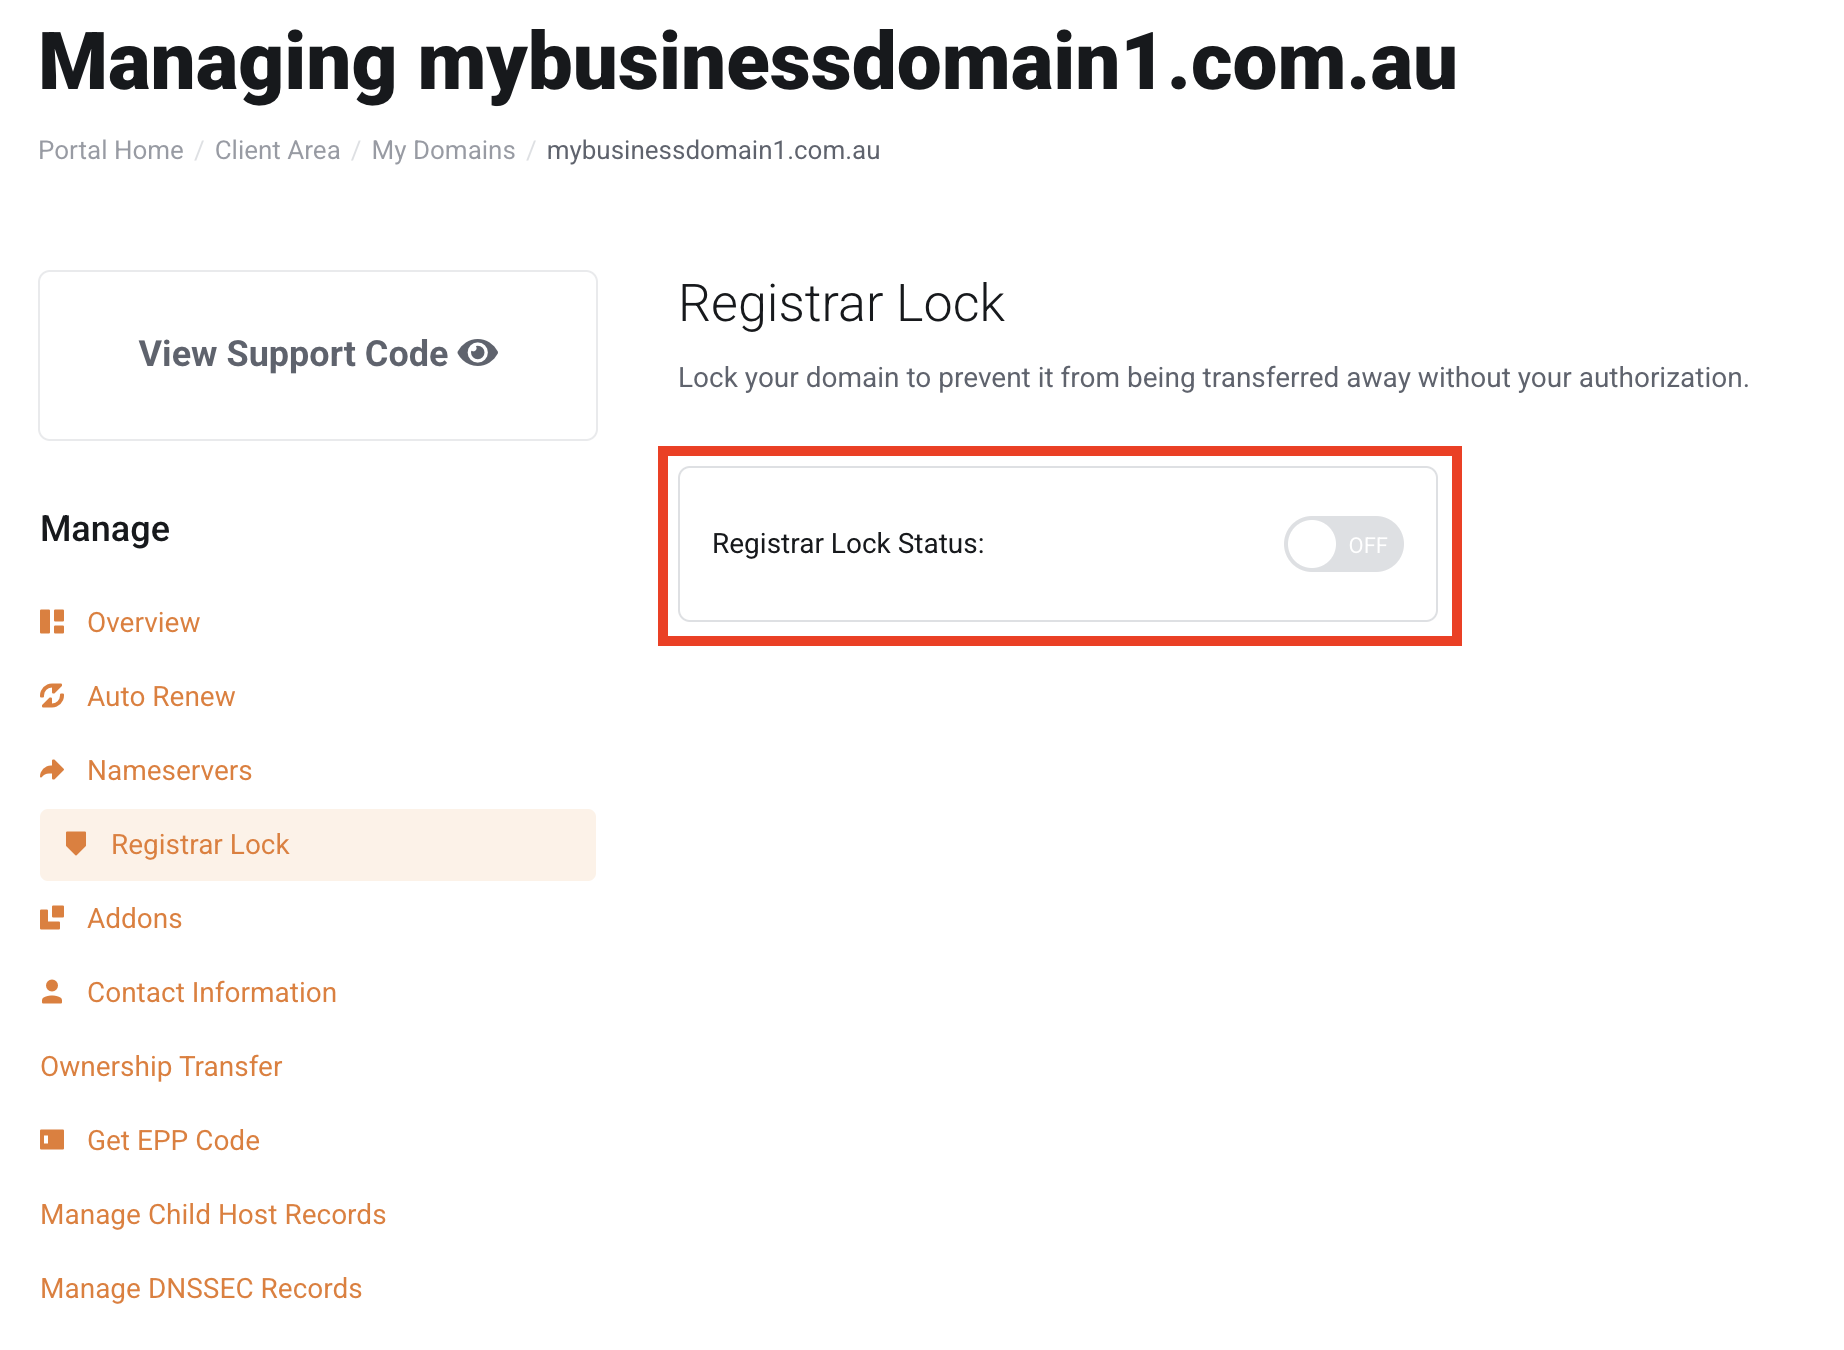
6. After that, to manage the ‘Registrar Lock’ status of your domain, click the ‘Registrar Lock‘ menu. From there, you can toggle the registrar lock on or off.
Note: The main purpose of the registrar lock is to secure the domain name against accidental or malicious transfers. Without the lock, anyone with access to your domain account could potentially transfer your domain to a different registrar, which could lead to losing control of the domain.
Enable ID Protection (optional)
7. If you’d like to add ‘Domain ID Protection‘ to your domain, click the ‘Addons‘ menu. You’ll see the ‘ID Protection‘ feature, click ‘Order‘ to proceed. Since the service is free, simply click ‘Checkout‘ and Domain ID Protection will be automatically added to your domain.
IMPORTANT NOTE:
Domain ID Protection is a useful feature for anyone who values privacy and wants to keep their personal information hidden from the public WHOIS database. It is commonly used by businesses and individuals to protect against privacy breaches, spam, and security threats.
SPECIAL NOTE FOR .AU DOMAINS:
Domain ID Protection is only available for gTLD domains (e.g., .com, .net) and is not available for .au domains.
AU domain policy does not allow details on WHOIS database to be obscured. However, the only information publicly available is; ABN/ACN etc, the name of the Registrant/Technical contact and email of the Registrant/Technical contact (protected by reCAPTCHA and only available on the auDA website).

8. Then, to update your domain contact information, follow our guide here: How to Update Domain Contact Details.
Get EPP code or domain password
9. To transfer ownership of your domain to someone else, follow our guide here: Move Services to Another WP Hosting Account Holder.
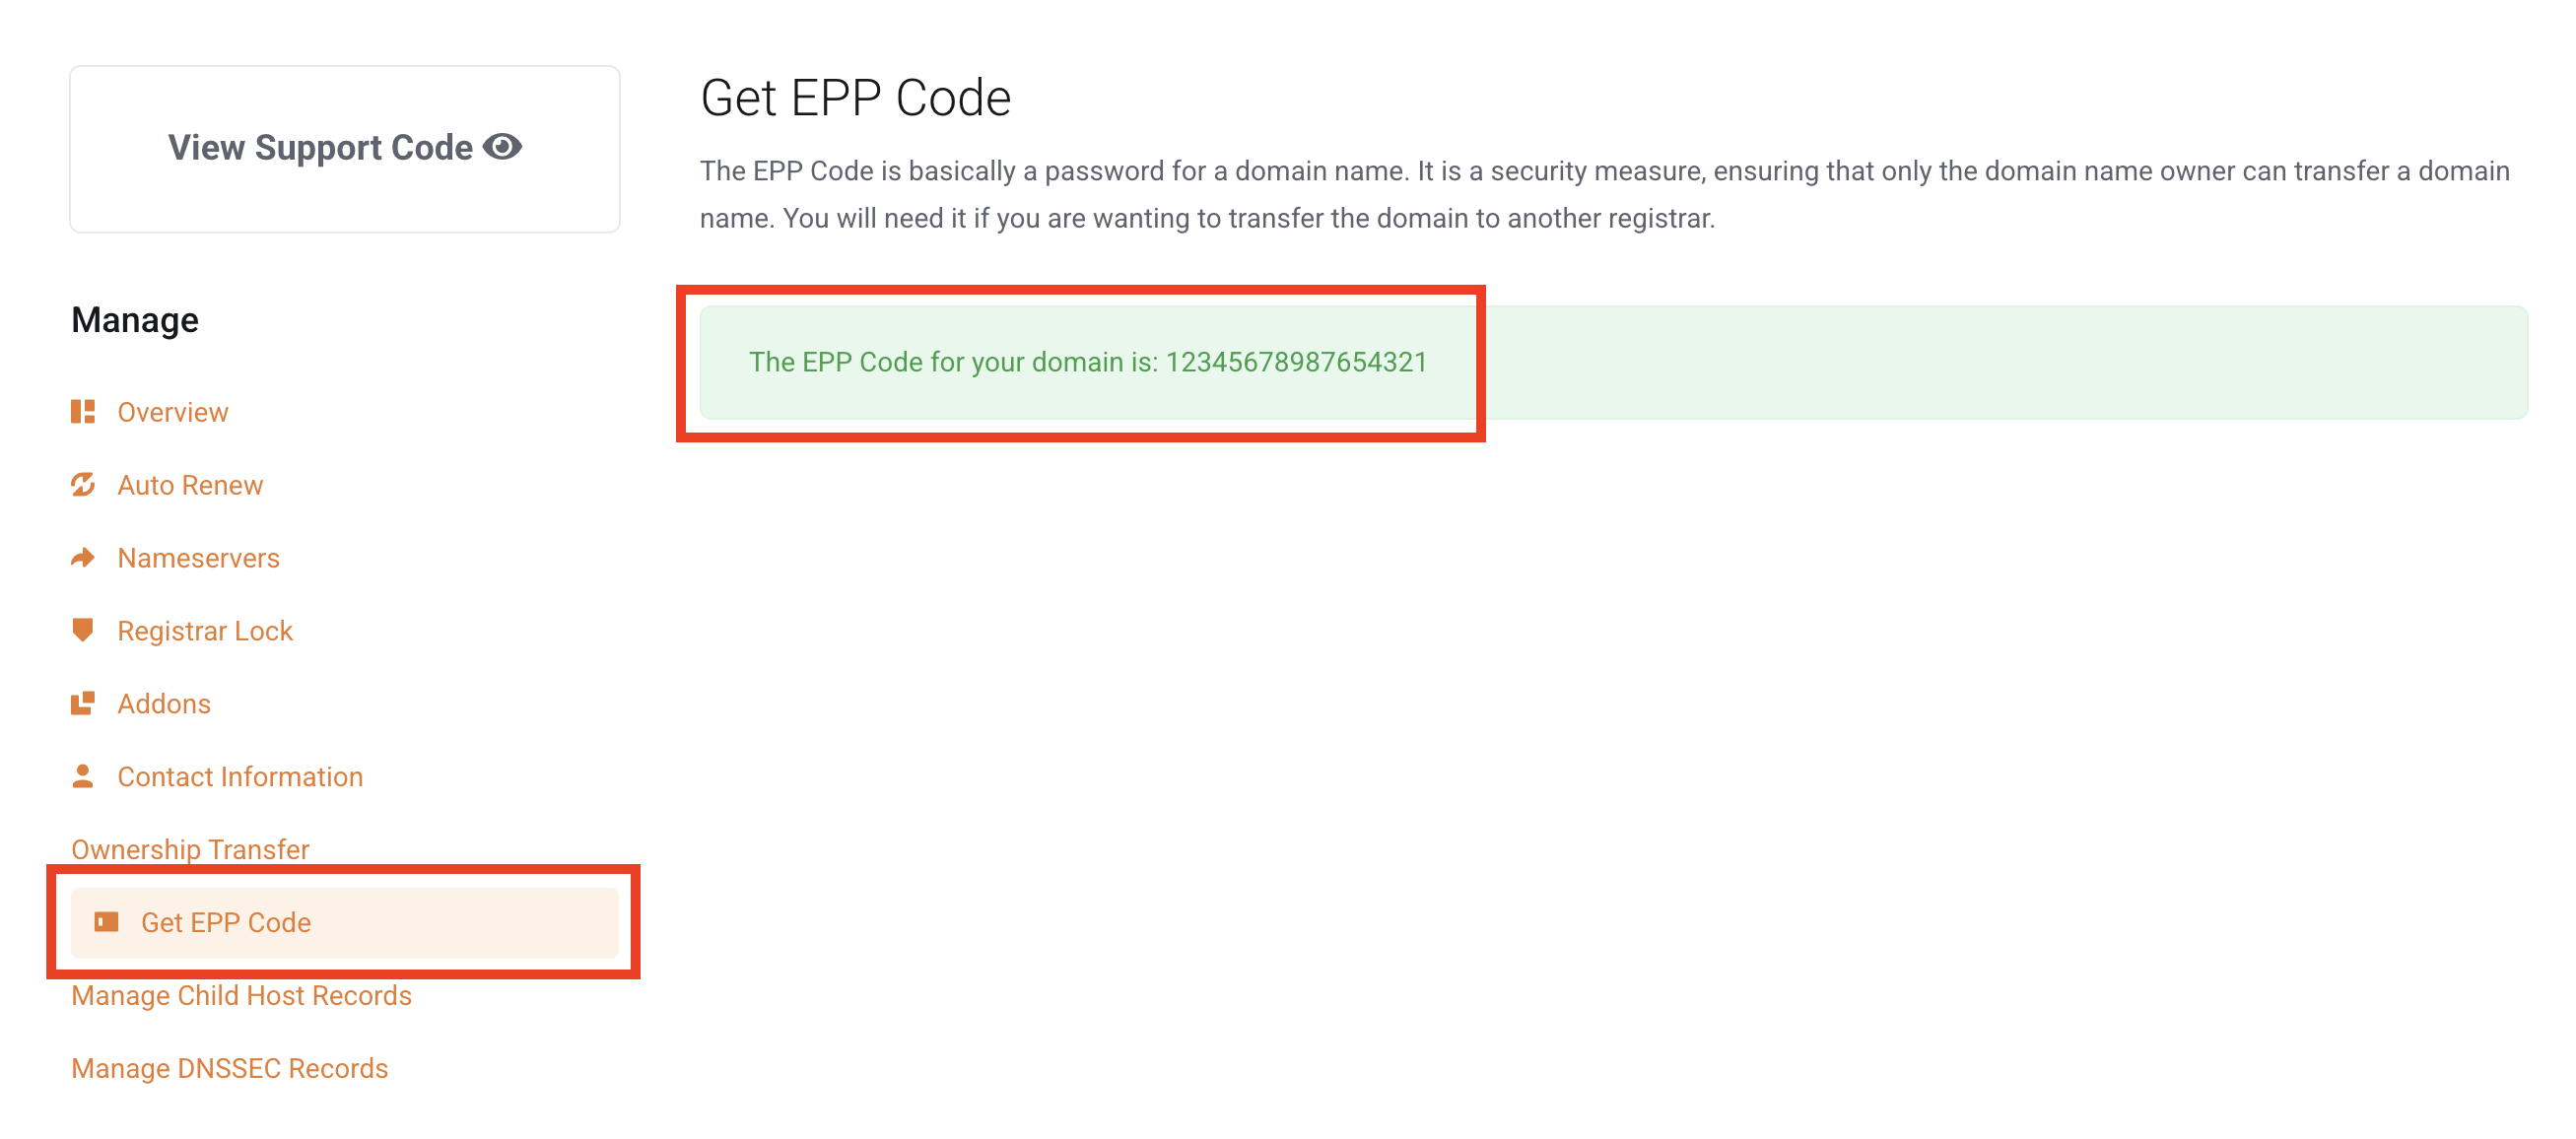
10. If you want to retrieve your ‘Domain Password‘ or ‘EPP Code‘, click the ‘Get EPP Code‘ menu. Then, you will be redirected to the ‘Get EPP Code‘ page for your selected domain. After that, simply copy the code provided and save it securely. This code is required if you wish to transfer your domain to another registrar.
Manage Child Host
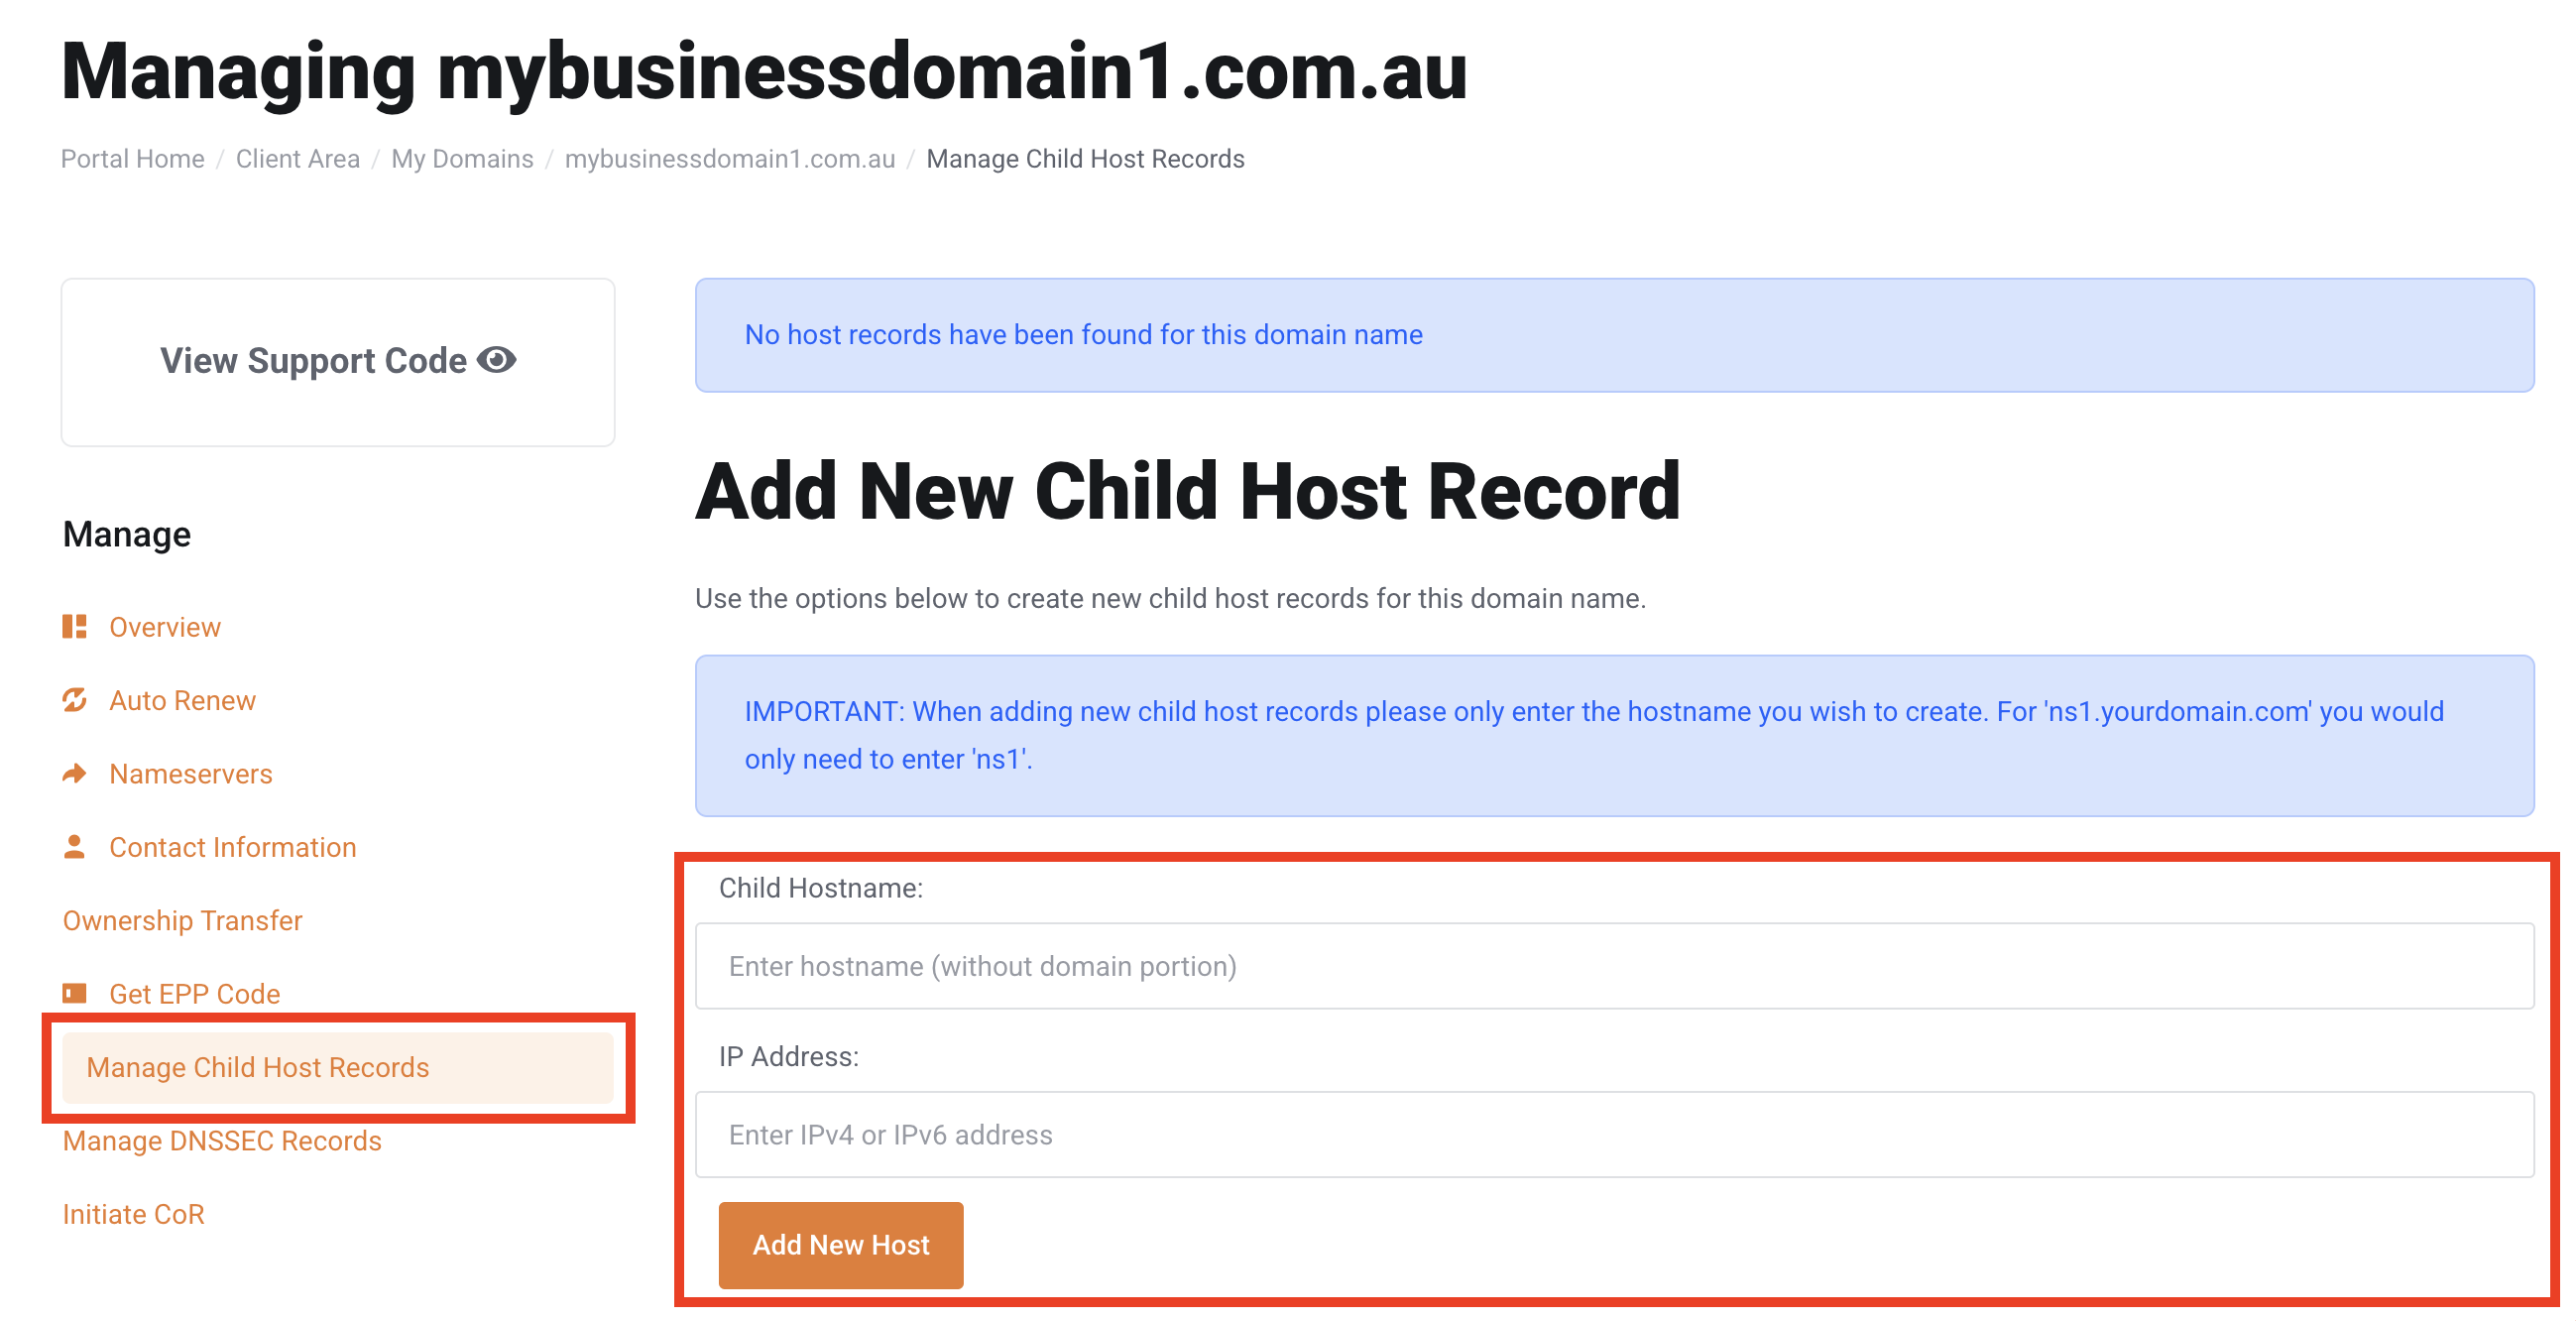
11. To create a ‘Child Host Record‘ on your domain management page, click on ‘Manage Child Host Records.’ Then, enter the ‘Child Hostname‘ you wish to create. For example, if you want to set up s1.mybusinessdomain1.com.au, simply enter s1 in the hostname field. After that, enter the IP address of your server and save the record.
Note: A Child Host Record (or “Glue Record“) lets you create custom nameservers for your domain, like ns1.yourdomain.com, and link them to specific IP addresses. This is handy if you want personalised nameservers instead of using the default ones from your hosting provider. Typically, it’s often used by web hosting resellers to add a professional touch by branding their nameservers. Keep in mind it can take up to 48 hours for the changes to fully update across the internet.
Configure DNSSEC
12. DNSSEC (Domain Name System Security Extensions) is like a security guard for the internet. It helps make sure that the websites you visit are actually the websites they claim to be. When you type a website address, DNSSEC checks the information’s legitimacy and confirms that no one has tampered with it.This protection prevents redirection to fake or harmful websites, keeping your online activities safer and more secure.
To configure DNSSEC, you’ll need to provide the following information:
- Key Tag: Enter the Key Tag value.
- Algorithm: Select the algorithm.
- Digest: Enter the Digest value.
- Digest Type: Select the appropriate Digest Type.
Ensure that all the details you enter are correct, as any incorrect information could make your domain inaccessible online.

Change of Registrant
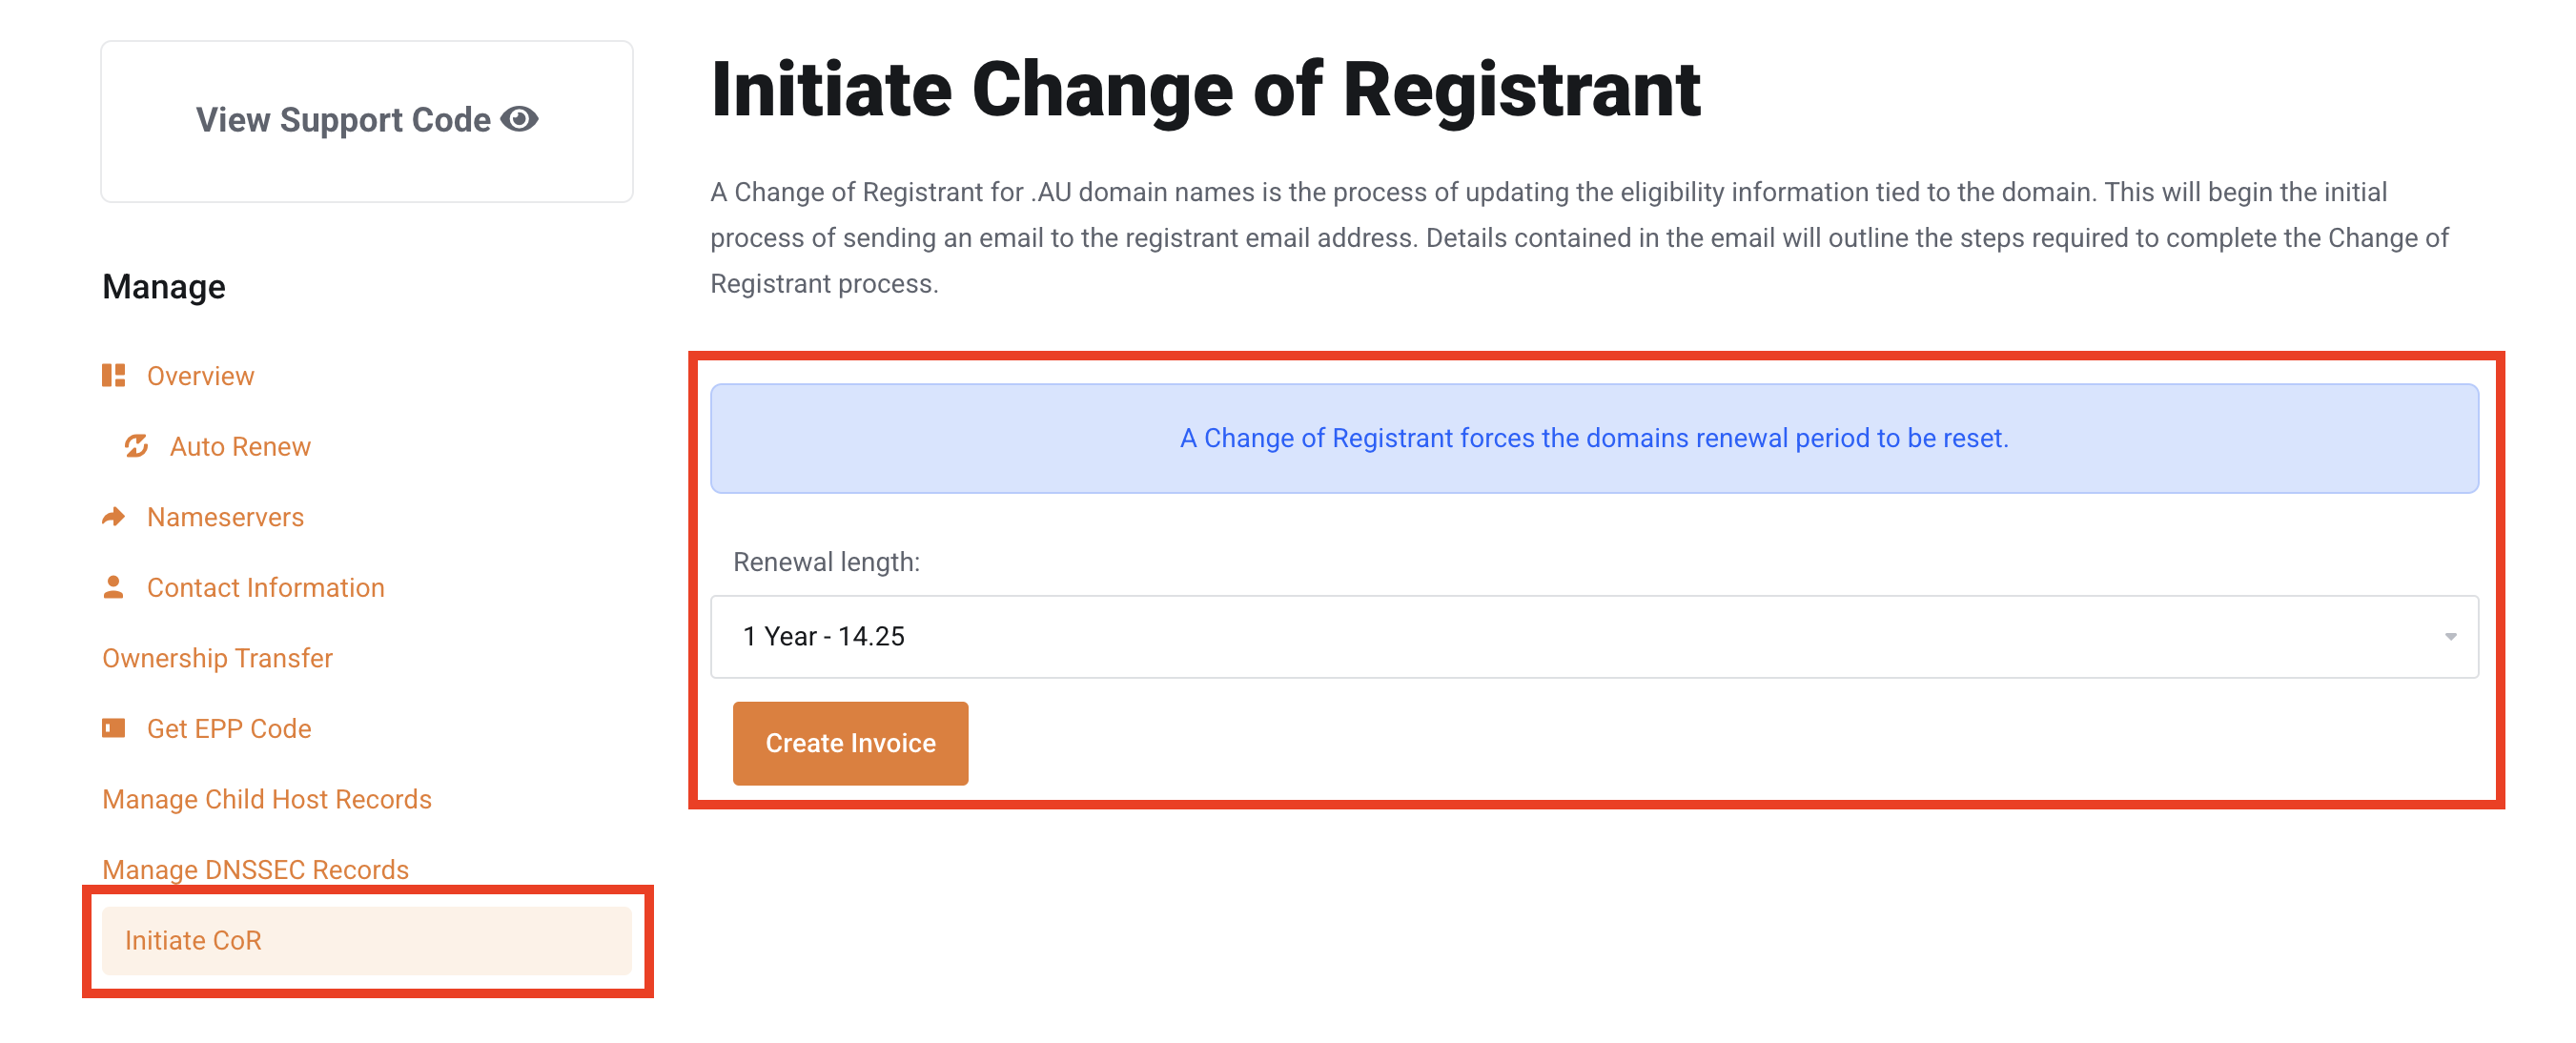
13. This option is available only for .au domains. Then to begin the Change of Registrant (CoR) process, go to your domain page’s manage section and click on the ‘Initiate COR‘ menu. The CoR details will be displayed. Please select your desired renewal period (note that a Change of Registrant resets the domain’s renewal period). Finally, click ‘Create Invoice,’ then a CoR email will be sent to the registrant’s email address. Follow the instructions in the email to update your ABN.
Conclusion
In conclusion, having a robust domain strategy is essential for a successful online presence. WP Hosting provides intuitive tools that simplify the process, allowing you to effortlessly register and manage domain names—or as some refer to it, registering a domain name—while keeping your settings current and secure. With these features, you not only streamline routine tasks but also position your website for long-term success.
Ultimately, effective domain management enhances both your website’s performance and user experience. By utilising the powerful tools offered by WP Hosting, you can confidently register and manage domain names, ensuring that your online operations remain reliable and competitive. In addition, staying proactive with your domain configurations helps you adapt quickly to changing demands and secure your digital presence.