This topic covers processes relating to a cPanel service.
You will need to be logged into the cPanel account to follow the steps.
If you’re not sure how to access your cPanel service — please, follow this guide before continuing: How do I Login to cPanel?
PLEASE NOTE: Some advanced features of the WordPress Management in cPanel, such as staging/cloning tools, are only available to users of Business/Commerce hosting plans or above.
What is cPanel’s WordPress Management tool?
cPanel’s WordPress Management tool (formerly WordPress Toolkit) provides an easy-to-use platform. It allows you to manage and update plugins and themes for your WordPress websites.
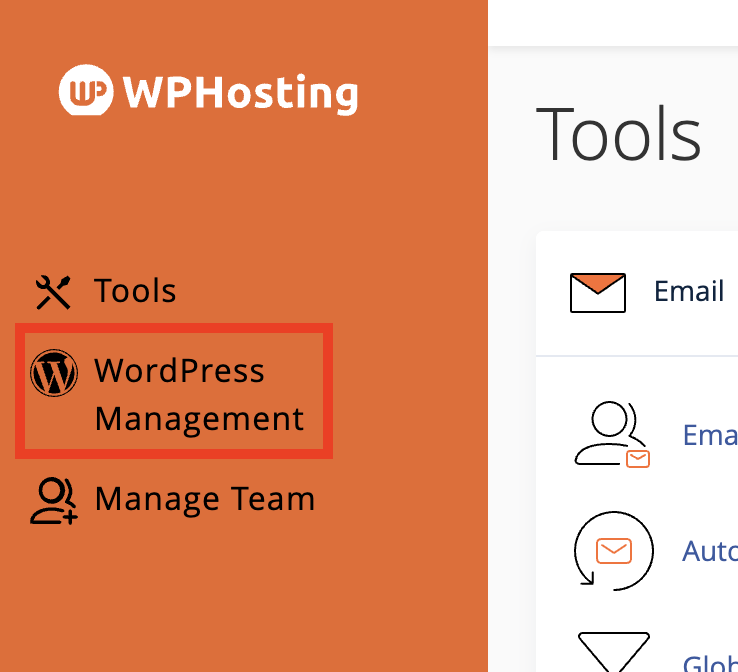
Accessing the WordPress Management tool
You can access the WordPress Management tool from the vertical menu on the left-hand side of the cPanel interface. Alternatively, you can find it in the list of tools under the “Domains” section.
The WordPress Management tool (formerly WordPress Toolkit) has a main dashboard, pictured below.
From here, you can log in to the WordPress site, access the File Manager, update plugins/themes, use the clone tool, enable ‘Maintenance Mode’ and more.
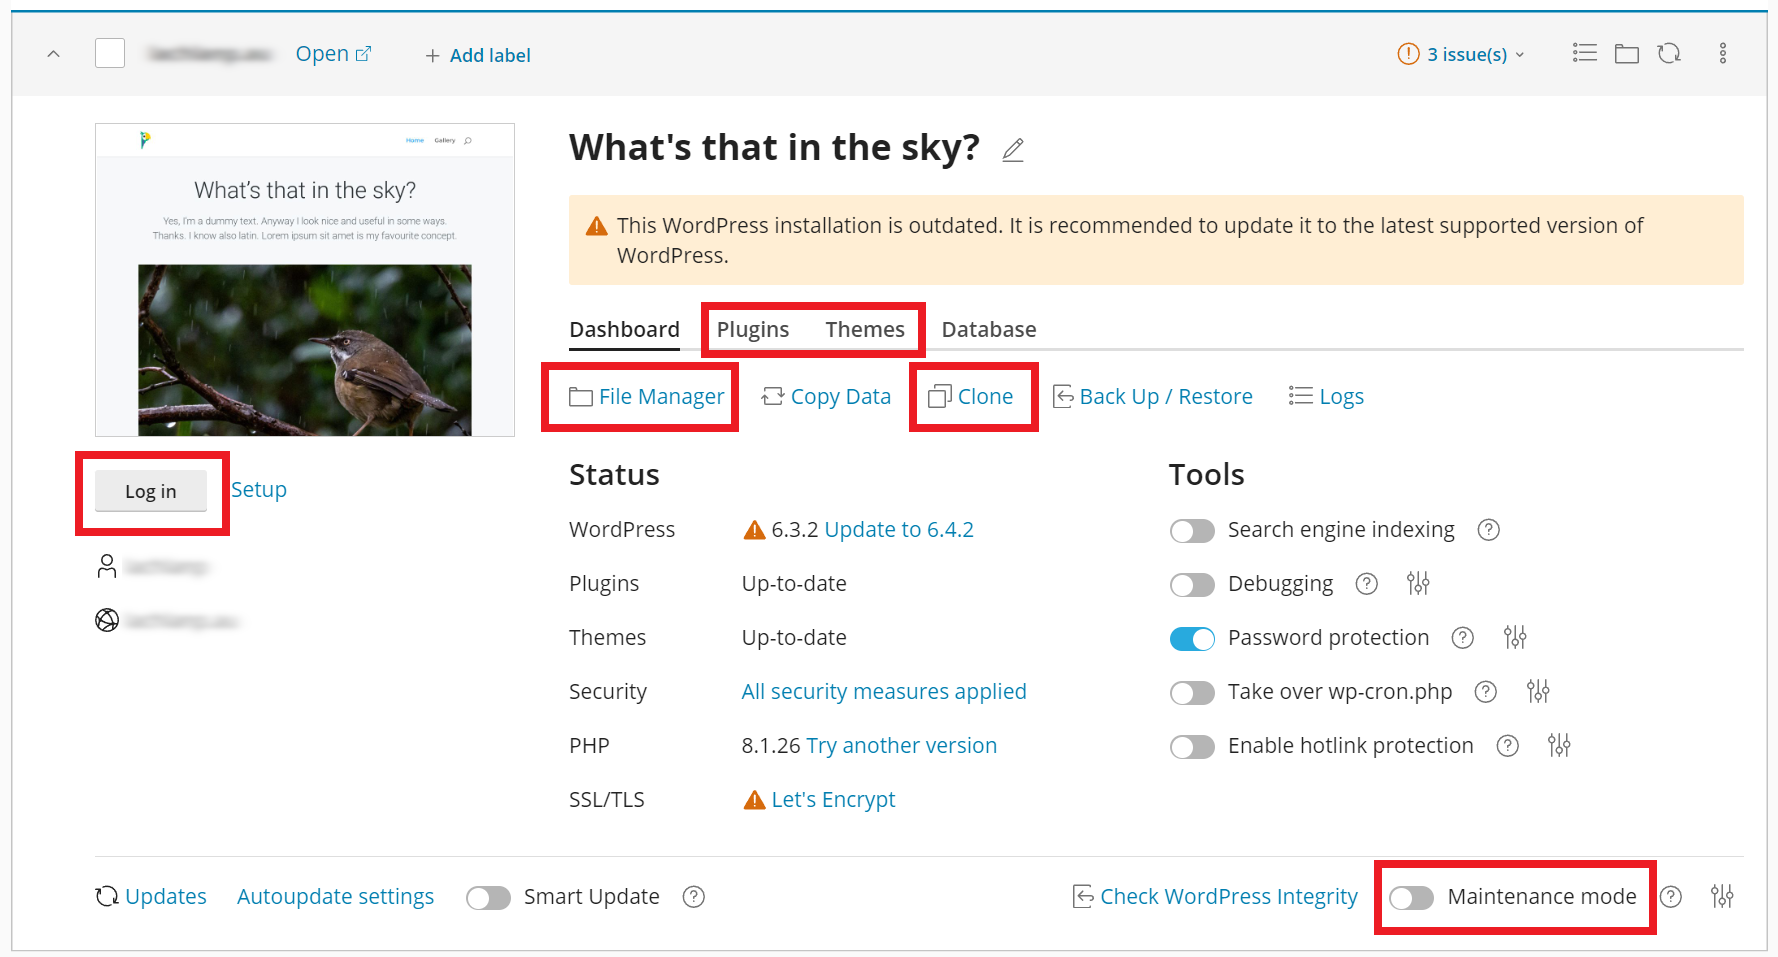
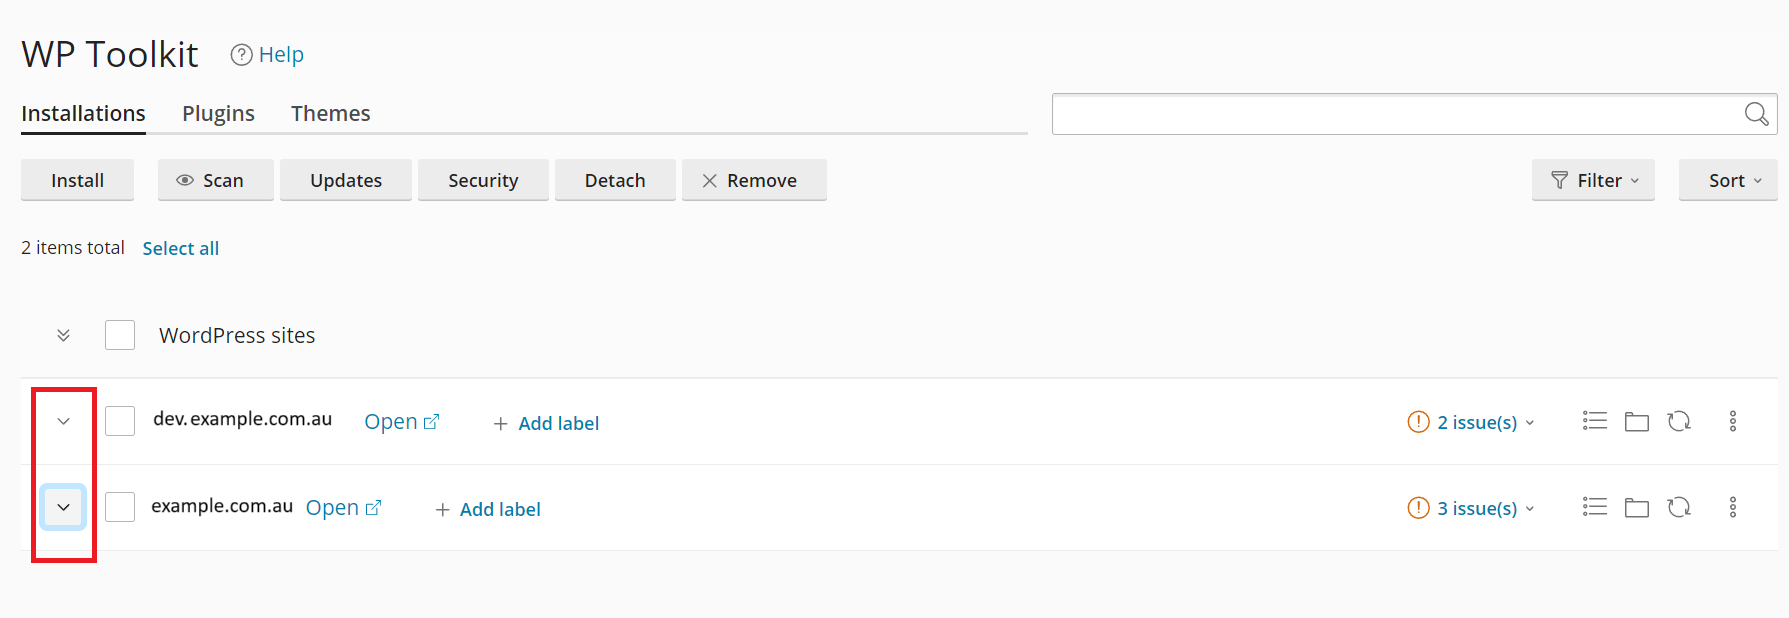
If you don’t see a site preview image and the WordPress Management options, click the ‘expand icon’ (down arrow) next to your site in the list. This action reveals additional site details.
Managing Plugins and Themes
To update plugins and themes
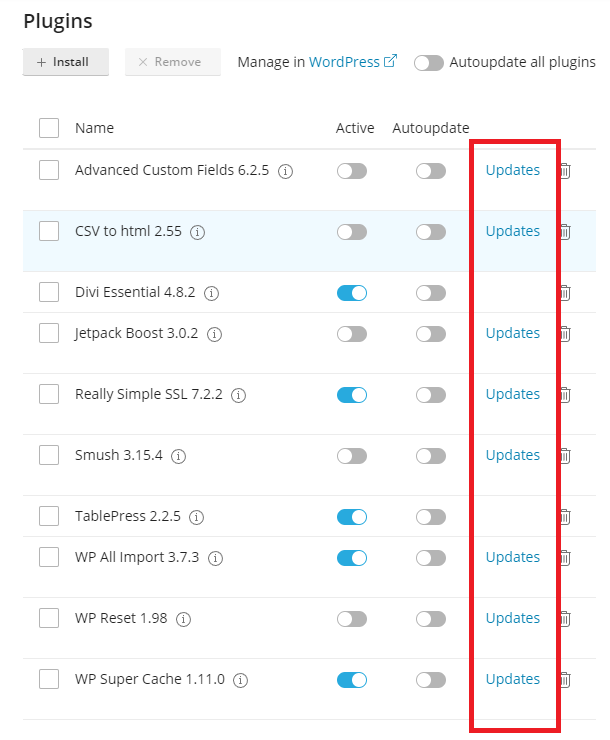
1. Click the ‘Plugins‘ or ‘Themes‘ tab

2. You will then see a list of plugins installed for this instance of WordPress. If a plugin is reported to have a newer version, “Updates” will appear next to the plugins/themes with available updates.
Please note: Some paid/premium plugins that require licensing may need to be updated manually – please see the plugin author’s documentation for more detail.
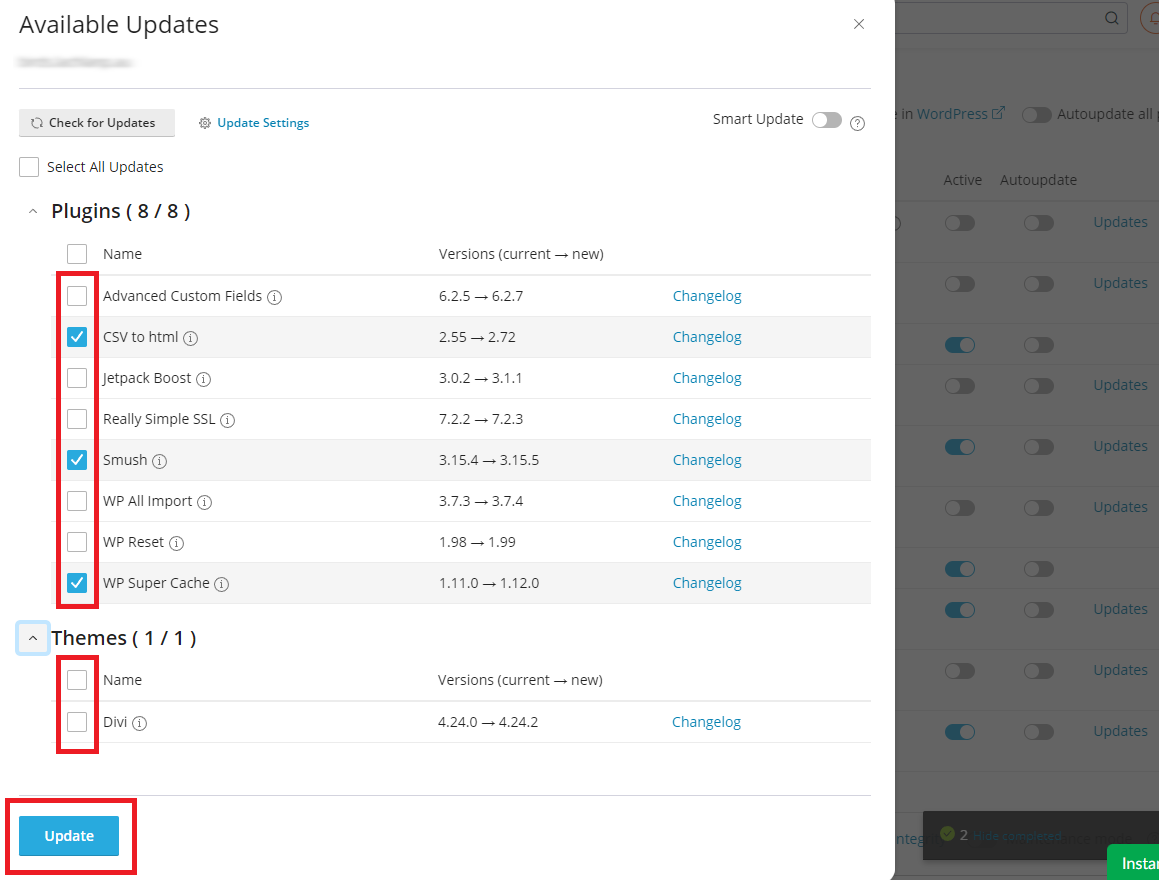
3. Then, clicking on any of the ‘Updates‘ links will take you to the Updates options. This will open a pop-up window on the left, shown below.
4. After that, click the checkbox next to each of the plugins/themes you’d like to update. (Placing a tick in the top checkbox, next to ‘Name’, will select all available items)
5. Then, click ‘Update‘ when you’re ready
6. Finally, you will see notifications about the updates at the top and a progress bar at the bottom.
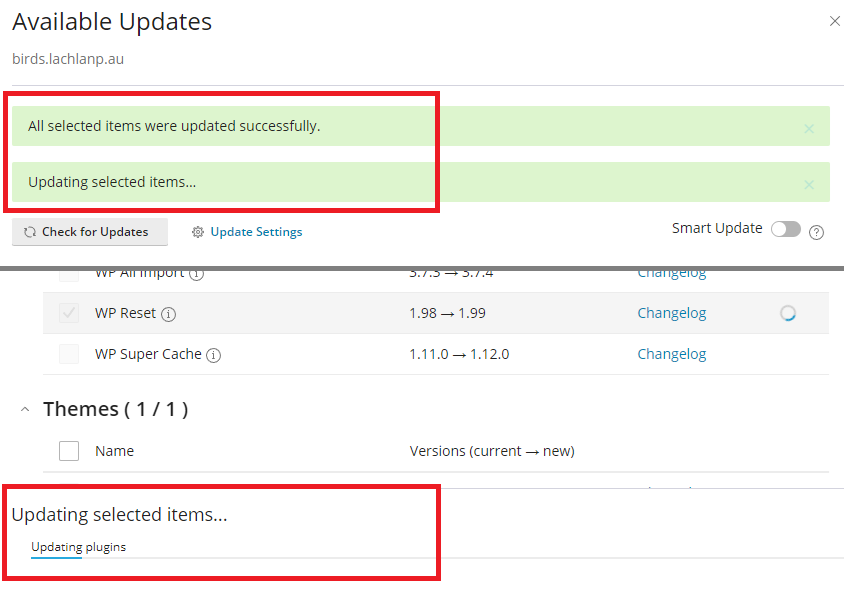
When complete, you’ll see a “All selected items were updated successfully” message.
To enable and disable plugins
Outdated plugins or conflicts with other plugins, themes, or site builders often cause many site issues. Additionally, poorly created plugins can trigger problems from the start.
Disabling plugins/themes can be useful for troubleshooting issues with your WordPress site. Deactivate a suspected plugin—or all of them—and then activate one at a time. This method helps you narrow down the potential culprits causing trouble with your site.
1. From the WordPress Management Plugins tab, note the “Active” column and the toggle switch next to each plugin.
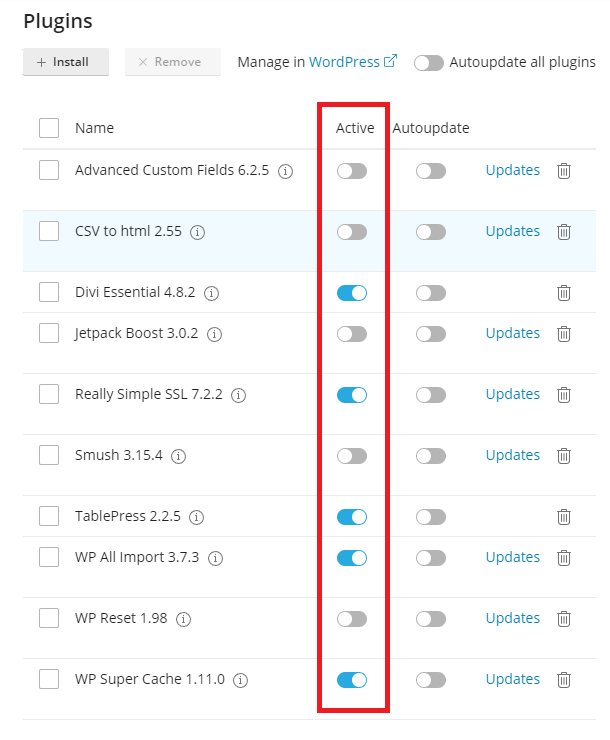
2. Finally, click the ‘Active‘ toggle icon to switch the plugin/theme on or off. Active plugins/themes will switch to the right and display a blue color, while inactive ones will appear grey and switch to the left.