This topic covers processes requiring access to your WP Hosting Client Area. If you’re not sure how to access the Client Area, please follow this guide before continuing – How do I Login to my WP Hosting Client Area?
What is MFA/2FA and why do I need it?
Enabling MFA/2FA (Multi-Factor or Two–Factor Authentication) adds an extra layer of security to your WP Hosting and other online accounts.
By requiring a second form of verification, it helps keep your information safe even if your password is guessed or stolen. Setting up MFA/2FA is an easy and effective way to protect yourself online.
Follow this guide to increase your digital security in just a few steps!
Types of 2FA codes that are supported
You’ll have the choice of using email based codes or an Authenticator app or email based codes.
- Authenticator app 2FA codes
- Codes are securely generated within your authenticator app every 30-60 seconds
- Codes are securely generated within your authenticator app every 30-60 seconds
- Email-based 2FA codes
- A single-use code will be sent to your registered address for each login attempt
To enable MFA/2FA in the Client Area
1. First, login to your WP Hosting Client Area
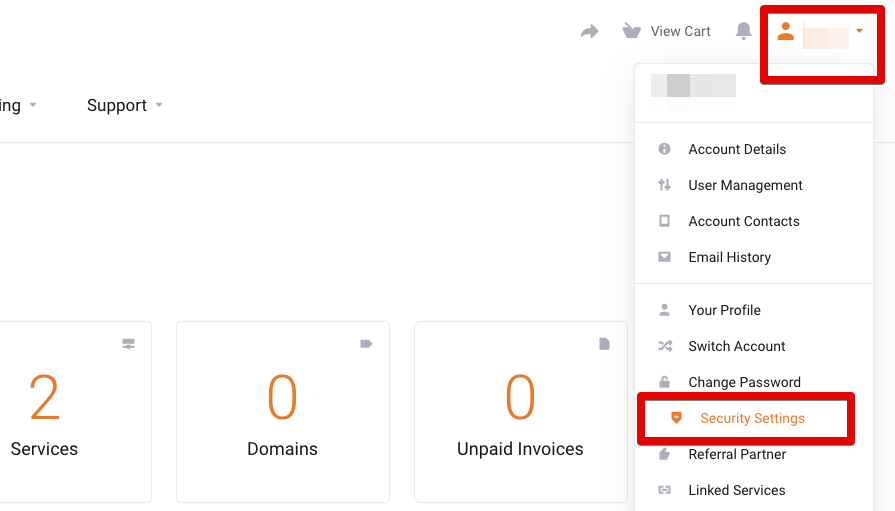
2. Once logged into the Client Area, click the profile name in the top-right and select ‘Security Settings‘ from the drop-down menu
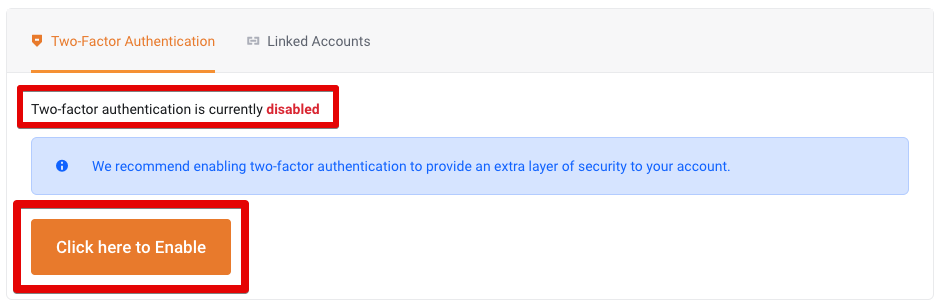
3. Next, click the ‘Two-Factor Authentication’ tab. This will display the current status.
Press ‘Click here to enable‘ to begin the 2FA / MFA setup
4. Here, you need to choose either token-based or email-based 2FA method.
- Time Based Tokens (authenticator app): Use an authenticator app such as Google Authenticator or Duo to generate one-time codes
- Email Two-Factor Authentication: sends one-time codes via your registered email address
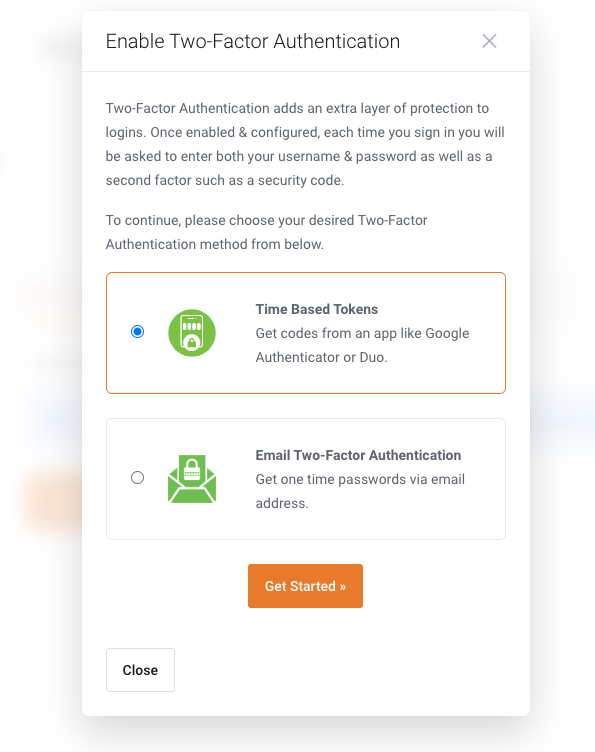
5. Make your choice between Time Based Tokens or Email Two-Factor Authentication, and then click ‘Get Started‘
If choosing Time Based Tokens
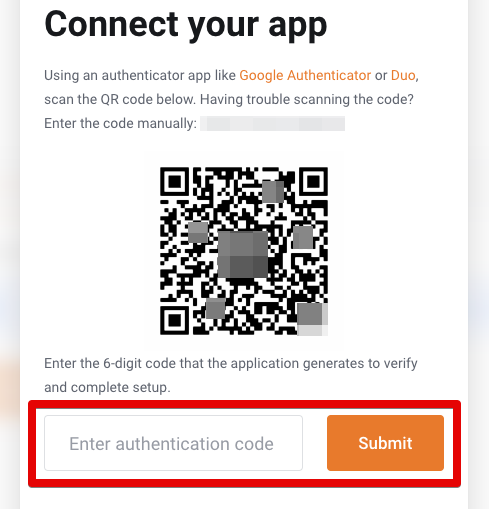
If choosing Time Based Tokens, you will see a QR code with a screen asking you to connect your app.
Then, download or open your preferred authenticator app on your smartphone. The steps will vary slightly between apps, but the general steps are;
- Open the authenticator app
- Scan the WP Hosting QR code
- Enter the code from the app and click ‘submit‘
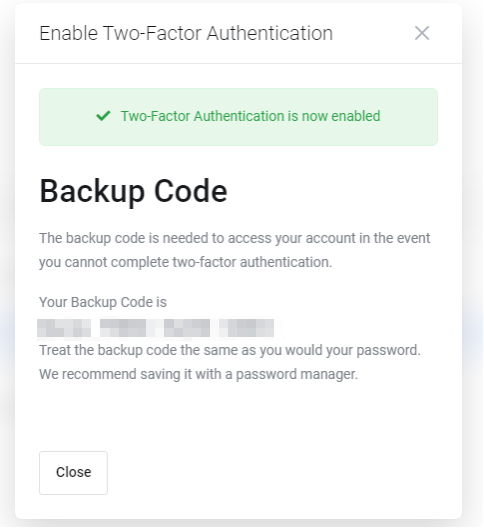
When 2FA is activated, you will see a message confirming “Two-Factor Authentication is now enabled“, and a Backup Code will be displayed.
IMPORTANT NOTE: Make a note of your backup code and treat it as you would any other password. Use this backup code to log in if you lose access to your phone or the authenticator app. Keep it safe!
!!! IMPORTANT NOTE !!!
- Remember to make a note of your backup code and treat it as you would any other password. This backup code can be used to login if you lose access to your phone or the authenticator app, so keep it safe.
If choosing Email 2FA
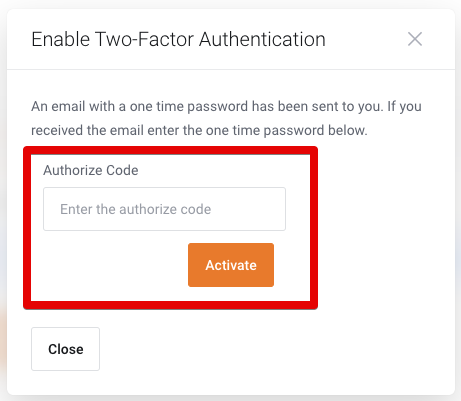
If you choose Email Two-Factor Authentication, the system sends an email to the primary account address within a few minutes. Please ensure you know the email address associated with your WP Hosting account and that you have access to any mail sent there.
This email will contain a single-use authentication code, valid for 1 hour – enter the code and click ‘Activate‘
PLEASE NOTE: The email 2FA codes are valid for 1 hour only.
This completes the email-based token 2FA setup
From now on, when you log in to the WP Hosting Client Area, the system sends a one-time code (valid for 1 hour) to the email address linked to your account.
To change the 2FA authentication method
To update the way you receive 2FA authentication codes, you will need to reset the configuration by disabling and re-enabling 2FA.
1. First, login to your WP Hosting Client Area
2. Then, once logged into the Client Area, click the profile name in the top-right and select ‘Security Settings‘ from the drop-down menu
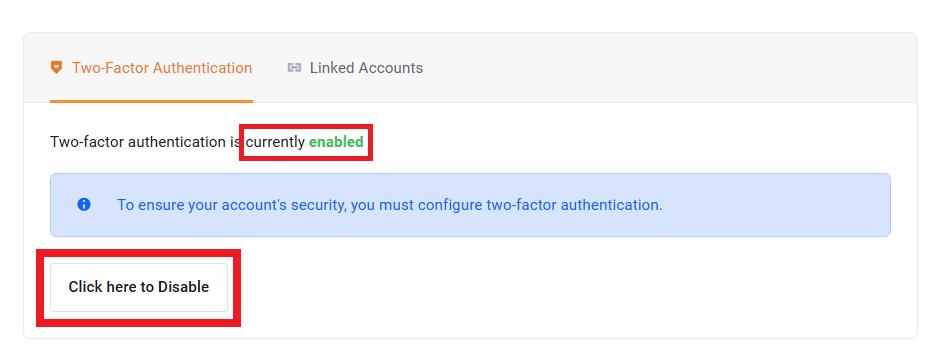
3. After that, take note of the current 2FA status. Then, you will see a message: “Two-factor authentication is currently enabled”, highlighted in green.
Click the ‘Click here to disable‘ button to reset 2FA
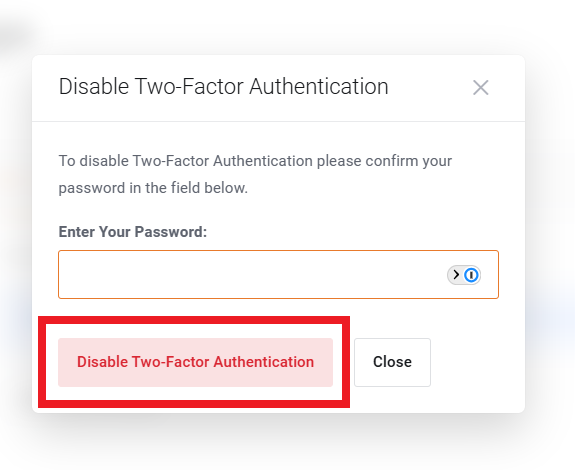
4. Then, the system prompts you to enter your current WP Hosting Client Area password.
Type your password in the text box and click ‘Disable Two-Factor Authentication‘
5. When you’ve successfully disabled 2FA, you will see the ‘disabled’ status highlighted in red.
Click the ‘Click here to Enable‘ button to restart the setup process (see the steps at the start of this guide for setting up 2FA again)
Important things to remember
- Remember to make a note of your backup code. Treat it as you would any other password. Use this backup code to log in if you lose access to your phone or the authenticator app, so keep it safe.
- Email codes will be sent to the address you’re using to login with
- Email 2FA codes are valid for 1 hour only