Ensuring the security of your Enterprise hosting account is crucial, and enabling two-factor authentication (2FA) is one of the best ways to protect your data. In this guide, you’ll learn how to enable 2FA step by step, allowing you to add an extra layer of security to your account. By pairing your authentication app with your account, you prevent unauthorized access and significantly enhance your login protection. Follow the instructions below to securely enable 2FA and safeguard your Enterprise hosting service.
1. Login to your Enterprise hosting service.
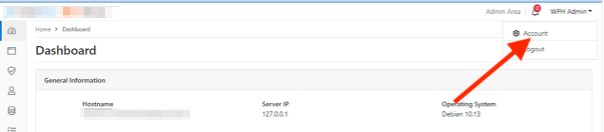
2. Click on your username on the top right of the web page and then click on Account.
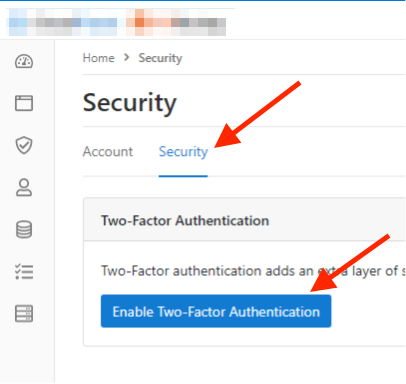
3. Click on the Security tab, then click on Enable Two-Factor Authentication.
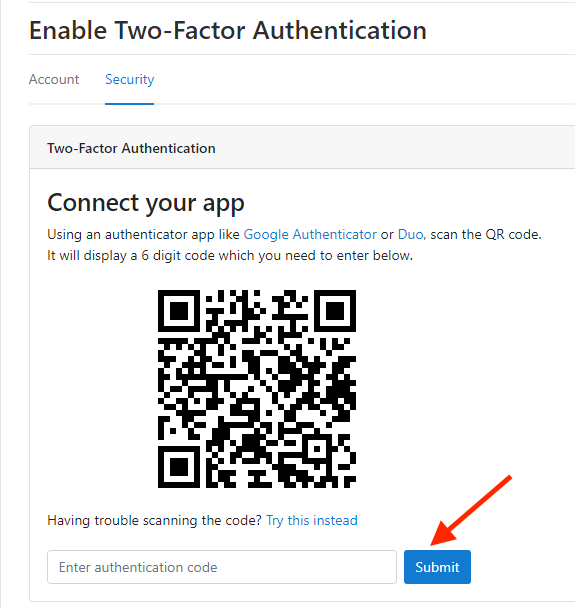
4. Next you will see a QR code with a screen asking you to connect your app. Open up your preferred authenticator (examples include Google Authenticator, 1Password, LastPass etc) app of choice and scan the QR code and then enter the authentication code from the authenticator app and click submit.
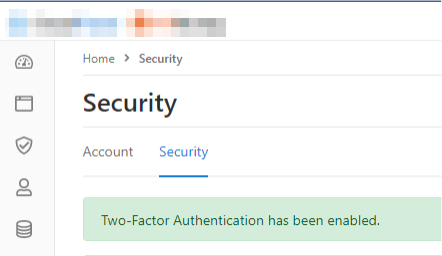
5. Lastly, you see a message saying ‘Two-Factor Authentication has been enabled‘.
By following these steps, you have successfully learned how to enable 2FA for your Enterprise hosting account. With two-factor authentication activated, your account is now more secure, reducing the risk of unauthorized access. Even if attackers compromise your password, this extra layer of protection keeps your data secure. Make sure to store your backup codes in a secure location, and enjoy the peace of mind that comes with enhanced account security.