Are you looking to create FTP users in cPanel quickly and efficiently? In this guide, we’ll show you how to create FTP users step by step, ensuring you have the right credentials to manage your website files with ease.
The steps in this guide are for hosting services using cPanel.
You will need to be logged into the hosting/cPanel account to follow the steps. If you’re not sure how to access your cPanel service — please, follow this guide before continuing: How do I Login to cPanel?
File Transfer Protocol (FTP) is a way to connect to your web hosting account to transfer files to/from the hosting service and is commonly used by web designers/developers to access sites when working on them.
We recommend creating individual ‘FTP Users’ for each person who needs access to your hosting service. Additionally, you can revoke access at any time by changing the password or deleting the FTP users as necessary.
Furthermore, to connect to your WP Hosting service via FTP, you’ll need valid FTP user credentials set up within your hosting/cPanel service.
Login to cPanel
1. First, login to cPanel.
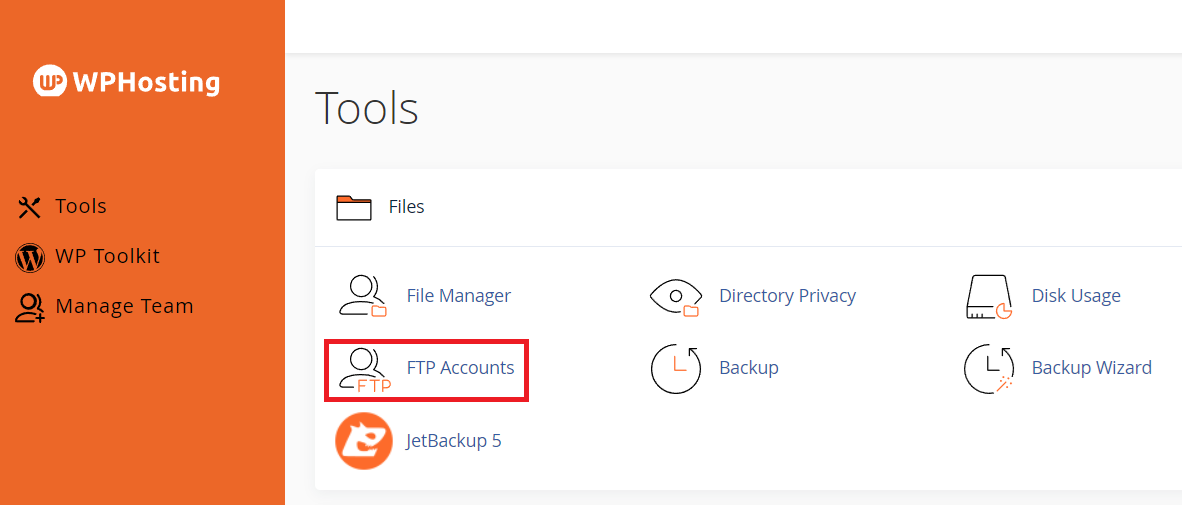
2. Navigate to ‘FTP Accounts‘, located in the “Files” section of the cPanel Tools
Create ftp account
3. On the FTP Accounts page, you will find a form to create a new FTP account. Fill out the following details:
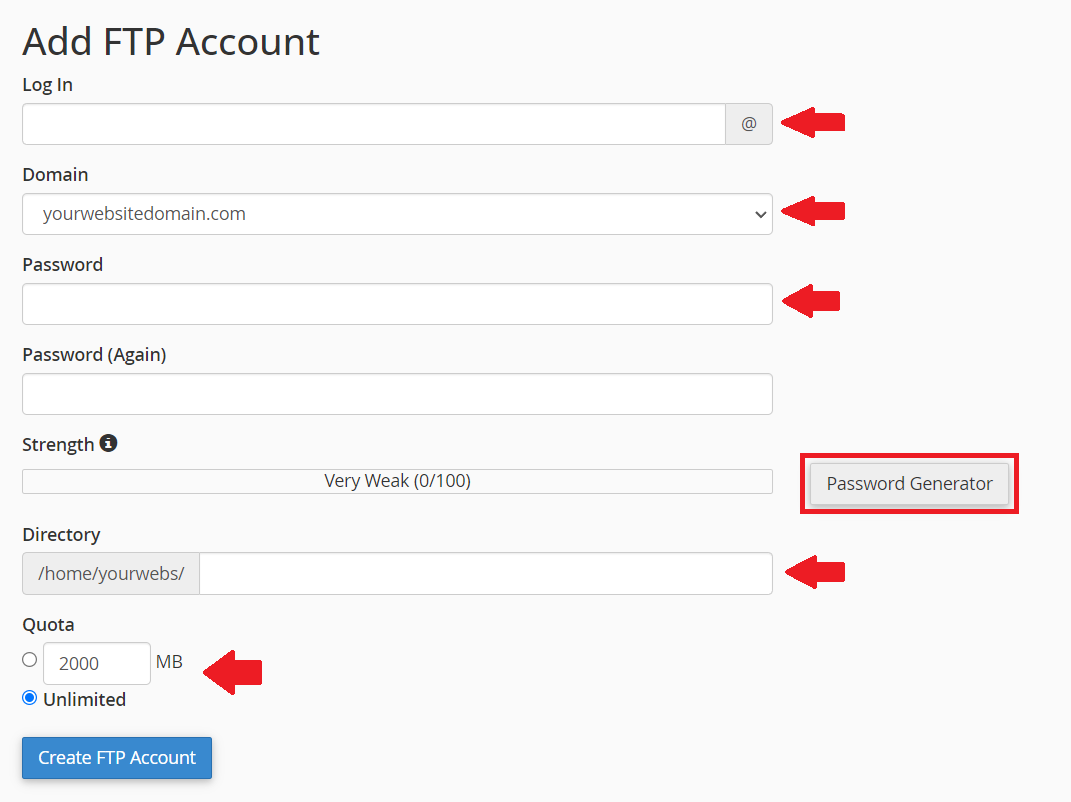
LOG IN: Enter a login name for the FTP account. The name you choose will be prepended to the domain to create the username (e.g. user@domain.com).
DOMAIN: Select the domain name you wish to assign to this FTP account (only applicable if you have multiple domains configured in your cPanel).
PASSWORD: Create a secure password for the FTP account. You can use the “Password Generator” tool for a strong password or choose your own.
DIRECTORY: By default, cPanel will automatically fill in the directory path based on the username chosen earlier (e.g. /home/cpanel_user/yourwebsite.com/ftp_username)
- To allow this FTP user access to a specific site directory, add the ‘document root’ of the site here (e.g. public_html).
- PLEASE NOTE: Leaving this field blank will give this FTP user access to all files on the hosting service.
QUOTA: Additionally, you can set a quota to limit the amount of disk space available to the FTP user. Note that, by default, the quota is unlimited.
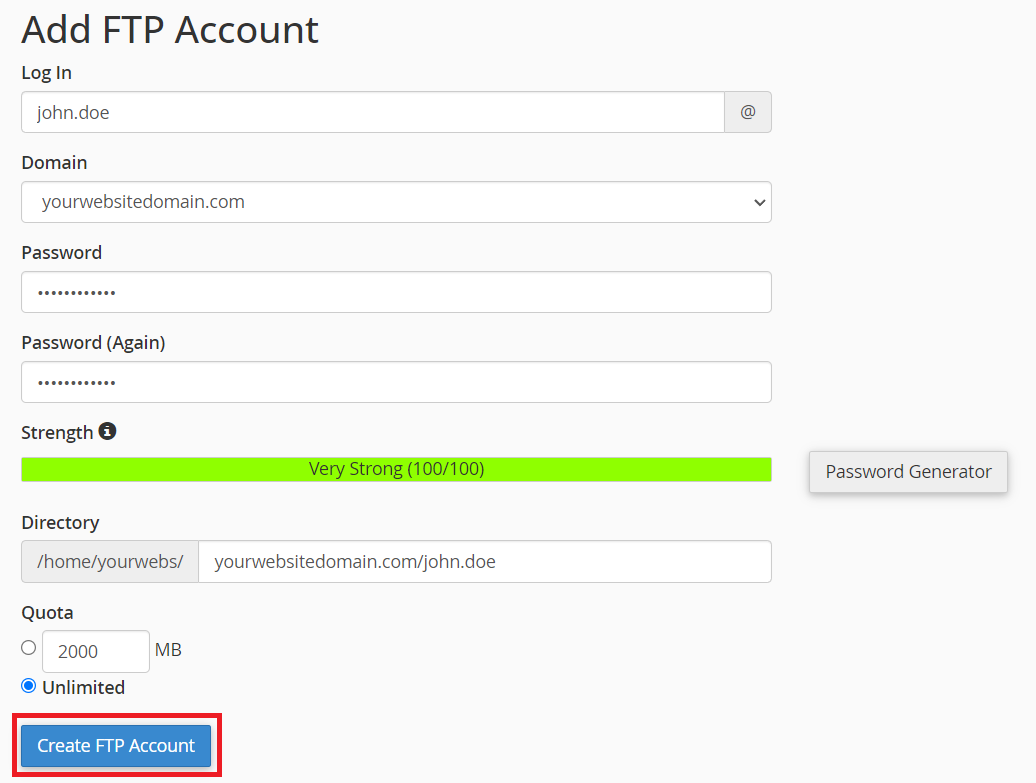
4. When you’re done, scroll down and click ‘Create FTP Account‘.
Configure FTP client
5. After completing these steps, head to the FTP Accounts menu, and you’ll see your new FTP user listed.

FTP details
6. Finally, you can connect to this service using your preferred FTP client software.
To connect, simply add the details requested by your FTP software. This will vary but generally, you will be asked for the details below;
- Server name/hostname: example_domain.com
- Username: ftp_user@example_domain.com
- Password: your_ftp_password
- Port: 21 (default FTP port)
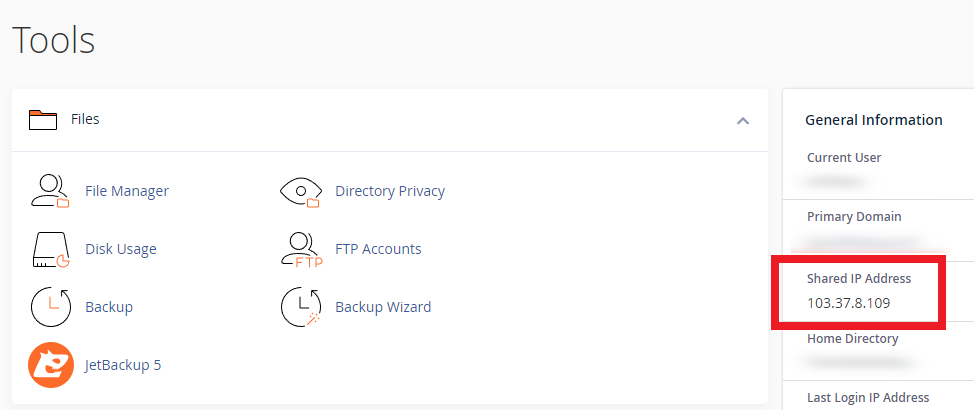
PLEASE NOTE: If your domain’s DNS records do not point to WP Hosting servers, then you may need to connect using the IP address instead of the hostname/server name. You can find the server’s IP address listed on the main page of your cPanel service under ‘General Information‘, shown below.