This topic covers processes relating to a cPanel service.
You will need to be logged into the cPanel account to follow the steps.
If you’re not sure how to access your cPanel service — please, follow this guide before continuing: How do I Login to cPanel?
What is NGINX Caching?
NGINX (pronounced “engine X”) caching is a feature that can help improve website performance by temporarily storing, or ‘caching’ web pages, images, and other content.
Instead of generating the same content repeatedly for every user, NGINX can serve the ‘pre-prepared’ or cached version of the site’s data, reducing server load and speeding up page delivery. This is especially useful for sites with high traffic.
Why do I need to clear or disable caching?
In some cases, you may need to clear or disable this cache, especially when making updates to your website. NGINX cache is refreshed every hour, but if you’re making changes to your site and need to see them sooner, you can disable the cache while you’re working on the changes or clear the cache once you’re done.
How to clear NGINX Caching:
1. First, login to cPanel
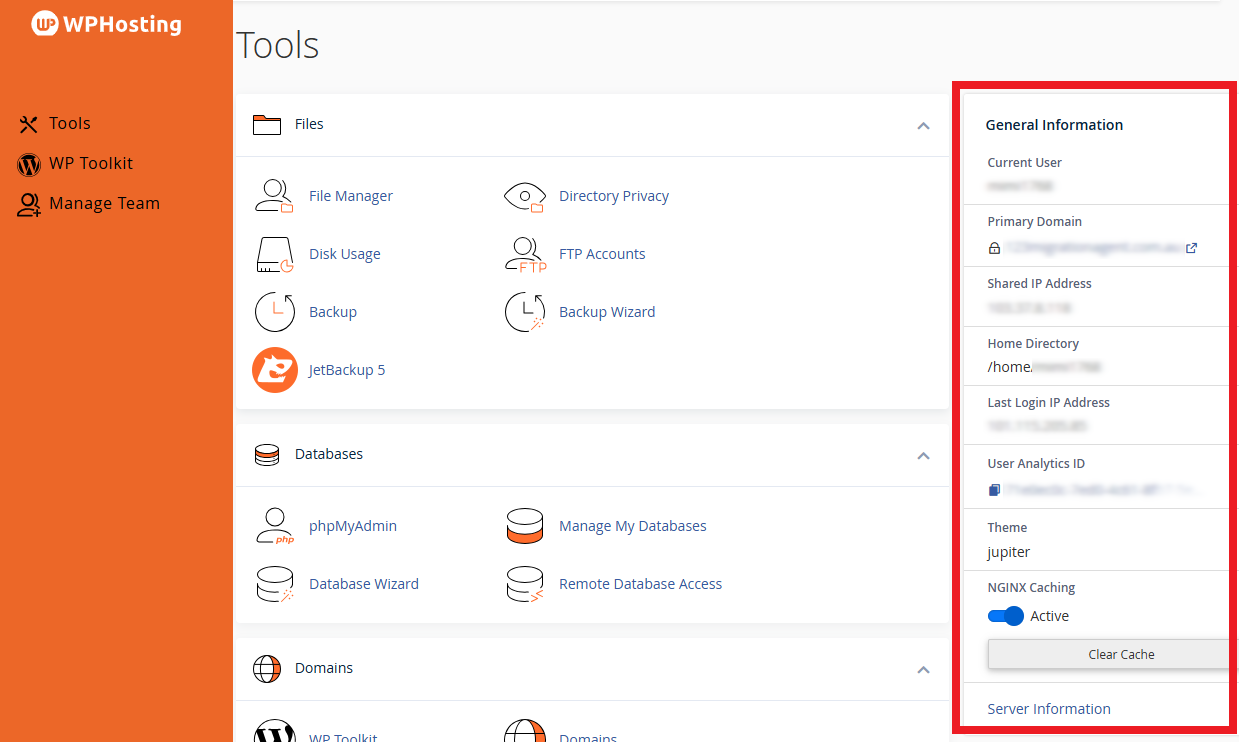
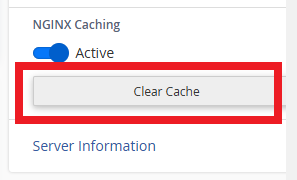
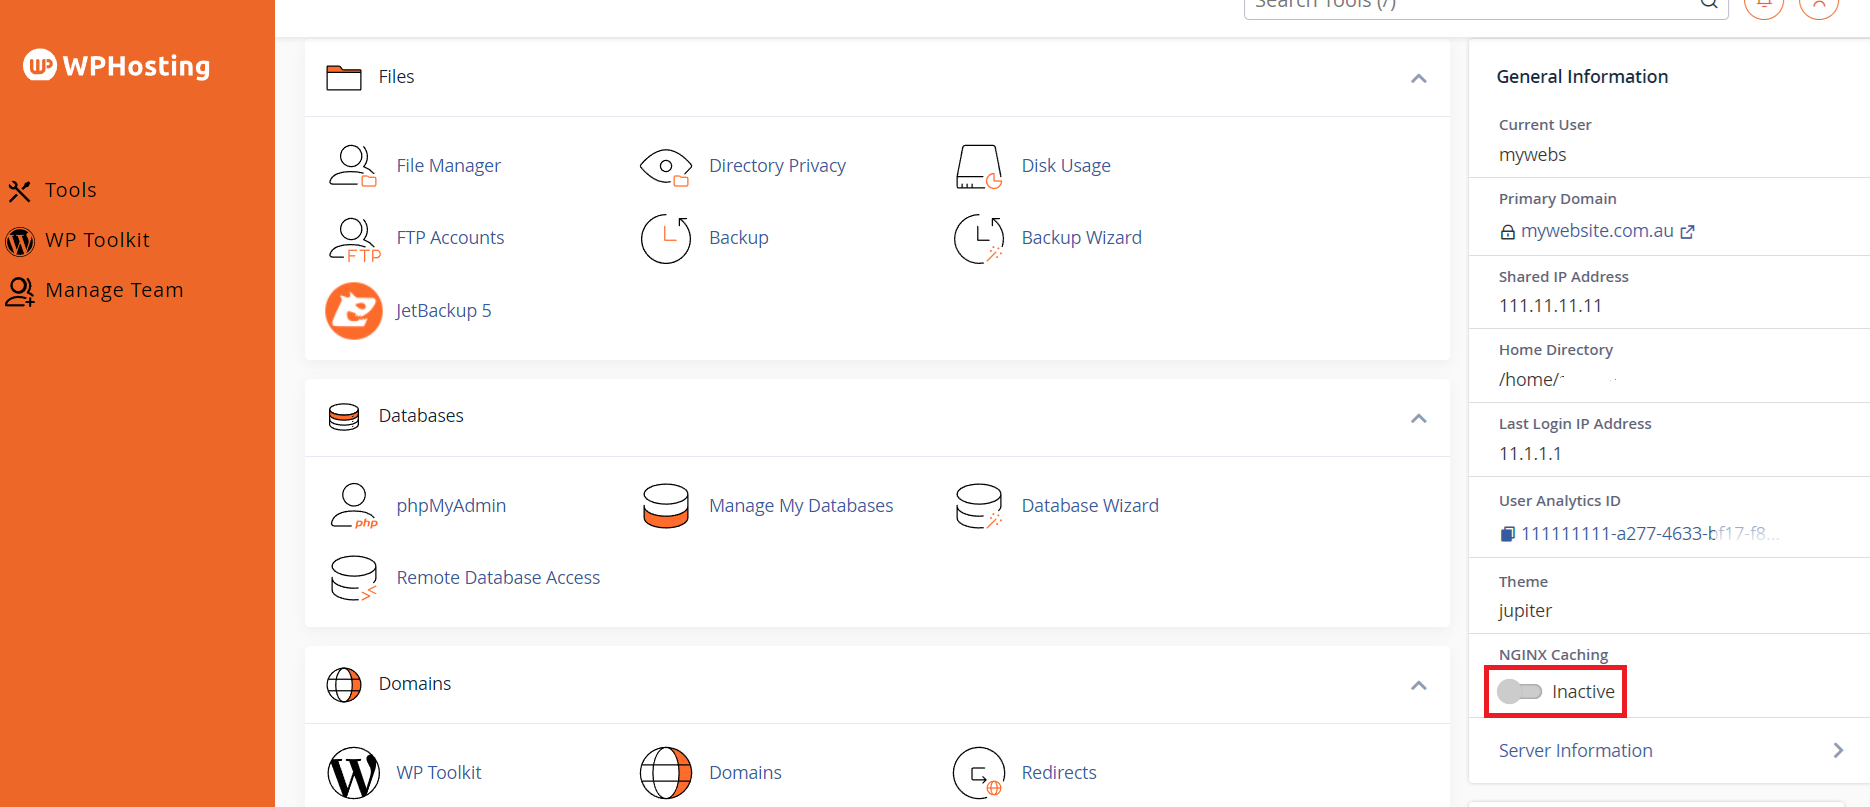
2. Next, look for the ‘NGINX Caching‘ section towards the bottom of the ‘General Information‘ panel on the left
3. Find the NGINX section and click the ‘Clear Cache‘ button.
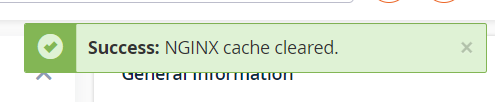
4. When the NGINX cache has been successfully cleared, you’ll see a notification pop-up, stating “Success: NGINX cache cleared.“
To disable NGINX Caching:
1. First, login to cPanel
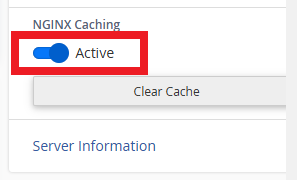
2.Look for the ‘NGINX Caching’ section in the ‘General Information’ panel on the left then click the toggle switch labelled ‘Active’ to disable caching.
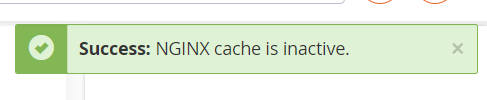
3. Once NGINX Caching is disabled, a notification will appear above the General Information section or in the top-right corner of your cPanel dashboard, confirming the action.
To enable NGINX Caching:
1. First, login to cPanel
2. Look for the ‘NGINX Caching’ section in the ‘General Information‘ panel on the left. Then click the toggle switch labelled ‘Inactive‘ to enable caching.
4o
3. Once NGINX Caching is enabled, a notification will appear above the General Information section or in the top-right corner. Confirming the action.
