This topic covers processes requiring access to your WP Hosting Client Area. If you’re not sure how to access the Client Area, please follow this guide before continuing – How do I Login to my WP Hosting Client Area?
JetBackup 5 is a powerful backup solution that offers flexible options for backing up different parts of your cPanel account, including your DNS zones. Creating a backup of your DNS zone ensures you can quickly restore your domain’s DNS records if they are accidentally deleted, overwritten, or modified during DNS changes or migration.
In this guide, we’ll walk you through the steps on how to backup your DNS zone with JetBackup in a cPanel environment.
What is a DNS zone?
A DNS zone is like a control panel for your domain’s DNS settings. It holds all the important records that tell the internet how to handle things like your website, emails, and subdomains. For example, it can point your domain to your web server’s IP address or direct emails to the right mail server. Each domain has its own DNS zone, and if you’re using cPanel or WHM, you can manage these records to update or troubleshoot how your domain behaves online.
Why back up DNS zones?
Backing up your DNS zones is a critical step in maintaining website and email uptime. DNS records control where your domain points, whether that’s your website, email server, subdomains, or external services.
Here’s why it matters:
- Protection from accidental changes or deletions
- Quick restoration after migrations or DNS edits
- Peace of mind before making DNS updates
Steps to backup DNS zone
Follow the steps below to manually back up your DNS zone using JetBackup 5:
1. Log in to your cPanel account.
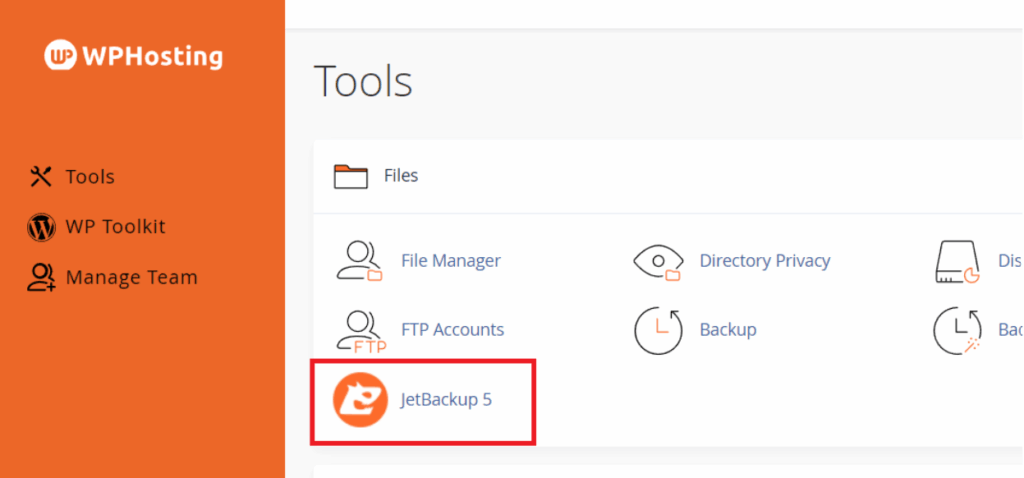
2. Navigate to the JetBackup 5 section. Look for the ‘JetBackup 5‘ icon and click on it.
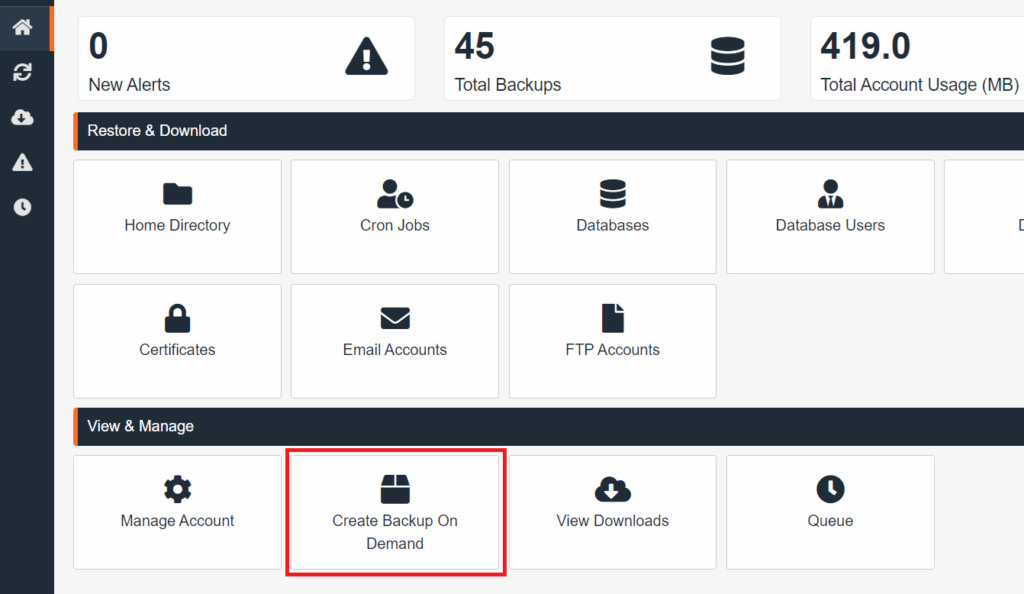
3. Click on ‘Create Backup On Demand’ if you want to generate a backup on the fly (optional). If you only need to download a backup from a previous day, you can skip this step.
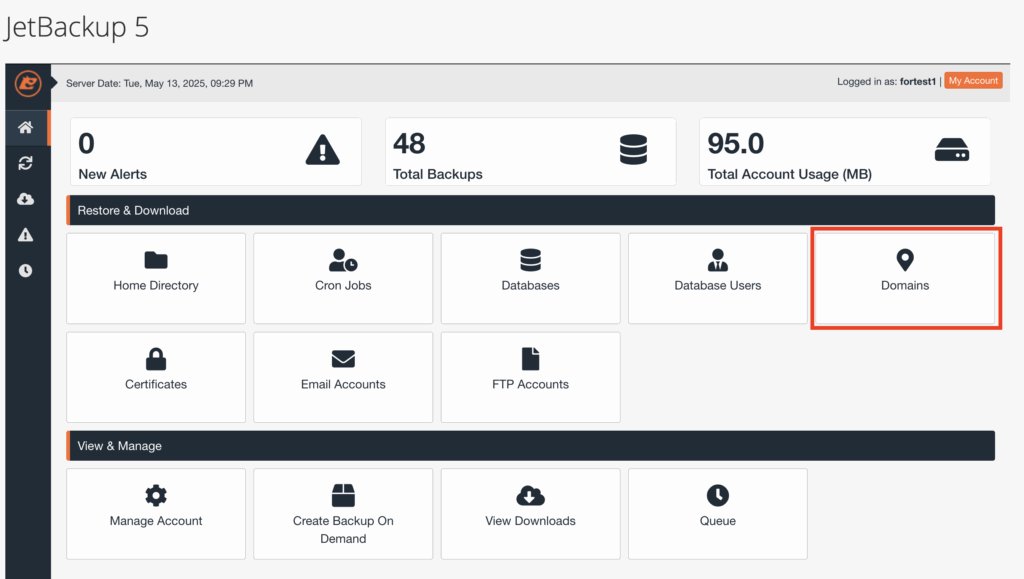
4. Under the Restore & Download section, select ‘Domains’.
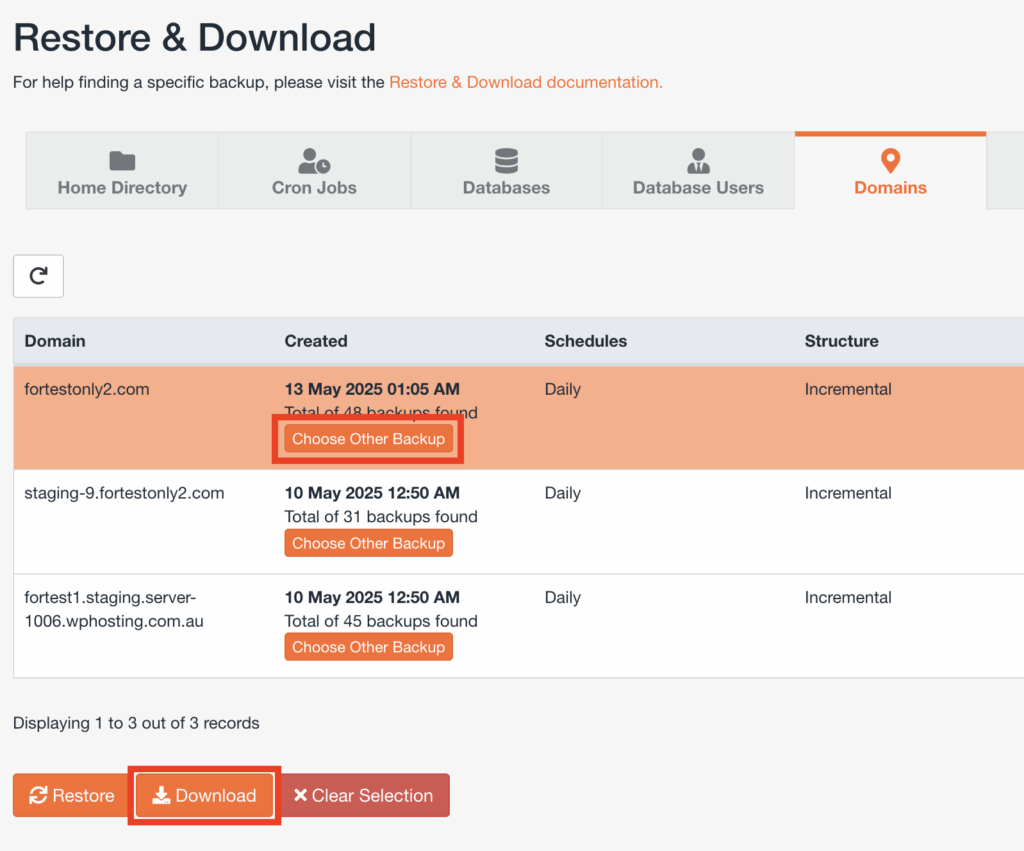
5. Then, on the Restore & Download page, click on ‘Choose Other Backup’ to select the date of the backup you want to download. Once you’ve selected the date, click ‘Download’ to begin the download.
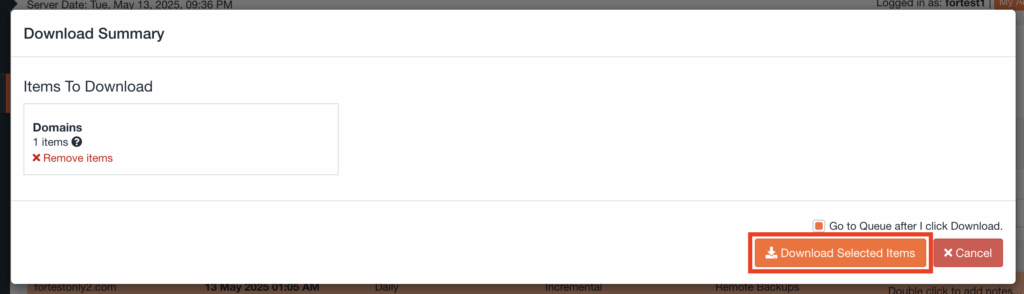
6. A Download Summary pop-up window will appear. Click ‘Download Selected Items’ to start the download.
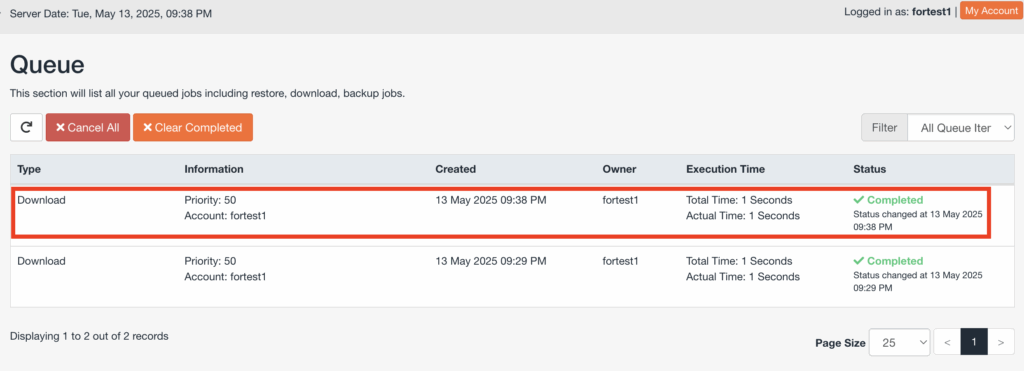
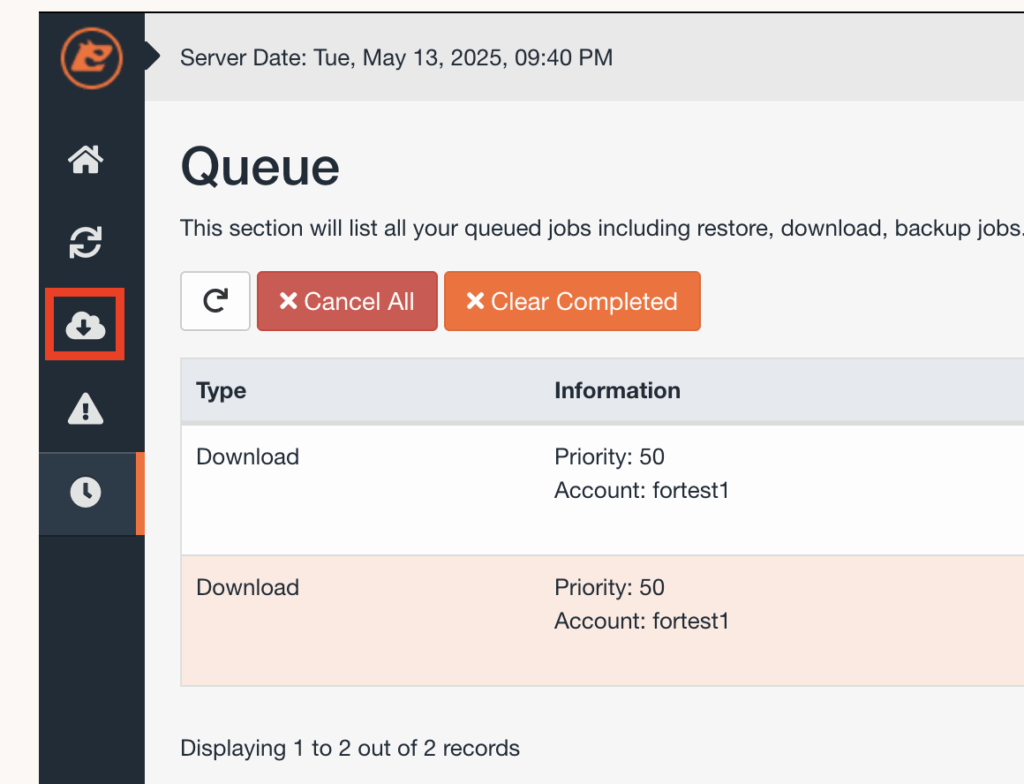
7. You’ll then be redirected to the Queue page. Once the download is complete, it will appear in the list. Click the ‘download icon‘ (cloud with a downward arrow).
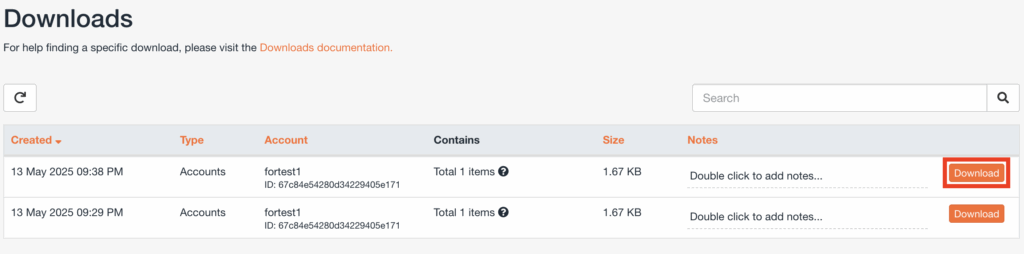
9. After that, you’ll be redirected to the Download page. Then, your most recent download will appear at the top of the list, click ‘Download’ to save it to your device.
How to restore a DNS zone
1. Follow the “Steps to backup DNS zone” section up until step 5. Then, from there, click the date that you want to restore from. Next, click ‘Restore‘.
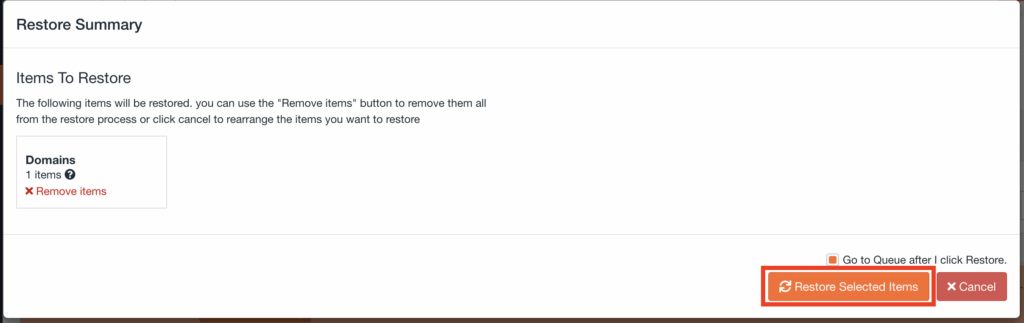
2. Then on the Restore Summary page, click the ‘Restore Selected Items‘.
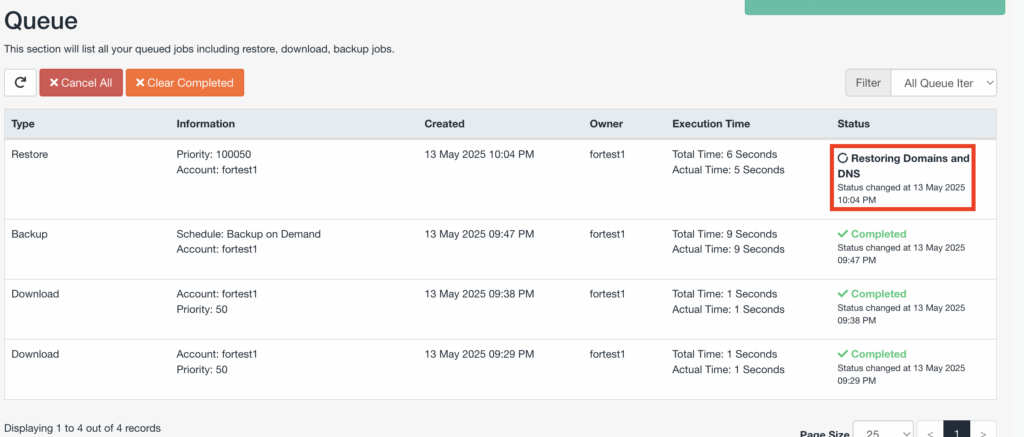
3. After that, you’ll be redirected to the Queue page. Once the restore is complete, the status will update to “Completed” along with the timestamp showing when the restore finished.
Final tips
- Schedule regular backups (WP Hosting run nightly backups).
- Always create a manual DNS backup before changing records.
- If you don’t see DNS zone options in JetBackup 5, simply contact WP Hosting support, our team will be happy to assist you further.
Backing up your DNS zone with JetBackup 5 is a quick and reliable way to protect your domain’s DNS settings. Whether you’re preparing for changes, recovering from an issue, or simply following best practices, having DNS backups readily available adds an extra layer of security and peace of mind.
Need help? We’re here for you.
If you have any questions or need assistance with DNS zone backups, our support team at WP Hosting is always ready to help. Don’t hesitate to reach out, we’re here to ensure your hosting experience is smooth, secure, and fully supported.