This article explains how to add rules to explicitly block or allow email from specific addresses for cPanel-hosted email addresses using built-in spam filters.
All our WP Hosting packages include essential spam filtering features designed to manage unwanted emails and ensure that important messages reach your inbox.
Please, follow the steps below to configure your email filters according to your needs.
Getting started with email block / allow lists
1. First, log in to cPanel.
2. Next, navigate to the ‘Spam Filters’ tool.
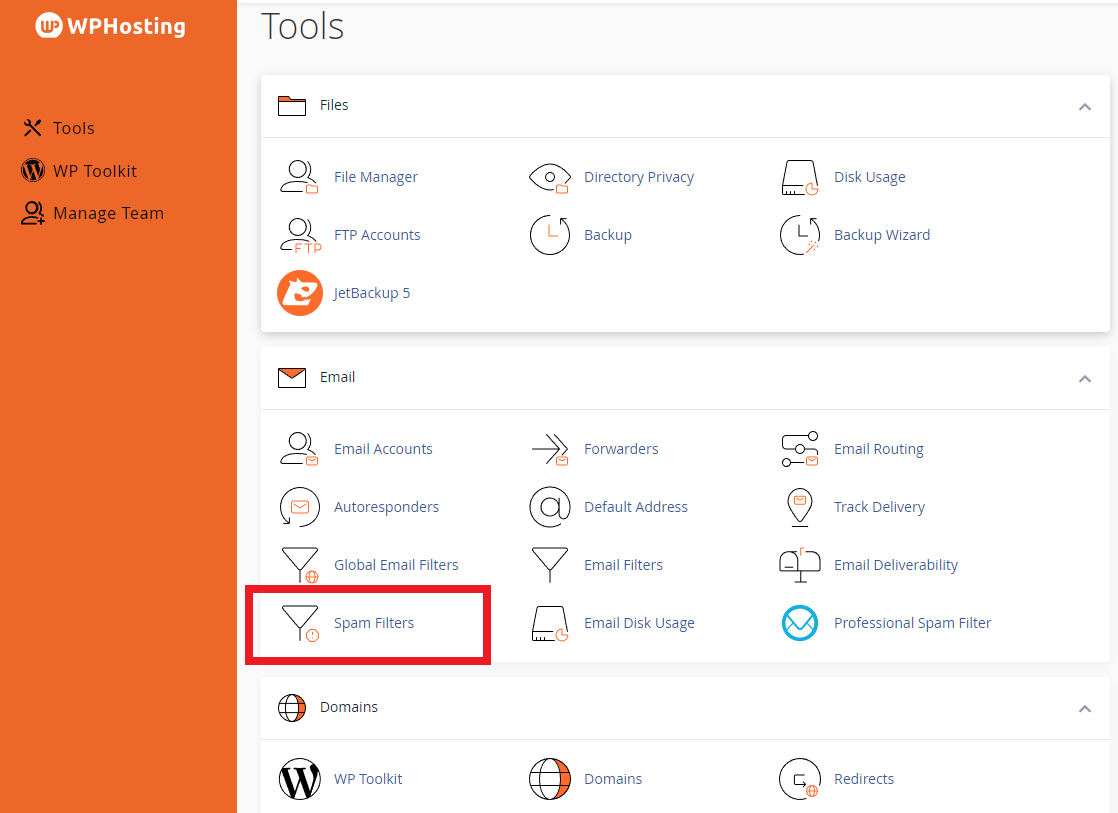
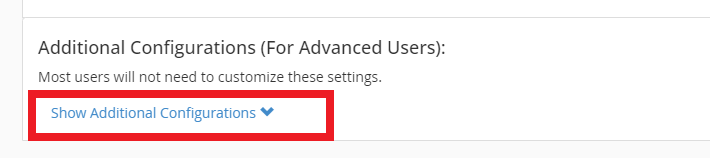
3. Then, on the ‘Spam Filters’ page, scroll down to the ‘Additional Configurations’ section.
4. After that, click the ‘Show Additional Configurations’ drop-down arrow.
5. Finally, select the appropriate option.
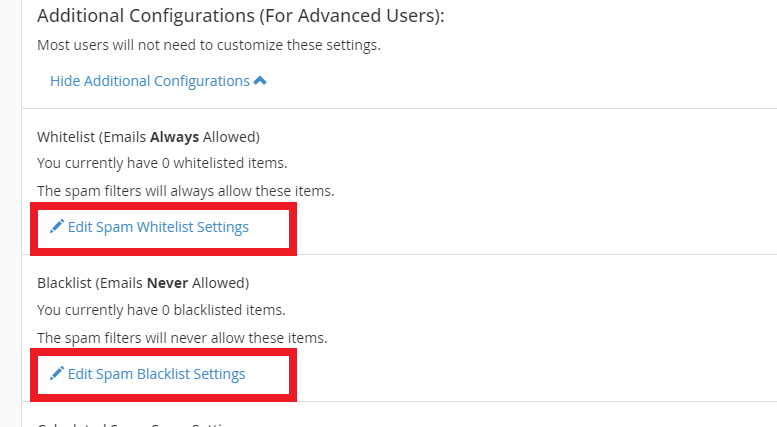
‘Edit Spam Whitelist Settings‘ to always allow an address
or
‘Edit Spam Blacklist Settings‘ to never allow an address
To add an address to the block list
1. Navigate to the ‘Show Additional Configurations’ section.
2. Then, click on ‘Edit Spam Blacklist Settings‘.
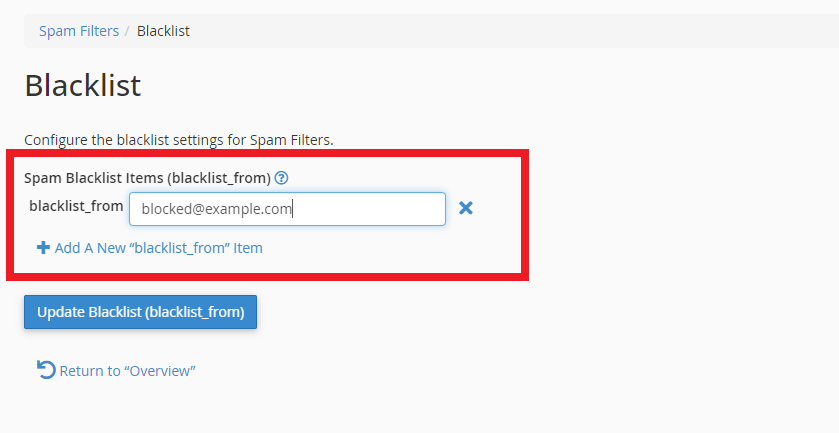
3. Next, enter the email address you want to block into the ‘blacklist_from‘ text box.
(see the notes below for more information)
4. Click ‘Update Blacklist (blacklist_from)‘ when you’re done
NOTE:
When you add addresses to the blacklist, use an asterisk (*) as a wildcard to represent multiple characters and a question mark (?) to represent a single-character wildcard. The following examples demonstrate how to properly use wildcards in the blacklist:
user@example.com— Blacklists a single email address.*@example.com— Blacklists all of the addresses atexample.com.?ser@example.com— Blacklists a single character in an address atexample.com(for example,user@example.com, but notAuser@example.com).
To add an address to the allow list
1. Open the ‘Show Additional Configurations‘ section.
2. Next, click Edit Spam Whitelist Settings.
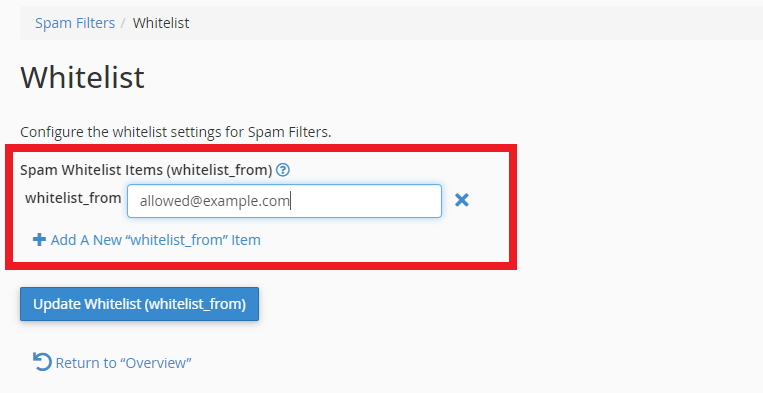
3. Then, enter the email address you wish to allow into the ‘whitelist_from‘ text box.
(see the notes below for more information)
4. Click ‘Update Whitelist (whitelist_from)‘ when you’re done
NOTE:
When you add addresses to the whitelist, use an asterisk (*) as a wildcard to represent multiple characters and a question mark (?) to represent a single-character wildcard. The following examples demonstrate how to properly use wildcards in the whitelist:
user@example.com— Whitelists a single email address.*@example.com— Whitelists all of the addresses atexample.com.?ser@example.com— Whitelists a single character in an address atexample.com(for example,user@example.com, but notAuser@example.com).
Conclusion
Once you complete these steps, you can manage your email traffic more effectively. The built-in spam filters block unwanted messages and ensure that important emails arrive in your inbox. Furthermore, if you encounter any issues or need further assistance, consult our support resources for additional guidance. Ultimately, these email block or allow lists create a secure and organised email environment.